
|
Yoga has long been celebrated for its multifaceted benefits for the mind, body, and spirit. Ashtanga Yoga, a dynamic and rigorous form of yoga, is known for its structured sequences that gradually build strength, flexibility, and mindfulness. In the primary series of Ashtanga Yoga, a multitude of poses challenge practitioners to connect with their bodies and minds in unique ways. One such pose is Navasana, commonly known as the Boat Pose. Let's delve into the nuances of Navasana and understand its significance within the Ashtanga Yoga practice.  The Essence of Navasana Navasana derives its name from the Sanskrit words "nava," meaning boat, and "asana," meaning posture. This pose mimics the shape of a boat, with the body balanced on the sit bones, legs lifted, and the spine forming a "V" shape. This seemingly simple pose demands engagement and activation of various muscle groups, requiring a blend of core strength, balance, and stability. Navasana is the thirteenth seated posture in the Ashtanga Yoga Primary series. This posture tends to be a challenging posture, regardless of how strong or flexible you are. Even if the first Navasana seems rather easy for you, with legs fully extended and back straight, by the fifth one, many practitioners find it challenging to maintain a straight back and breathe freely. If you find the full expression of Navasana challenging, be sure to check out our recommendations for modifying this posture. 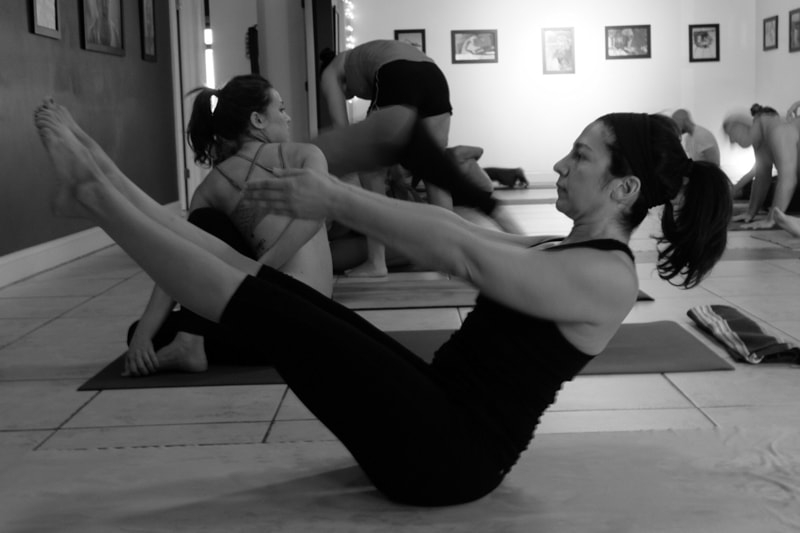 Benefits of Navasana Physical Benefits: Core Strengthening: Navasana is a powerhouse for building core strength. It engages the entire abdominal region, including the rectus abdominis, transverse abdominis, and obliques. A strong core supports better posture, spine health, and overall stability. Hip Flexor Flexibility: As you lift your legs in Navasana, the hip flexors are stretched and engaged. Regular practice can lead to increased flexibility in the hip joints, promoting better mobility and reduced tension in the lower back. Improved Digestion: The compression of the abdominal area in Navasana massages and stimulates the digestive organs. This can aid in digestion, alleviate constipation, and promote better gut health. Spinal Health: The pose encourages a straight spine, which helps in maintaining a healthy posture and reducing the risk of spinal issues. The engagement of core muscles also contributes to spinal stability. Stronger Back Muscles: While the pose predominantly focuses on the front body, the muscles of the lower back are also engaged to support the lift of the legs. This balanced engagement promotes overall spinal strength. Mental and Emotional Benefits: Enhanced Concentration: Balancing in Navasana requires focused attention and mindfulness. Practicing this pose helps sharpen your concentration skills and teaches you to remain present in the moment. Stress Relief: The deep breathing combined with the physical effort in Navasana triggers the release of endorphins—natural stress relievers. This can help alleviate tension and promote a sense of calm. Confidence Boost: As you gradually improve your strength and balance in Navasana, you'll experience a boost in self-confidence. Achieving even small milestones in the pose can empower you both on and off the mat. Mind-Body Connection: Navasana demands synchronization between breath, movement, and mental focus. This strengthens the mind-body connection, allowing you to become more attuned to your body's signals and needs. Energetic Benefits: Manipura Chakra Activation: In yoga philosophy, Navasana stimulates the Manipura chakra, which is associated with personal power, confidence, and transformation. Activating this chakra can foster a sense of empowerment and self-assuredness. Prana Flow: The posture encourages the flow of prana (life force energy) along the spine. This revitalizing energy flow can leave you feeling invigorated and balanced. 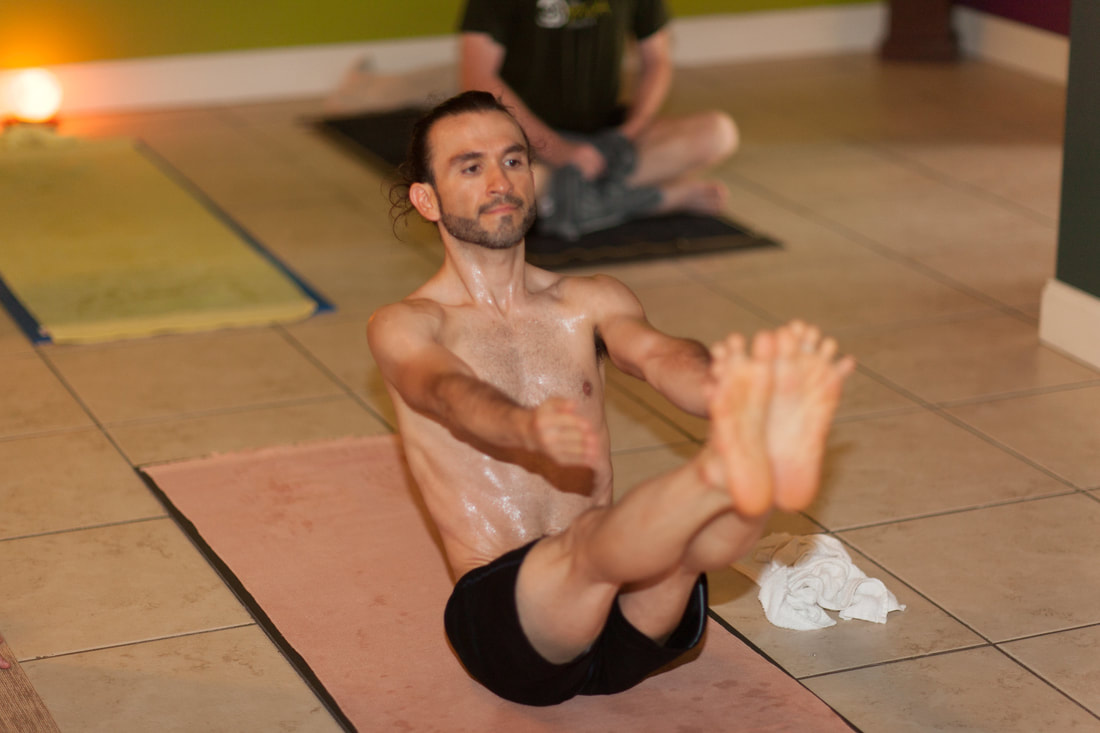 Contraindications Pregnancy: Navasana involves significant engagement of the abdominal muscles, which can put pressure on the abdominal area and the pelvic floor. The full expression of this posture is NOT recommended if you are pregnant. Some women will find they can easily still do this asana while pregnant, but it puts too much pressure on your abdominal wall and therefore is better done in a modification form during pregnancy, or avoided altogether. Diastasis Recti: This condition occurs when the abdominal muscles separate, often due to pregnancy or rapid weight changes. Navasana can exacerbate this condition and should be avoided until the separation has healed and abdominal strength is restored. Recent Abdominal Surgery: If you've undergone abdominal surgery, such as hernia repair or any surgery involving the core muscles, consult with your healthcare provider or a qualified yoga instructor before attempting Navasana. Back Injuries: Individuals with chronic or acute back issues, such as herniated discs, should approach Navasana with caution. The pose involves a balancing action that could strain the lower back if not executed correctly. Consider modifying or avoiding the pose if you have any discomfort or pain. Neck Issues: If you have neck injuries, cervical spine problems, or experience neck pain, be cautious in Navasana. Avoid rounding the upper back excessively, as this can strain the neck and exacerbate any existing issues. High Blood Pressure: Navasana requires a strong engagement of the core muscles and can cause a rise in blood pressure. If you have uncontrolled high blood pressure or any heart-related issues, consult your healthcare provider before attempting this pose. Wrist or Shoulder Injuries: Placing the hands on the floor behind the hips in Navasana can put pressure on the wrists and shoulders. If you have wrist or shoulder injuries or discomfort, consider modifications, or avoid the pose altogether. Recent Surgeries or Injuries: If you've had recent surgeries or injuries that affect your ability to balance or engage the core muscles, Navasana may not be suitable until you've fully recovered and regained strength. Lack of Core Strength: If you're new to yoga or have a weak core, attempting Navasana prematurely can strain the muscles and potentially lead to injury. Work on building core strength through gentler poses before progressing to more advanced poses like Navasana. Always prioritize your safety and well-being when practicing yoga. If you're uncertain about whether Navasana is appropriate for you, consult a qualified yoga instructor or healthcare professional. They can offer guidance and modifications tailored to your individual needs and limitations. Remember that yoga is about honoring and respecting your body's signals, and there's no shame in opting for alternatives that better suit your unique circumstances. 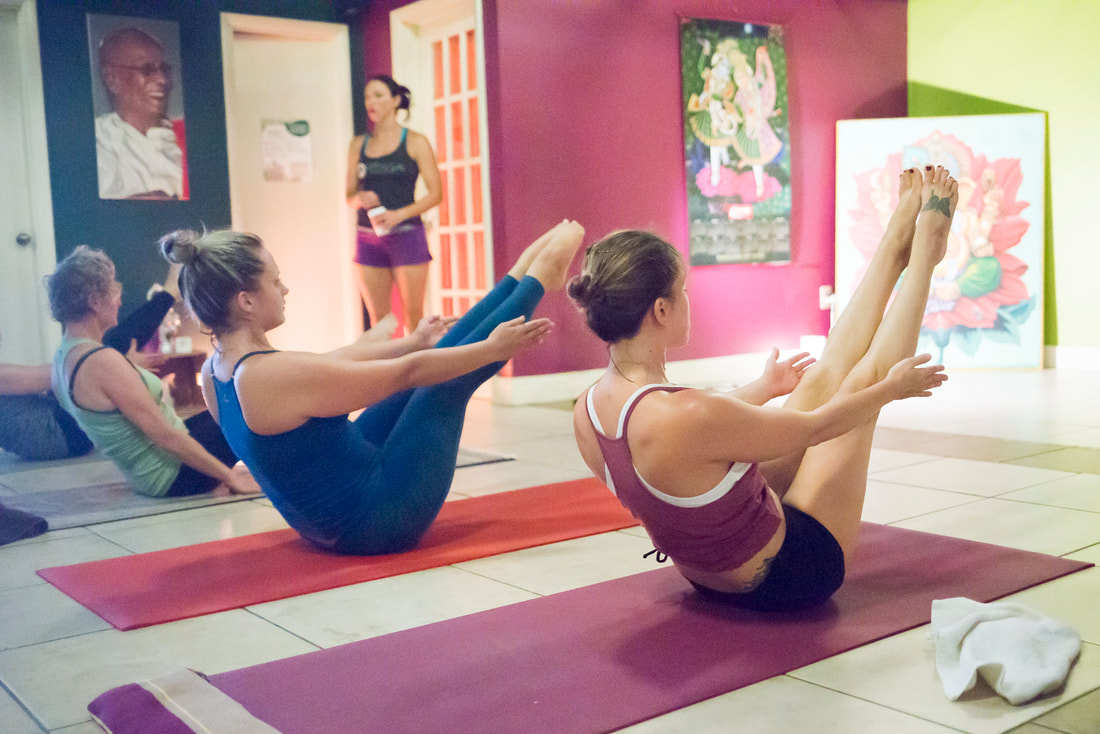 Tap here to watch a step-by-step tutorial video on Navasana. Step-by-Step Instructions for the Full Expression of Navasana with Sanskrit Vinyasa Count We will be entering this posture from downward facing dog, having just taken a vinyasa after Marichyasana D. Sapta (Vinyasa #7): From Adho Mukha Svanasana (down dog), look forward and walk or jump your feet through. Lean back slightly and extend your legs up and out in front of you, off the floor. Take your arms out in front of you, hip width apart. Open your chest and draw your belly in. Work to keep your toes pointed and your legs straight. Work to have your toes in line with your eye level. Continue to lengthen your back, lift your chest and gaze towards your toes (Padhayoragrai Drishti). Take five deep breaths here. Asthau (Vinyasa #8) Inhale, cross your legs, bring your hands to the floor and push your body off the floor. Exhale back down to the ground. Sapta (Vinyasa #7) Begin your second (2nd) of five Navasana’s. Extend your arms in front of you in line with your eyes. Lean back slightly and lift your feet off the floor. Your legs are straight legs and your chest is lifted. Gaze towards your toes (Padhayoragrai Drishti). Take five deep breaths here. Asthau (Vinyasa #8) Inhale, cross your legs, bring your hands to the floor and push your body off the floor. Keep your head and chin up as you do so. Exhale back down to the ground. Sapta (Vinyasa #7) Begin your third (3rd) of five Navasana’s. Extend your arms in front of you in line with your eyes. Lean back slightly and lift your feet off the floor. Your legs are straight legs and your chest is lifted. Gaze towards your toes (Padhayoragrai Drishti). Take five deep breaths here. Asthau (Vinyasa #8) Inhale, cross your legs, bring your hands to the floor and push your body off the floor. Keep your head and chin up as you do so. Exhale back down to the ground. Sapta (Vinyasa #7) Begin your fourth (4th) of five Navasana’s. Extend your arms in front of you in line with your eyes. Lean back slightly and lift your feet off the floor. Your legs are straight legs and your chest is lifted. Gaze towards your toes (Padhayoragrai Drishti). Take five deep breaths here. Asthau (Vinyasa #8) Inhale, cross your legs, bring your hands to the floor and push your body off the floor. Keep your head and chin up as you do so. Exhale back down to the ground. Sapta (Vinyasa #7) Begin your fifth (5th) and final Navasana. Extend your arms in front of you in line with your eyes. Lean back slightly and lift your feet off the floor. Your legs are straight legs and your chest is lifted. Gaze towards your toes (Padhayoragrai Drishti). Take five deep breaths here. Nava (Vinyasa #9) After your fifth breath in your last Navasana position, cross your legs, bring your hands to the ground and jump back into Chaturanga Dandasana. Dasa (Vinyasa #10) Inhale into Urdhva Mukha Svanasana(Upward facing dog) Ekadasa (Vinyasa #11) Exhale into Adho Mukha Svanasana (Downward facing dog) Tap above or click here to watch our full step-by-step tutorial video of Navasana. Navasana Modifications For practitioners who are building their strength or working with limitations, there are several wonderful modifications available for you to safely work your way towards the full expression of Navasana. 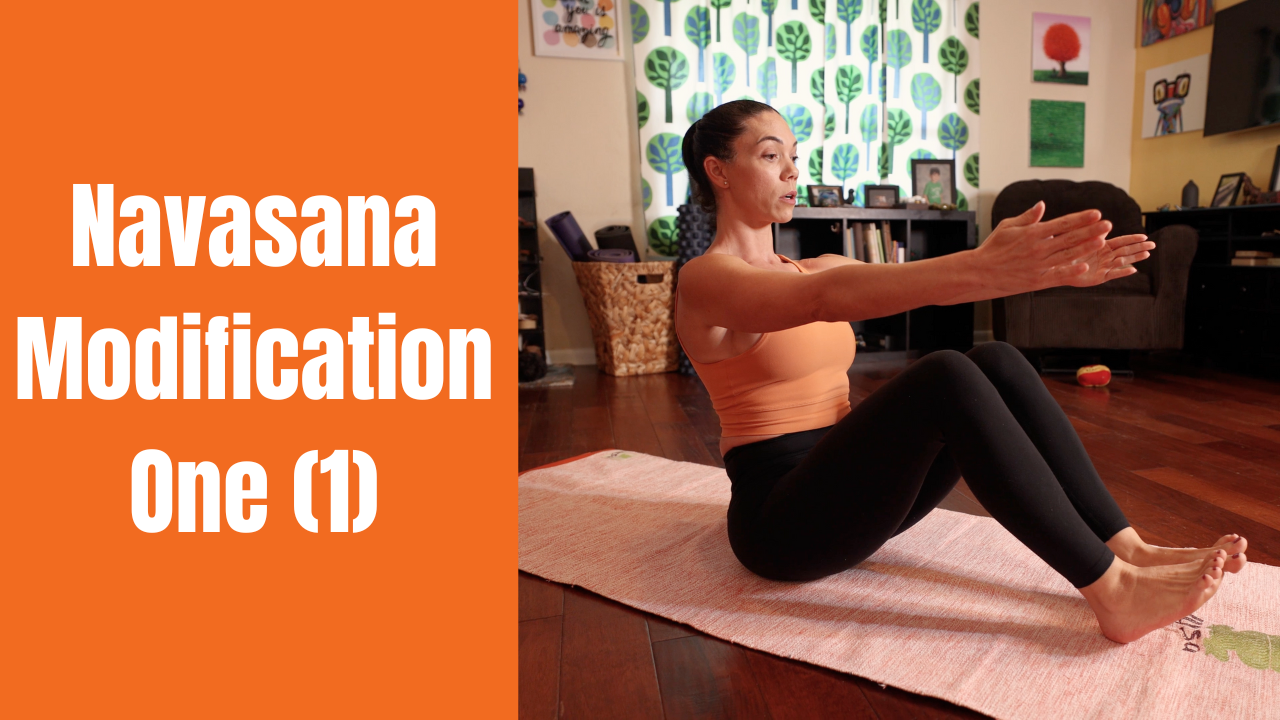 Variation One (1) Start in downward facing dog. Walk or jump through to seated position. From there, bend your knees and extend your arms out in front of you (hip distance apart). Lean back slightly ensuring you maintain a straight back. Your head is up. Breathe here for five deep breaths. Engage mula bandha with every inhale and uddiyana bandha with every exhale. After your fifth exhale, bring your hands to the ground, cross your legs, inhale and press through your hands and try to lift your hips off the floor keeping your feet on the mat. Exhale, lower back down. Make sure you keep your head up and eyes forward while you lift your hips off the floor. Then start with Navasana #2 with arms extended, knees bent, head and eyes lifted. Make sure you are slightly leaning back to maintain a straight spine. Breathe here for five deep breaths. On your last exhale, cross your legs and repeat the lift. Repeat Navasana and the lift three more times (for a total of five Navasana). After your fifth breath in your fifth and final Navasana, take your Vinyasa. 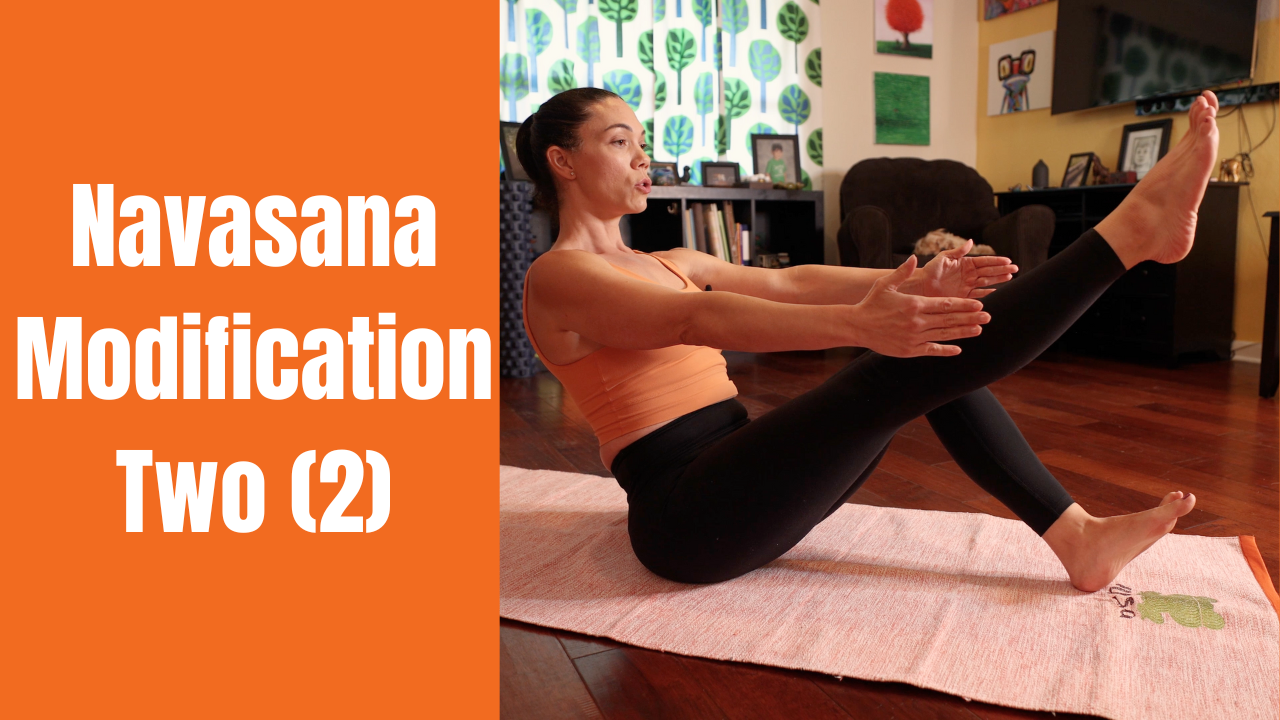 Variation Two (2) Start from downward facing dog. Jump, hop or walk through to seated position. Extend your arms in front of you (hands are hip distance apart). Bend your knees and lean back slightly to ensure your back is straight. Lift your chin and head up. Lift one of your legs in the air and stretch it up and out. Breathe here for five deep breaths. Maintain engagement of mula bandha with every inhale and uddiyana bandha with every exhale. After your fifth exhale, bring your hands to the floor midway between your knees and hips. Keep your head up and eyes forward. Inhale and press through your hands and try to lift your hips and feet. Exhale, lower back down. We will do this 5x. Inhale and begin Navasana #2. Bend. Your knees, extend your arms, and lift your chest as you lean back. Lift your other leg off the floor and extend it forward. Do your best to keep your chest lifted and your back flat. Breathe here for five deep breaths. At the end of your fifth exhale, cross your legs and repeat the lift. Repeat Navasana and the lift three more times total. Be sure to alternate the extended leg each time. On the fifth and final Navasana, you may try to attempt the full expression with both legs straight. However, if you are fatigued, do your last Navasana with both feet on the floor and knees bent (Modification 1). Once you take your fifth breathe here in your fifth Navasana, take your Vinyasa. As this modification becomes easier, you may begin doing Navasana with both legs lifted and both knees bent. And once that modification becomes easier, you can begin attempting the full expression of Boat Posture. 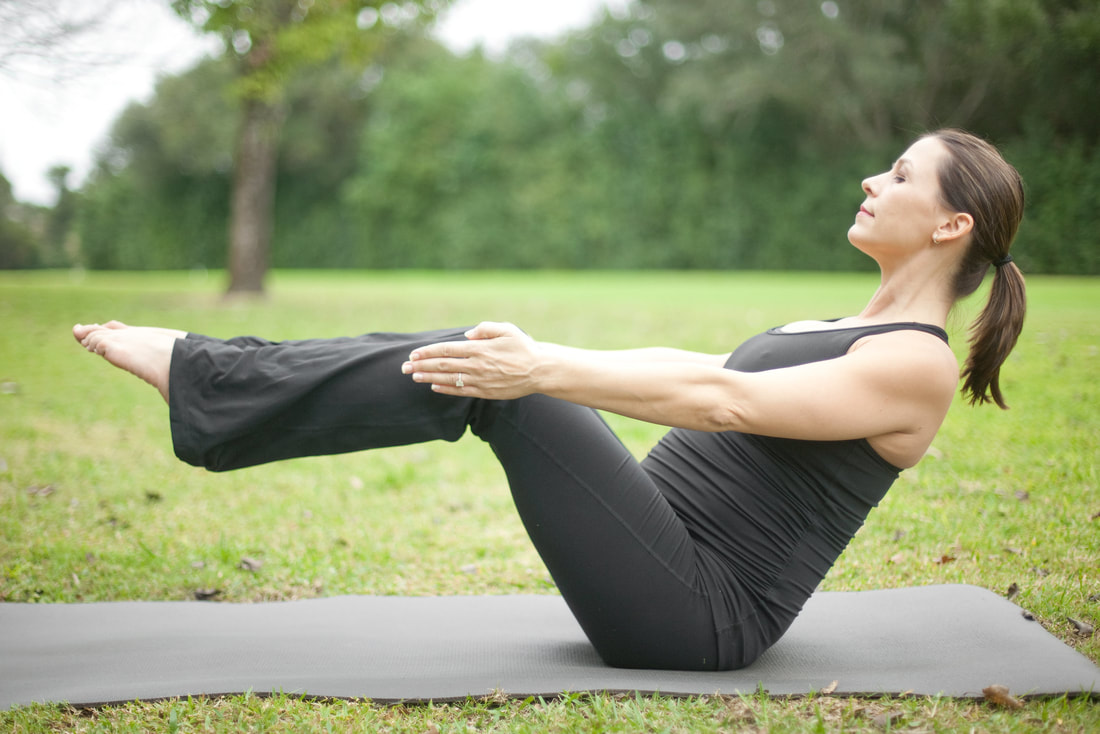 Common Mistakes Do NOT compromise your body position in Boat pose to get your legs straight. It is WAY more important for your back to be straight in Navasana than for your legs to be straight. Whenever you find your back starting to round as you get fatigued, take a modification of the posture that will help you safely keep your chest lifted and back flat. It is most important to focus on keeping your back straight. Keeping one leg on the floor or bending both knees are extremely useful modifications. Both allow the spine and pelvis to stay open and long, while you work to strengthen your hips and core.  Precautions and Considerations While Navasana offers numerous benefits, it's important to practice with awareness and respect for your body's limitations. If you're new to yoga or have any existing injuries or conditions, consider these precautions: Modify as Needed: If you're struggling with the full expression of Navasana, feel free to use your hands for support behind your thighs or keep your feet on the ground. Avoid Straining: Don't force your legs higher than your hip flexors allow. Overstraining can lead to discomfort or injury. Listen to Your Body: If you experience pain, discomfort, or strain while practicing Navasana, release the pose and consult a yoga instructor or healthcare professional. Navasana, the Boat Pose, is a cornerstone of the Ashtanga Yoga primary series. Through its physical challenges and mental subtleties, Navasana embodies the essence of yoga—union of body, mind, and spirit. As you practice Navasana and explore its depths, remember that yoga is a journey, not a destination. Each attempt, each moment of presence, contributes to your growth on and off the mat.  Practice with The Yoga Shala If you want to join us for LIVE classes, The Yoga Shala offers virtual and in person classes every weekday morning. Owner, Krista Shirley, also offers virtual or in person private sessions (Yoga, Meditation, Breath-work, Nutrition, Life Coaching and Mentorship). Visit theyogashala.org for details. Be sure to signup for our newsletter to stay on top of local events and classes, Nysa products sales, new offerings, new products and more! We hope you find this video series helpful to you in creating or maintaining your yoga practice!  About Krista Krista Shirley is a level II authorized Ashtanga Yoga teacher. She is deeply passionate about sharing these teachings with all who wish to learn. If you want to join Krista in person she teaches daily classes at The Yoga Shala in Winter Park, Florida. She also offers virtual sessions in Yoga, Meditation, Breath-work, Nutrition, Life Coaching and Mentorship. Check out www.theyogashala.org for more details. If you do not live in Central Florida and want to find an authorized teacher in your area, check out our teacher, Sharath Jois’ website, for a list of all teachers authorized and certified by his yoga centre in India.
❤️SHOP MERCHANDISE: Nysa Products
❤️LET'S BE SOCIAL: Instagram: Krista Shirley Yoga Instagram: The Yoga Shala Facebook: The Yoga Shala Facebook: KristaShirleyYoga For other inquires please contact: krista@theyogashala.org
0 Comments
Ashtanga Yoga, often referred to as the "eight-limbed path," is a dynamic and structured practice that encompasses various poses designed to align these three facets of our being. Among the gems of the Ashtanga Yoga Primary Series lies Marichyasana D, a pose that embodies both physical depth and spiritual symbolism. Marichyasana D The Essence of Marichyasana D Marichyasana D (mar-ee-chee-AHS-anna), also spelled Marīcyāsana D, translates to Pose Dedicated to the Sage Maricihi. Marichyasana D is the third of four Marichyasana poses from the Ashtanga Yoga Primary Series. I have also written a step-by-step guide for all four of the Marichyasana poses from Ashtanga Yoga’s Primary Series (Marichyasana A, Marichyasana B and Marichyasana C ). Marichyasana D is a seated twisting pose that offers profound benefits for the body, mind, and energy channels. The pose involves a deep spinal twist, binding, and a forward fold. Its multifaceted nature makes it a transformative posture that encourages flexibility, strength, and inner exploration. This is the twelventh seated posture in the Primary Series (yoga chikitsa). All four Marichyasana poses (A, B, C, D) build upon one another preparing students for postures that follow.  Benefits of Marichyasana D Physical Benefits Spinal Flexibility: Marichyasana D involves a deep spinal twist, which increases the flexibility of the entire spine, promoting better posture and overall spinal health. Digestive Health: The twisting motion massages the abdominal organs, aiding digestion and promoting the efficient functioning of the digestive system. Hip Mobility: The pose requires the hips to open and rotate, enhancing hip joint flexibility and relieving stiffness. Hamstring and Lower Back Stretch: The forward fold in Marichyasana D stretches the hamstrings and lower back muscles, reducing tension and improving flexibility. Oblique Strengthening: The engagement of the oblique muscles during the twist helps tone and strengthen the sides of the torso. Shoulder Mobility: The twisting action and binding in the pose help improve shoulder flexibility and range of motion. Energetic and Spiritual Benefits Chakra Activation: Marichyasana D stimulates the Manipura chakra (solar plexus), which is associated with confidence, willpower, and self-esteem. It also connects with the Muladhara chakra (root), promoting a sense of stability and grounding. Prana Flow: The pose opens up energy channels in the body, facilitating the smooth flow of prana (life force energy), leading to enhanced vitality and a balanced state of being. Mind-Body Connection: The act of binding in the pose encourages a strong connection between the body and mind, fostering mindfulness and self-awareness. Mental and Emotional Benefits Stress Relief: Twisting poses like Marichyasana D are known to have a calming effect on the nervous system, helping to reduce stress and anxiety. Focused Attention: The complexity of the pose requires concentration and focus, helping to quiet the mind and improve mental clarity. Patience and Persistence: Achieving the full expression of Marichyasana D may take time and consistent practice, teaching valuable life skills of patience and persistence. Inner Exploration: The deep twist and introspective nature of the pose provide an opportunity to explore emotions and thought patterns, fostering emotional release and self-discovery. Overall Well-being Balanced Body: By addressing multiple aspects of flexibility, strength, and alignment, Marichyasana D contributes to a balanced and harmonious body. Enhanced Flexibility: Regular practice of the pose contributes to increased overall flexibility, making daily movements more comfortable and fluid. Holistic Approach: Marichyasana D's combination of physical, energetic, and mental benefits embodies the holistic nature of yoga, supporting overall well-being.  Marichyasana D Contraindications While Marichyasana D offers numerous benefits, it's important to be aware of its contraindications and practice the pose safely. As with any yoga pose, not everyone's body is the same, and certain conditions may make it advisable to avoid or modify Marichyasana D. Here are some contraindications to consider: Spinal Issues: Individuals with severe spinal issues, such as herniated discs or serious spinal misalignments, should approach Marichyasana D with caution. Twisting poses can potentially exacerbate these conditions. Recent Abdominal Surgery: If you've had recent abdominal surgery or any abdominal trauma, it's recommended to avoid deep twists like Marichyasana D, as they can strain the healing tissues. High Blood Pressure: Twisting poses can temporarily increase blood pressure. If you have uncontrolled high blood pressure or hypertension, it's best to consult your healthcare provider before attempting this pose. Pregnancy: Deep twisting poses are generally contraindicated during pregnancy, especially as the pregnancy progresses. Twists can compress the abdominal area and interfere with the space needed for the growing fetus. Therefore it is NOT recommended that pregnant women take the full expression of this yoga posture. Some expectant mothers will find they can still do the half-lotus with no trouble and other expectant mothers might find it painful. If you do, simply put the foot of the half lotus leg on the ground under the bent knee. Either way you choose to do the half-lotus leg, twist your body away from the bent knee. You can draw your right knee towards your body with your right hand and begin rotating to the left (you will be facing away from your bent leg). However, if you find this variation uncomfortable during pregnancy, omit it altogether until after you’ve given birth. Glaucoma: Marichyasana D involves forward bending and potentially straining the eyes. If you have glaucoma or other eye conditions, consult your doctor before practicing this pose. Knee Issues: If you have knee injuries, pain, or limitations, be cautious with the half lotus position used in Marichyasana D. You might need to modify or skip this pose to protect your knees. Shoulder Injuries: Individuals with acute or chronic shoulder injuries should approach binding in Marichyasana D with care. Overexertion or improper alignment can strain the shoulders. Wrist Issues: If you have wrist problems, the twisting and binding actions could exacerbate discomfort. Proper support and alignment are crucial to avoid strain on the wrists. Recent Surgery: Avoid Marichyasana D if you've had recent surgery on the hips, spine, shoulders, or any area directly involved in the pose. Inexperienced Practitioners: Those new to yoga or with limited flexibility might find the pose challenging. It's important to work gradually and avoid pushing your body beyond its limits. Always prioritize your safety and listen to your body. If you have any medical conditions or concerns, it's wise to consult a healthcare professional or experienced yoga instructor before attempting Marichyasana D or any other challenging yoga pose. In some cases, modifications can be made to adapt the pose to your individual needs and limitations. Be sure to check out our suggestions for modifying Marichyasana D below. Remember that yoga is about creating harmony within your body, so honor your body's signals and make choices that align with your well-being.  Tap here to watch a step-by-step tutorial video on 3 modifications/variations and the full expression of Marichyasana D. Step-by-Step Instructions for the Full Expression of Marichyasana D with Sanskrit Vinyasa Count We will be entering this posture from downward facing dog, having just taken a vinyasa after Marichyasana C to seated position. Sapta (Vinyasa #7): From Adho Mukha Svanasana (down dog), look forward and walk or jump your feet through and have a seat on the floor with your legs extended in front of you. Bend your left leg and bring it on top of your right leg into a half-lotus position. Bend your right leg up, working to get your right foot as close as possible to your right glute. Root down into your sits bones and lengthen your spine. Lift your left arm and rotate your upper back to the right. Take your left arm over and around your right leg. Push your left arm into your outer right knee. Bend your left elbow. Wrap your left arm around your bent right knee. Shift your weight from your right hand into your hips, and bring your right arm behind you to grab your left hand/fingers. If possible, bind your fingers or wrist. Breathe here for five deep breaths. Your gaze is to the side over your right shoulder (parsva drishti). Throughout the five breaths, on each inhale, engage Mula Bandha (root/pelvic lock). With each exhale, engage Uddiyana Bandha (naval lock). TIPS:
Asthau (Vinyasa #8) After your fifth breath, exhale and release your arms, straighten both legs to release the posture. Bring your hands to the floor, cross your legs and lift your body up off the ground. Nava (Vinyasa #9) Exhale and jump back into Chaturanga Dandasana. Dasa (Vinyasa #10) Inhale into Urdhva Mukha Svanasana(Upward facing dog) Ekadasa (Vinyasa #11) Exhale into Adho Mukha Svanasana (Downward facing dog) Dvadasa (Vinyasa #12) From Adho Mukha Svanasana (down dog), look forward and walk or jump your feet through and have a seat on the floor with your legs extended in front of you. Bend your right leg and bring it on top of your left leg into a half-lotus position. Bend your left leg up, working to get your left foot as close as possible to your left glute. Root down into your sits bones and lengthen your spine. Lift your right arm and rotate your upper back to the left. Take your right arm over and around your left leg. Push your right arm into your outer left knee. Bend your right elbow. Wrap your right arm around your bent left knee. Shift your weight from your left hand into your hips, and bring your left arm behind you to grab your right hand/fingers. If possible, bind your fingers or wrist. Breathe here for five deep breaths. Your gaze is to the side over your left shoulder (parsva drishti). Throughout the five breaths, on each inhale, engage Mula Bandha (root/pelvic lock). With each exhale, engage Uddiyana Bandha (naval lock). Trayodasa (Vinyasa #13) After your fifth breath, exhale and release your arms, straighten both legs to release the posture. Bring your hands to the floor, cross your legs and lift your body up off the ground. Caturdasa (Vinyasa #14) Exhale and jump back into Chaturanga Dandasana. Pancadasa (Vinyasa #15) Inhale into Urdhva Mukha Svanasana(Upward facing dog) Sodasa (Vinyasa #16) Exhale into Adho Mukha Svanasana (Downward facing dog) Marichyasana D is a testament to the depth and richness of the Ashtanga Yoga Primary Series. It embodies physical, mental, and spiritual dimensions, inviting us to delve into the layers of our being. Through this pose, we not only stretch our muscles but also expand our consciousness, aligning ourselves with the timeless wisdom of yoga. So, as you step onto your mat and into Marichyasana D, embrace the journey of transformation it offers—one twist at a time. If you find the full expression of Marichyasana D to be a challenge, be sure to check out the modifications for this pose below. Tap above or click here to watch a step-by-step tutorial video of Marichyasana D. Marichyasana D Modifications No matter what variation of the pose you choose, move slowly through the posture, acknowledge your limits, and respect your bodies limitations. 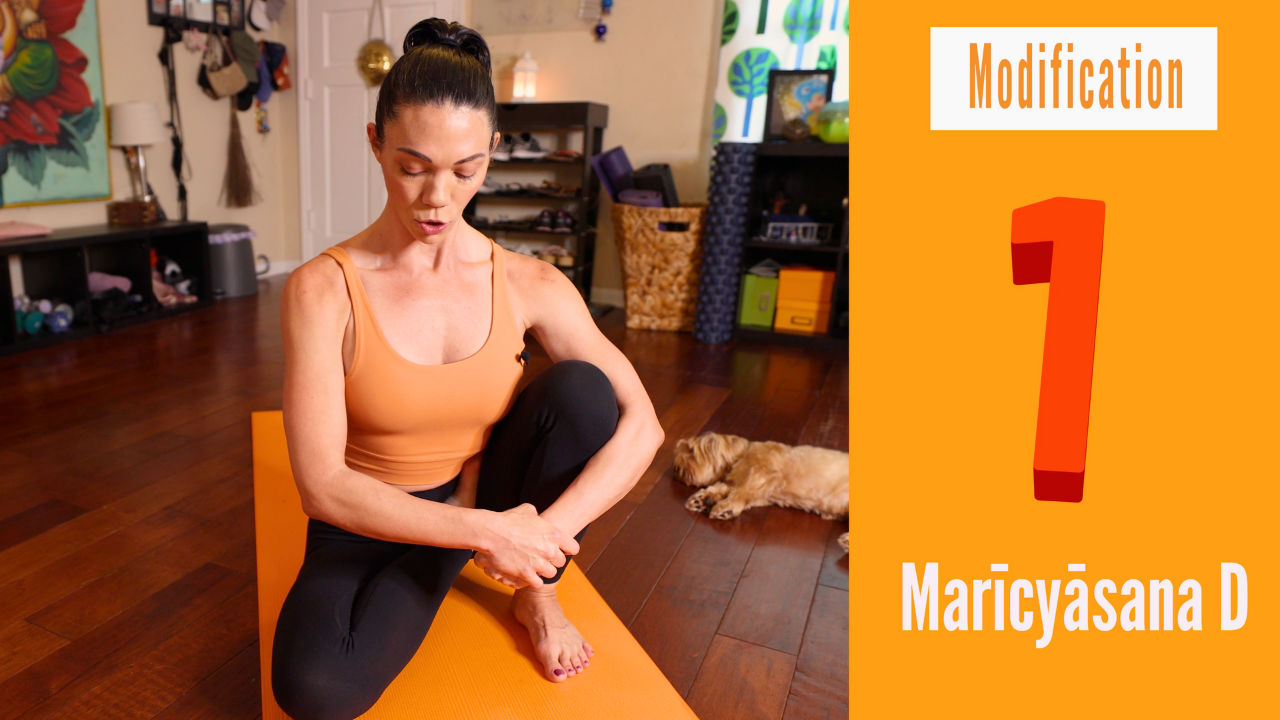 Marichyasana D Modification One (1) Variation One (1) Starting from Dandasana (Staff Posture), take your left leg into half-lotus. Bend your right leg up and guide your right foot as close as possible to your glute. Lengthen out of your sits bones (it is ok if your right glute is off the floor). Take your right arm around your left bent knee and take your left arm forward to bind with your right in front of your body. Scoop out of your lower back to extend your torso up and forward. Stay here for five deep breaths. Sit up as tall as you can. With every inhale, engage mula bandha. With every exhale, activate uddiyana bandha. Try to engage your inner left thigh (half-lotus leg) to bring the knee forward and downward. This will help ensure the knee doesn’t float out to the side. At the end of your fifth breath, inhale to look lengthen on last time. Exhale to release the posture. Take your vinyasa. Repeat on the left side.  Marichyasana D Modification Two (2) Variation Two (2) Start this modification from Dandasana (Staff Posture). Bring your left leg into half-lotus posture. Bend your right leg up and take your right foot as close as possible to your glute. Lengthen out of your sits bones and take your left arm AROUND your bent right knee. At the same time, work to push the knee towards your chest. Take your right hand (or finger tips) to the floor behind you. This will help you with spinal rotation and balance. Push down into your right hand. Root into your right foot and right hip. Activate your left hamstring (squeeze your inner left thigh). Flex your left foot just enough to keep it active. Breathe here for five deep breaths. With every inhale, extend up out of your torso and push your right hand into the ground. Pull your knee to your chest. Lengthen out of your spine and rotate your torso as you look over your right shoulder (parsva dristhi). At the end of your fifth breath, inhale to look forward. Exhale, release your arm and right leg. Take your vinyasa. Repeat on the left side. 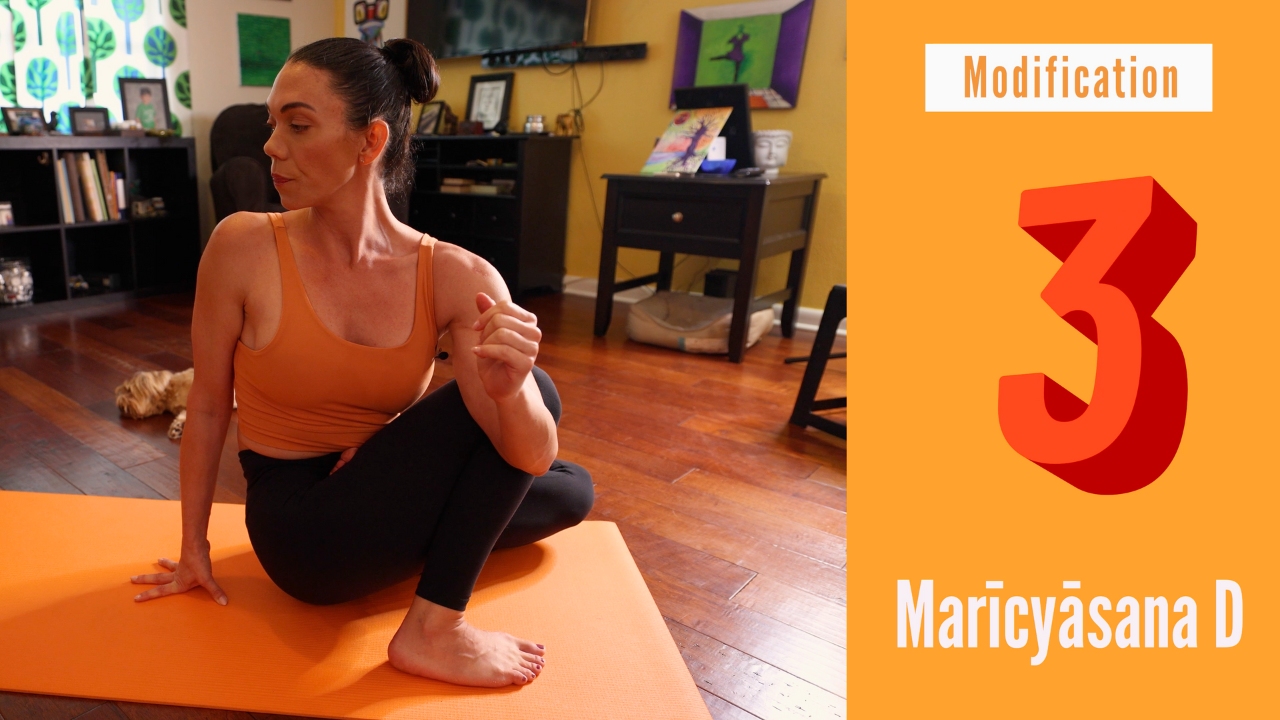 Marichyasana D Modification Three (3) Variation Three (3) Start Variation three from Dandasana (Staff Posture). Place your left leg into half-lotus posture. Bend your right leg up and draw your right foot as close as possible to your glute. Extend out of your sits bones (your right glute may lift off the floor, that’s ok). Take your left arm OVER your bent right knee. Push your right knee towards your chest. Press your right hand (or finger tips) into the ground behind you. This will help you with spinal rotation and balance. Push down into your right hand. Root down into your right foot and hip. Activate your left hamstring (squeeze your inner left thigh). Flex your left foot just enough to keep it engaged (tensegrity). Breathe here for five deep breaths. With every inhale, try to extend up out of your torso up and root your right hand into the ground. With every exhale, draw your knee towards your chest. Extend your spine, look over your right shoulder as you rotate your body to the right. After your fifth breath in the posture, inhale to look forward. Exhale to release your arm and right leg. Take your vinyasa. Repeat on the left side. 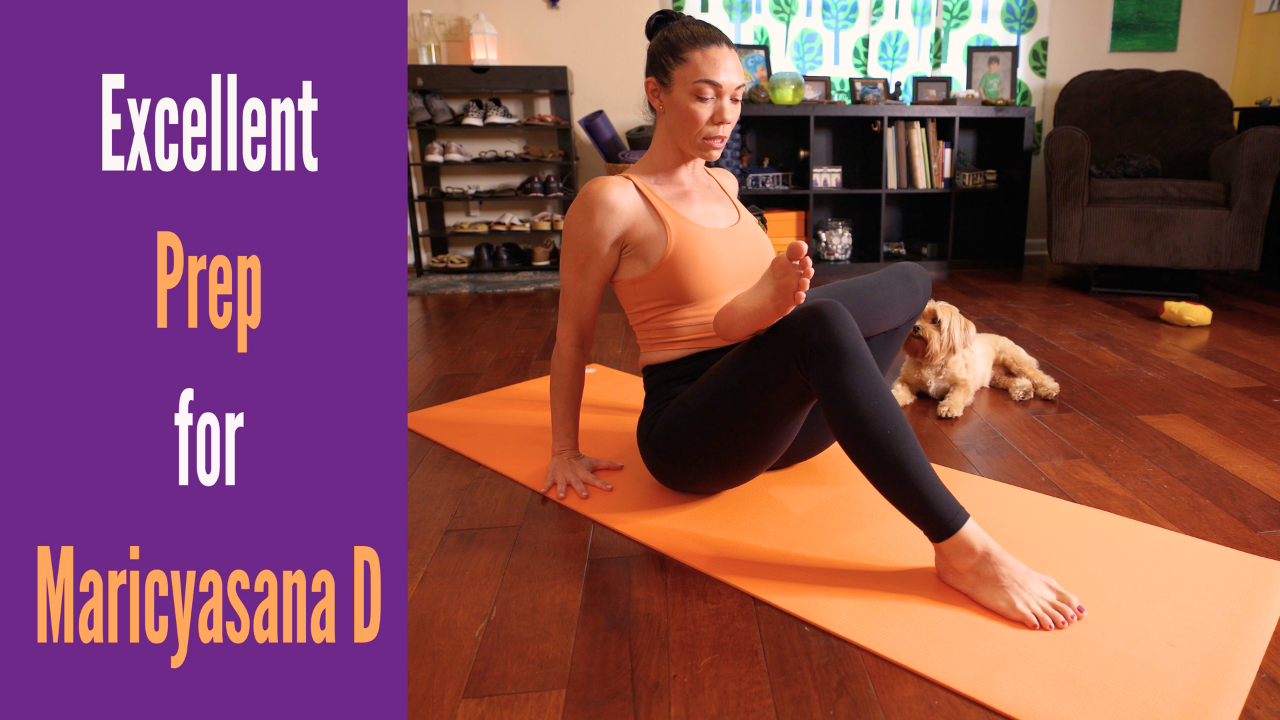 Preparatory Postures Parivr̥tta Trikoṇāsana - https://youtu.be/hfxUTiIz7vQ Parivr̥tta Pārśva Koṇāsana - https://youtu.be/I6EnkExh_-o Marichyasana B - https://youtu.be/T470eQ3sVs8 Marichyasana C - https://youtu.be/2zf3-RPPCxY  Practice with The Yoga Shala If you want to join us for LIVE classes, The Yoga Shala offers virtual and in person classes every weekday morning. Owner, Krista Shirley, also offers virtual or in person private sessions (Yoga, Meditation, Breath-work, Nutrition, Life Coaching and Mentorship). Visit theyogashala.org for details. Be sure to signup for our newsletter to stay on top of local events and classes, Nysa products sales, new offerings, new products and more! We hope you find this video series helpful to you in creating or maintaining your yoga practice! 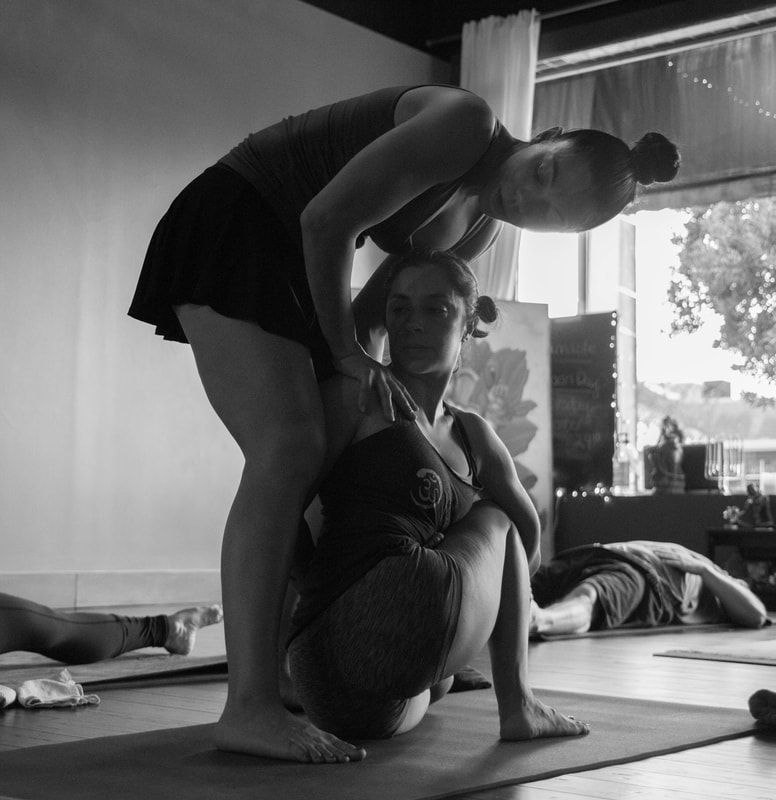 About Krista Krista Shirley is a level II authorized Ashtanga Yoga teacher. She is deeply passionate about sharing these teachings with all who wish to learn. If you want to join Krista in person she teaches daily classes at The Yoga Shala in Winter Park, Florida. She also offers virtual sessions in Yoga, Meditation, Breath-work, Nutrition, Life Coaching and Mentorship. Check out www.theyogashala.org for more details. If you do not live in Central Florida and want to find an authorized teacher in your area, check out our teacher, Sharath Jois’ website, for a list of all teachers authorized and certified by his yoga centre in India. Check out other Ashtanga Yoga Tutorials
❤️SHOP MERCHANDISE: Nysa Products
❤️LET'S BE SOCIAL: Instagram: Krista Shirley Yoga Instagram: The Yoga Shala Facebook: The Yoga Shala Facebook: KristaShirleyYoga For other inquires please contact: krista@theyogashala.org Yoga, with its rich history dating back thousands of years, has become a beloved practice for individuals seeking physical, mental, and spiritual well-being. Among the many branches of yoga, Ashtanga Yoga stands out for its dynamic sequences and precise postures. In this blog post, we will delve into the intricate details of Marichyasana C, a challenging yet rewarding pose that is a part of the Ashtanga Yoga tradition.  The Essence of Marichyasana C Marichyasana C, often referred to as the "Marichi's Pose C," is a seated twist that honors the sage Marichi, one of the mind-born sons of Brahma in Hindu mythology. Marichyasana C (mar-ee-chee-AHS-anna), also spelled Marīcyāsana C, is the third of four Marīcyāsana poses from the Ashtanga Yoga Primary Series. This is the eleventh seated posture in the Ashtanga Yoga Primary Series (yoga chikitsa) . All four Marichyasana postures (A, B, C, D) build upon one another to prepare students for postures that follow. I’ve also written a step-by-step guide for all four of the Marichyasana poses from Ashtanga’s Primary Series (Marichyasana A, Marichyasana B, and Marichyasana D). 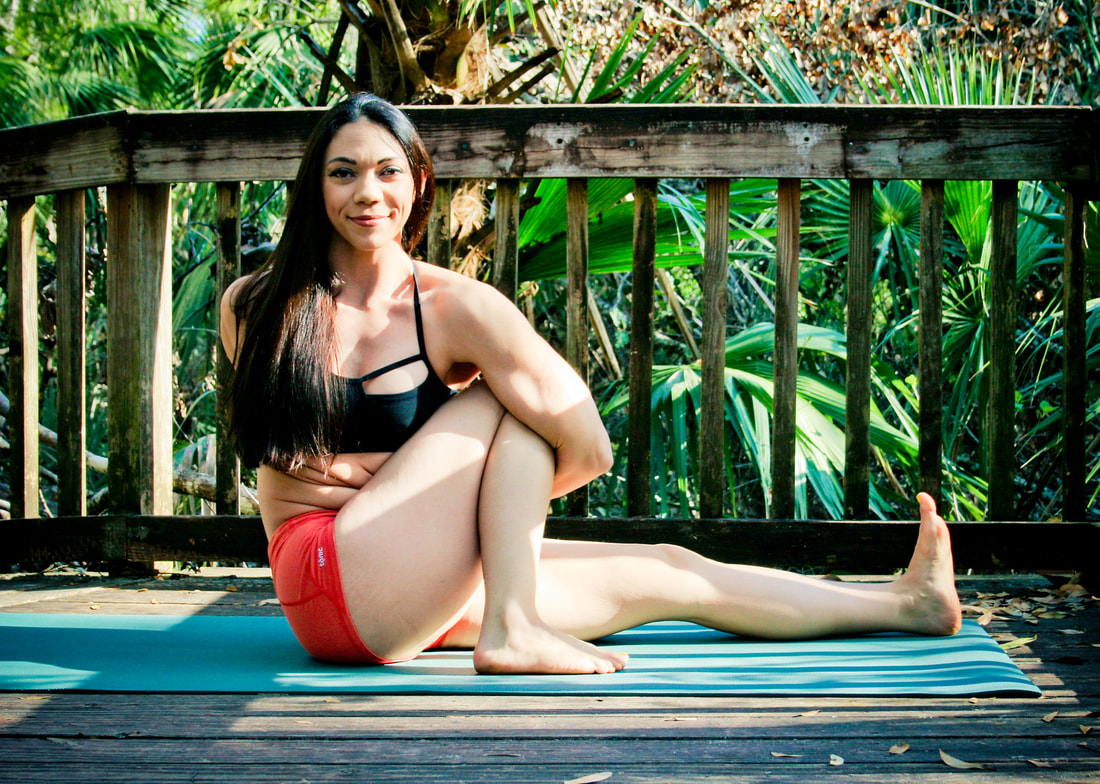 click here to watch a full yoga tutorial on Marichyasana C Benefits of Marichyasana C Spinal Flexibility and Mobility: Marichyasana C involves a deep spinal twist, which helps improve the flexibility and mobility of the entire vertebral column. The twisting motion stimulates the intervertebral discs, maintaining their health and preventing stiffness. Digestive Health: The compression and massage of the abdominal organs that occur during the twist can aid in digestion, alleviate bloating, and encourage the proper functioning of the digestive system. This can be particularly beneficial for individuals with digestive issues. Detoxification: Twisting poses like Marichyasana C stimulate the organs involved in detoxification, such as the liver and kidneys. The twisting action enhances blood flow to these organs, promoting the elimination of toxins and waste products from the body. Improved Circulation: The twisting and bending of the torso in this pose stimulate blood circulation throughout the body. Enhanced circulation brings more oxygen and nutrients to the cells, helping to rejuvenate the body's systems. Hip and Shoulder Opening: Marichyasana C stretches the hips, thighs, and shoulders. Over time, this can lead to increased flexibility in these areas and relief from tightness or discomfort. Enhanced Lung Capacity: The twist stimulates the chest and encourages expansion of the ribcage. This can lead to improved lung capacity, which is beneficial for overall respiratory health. Mind-Body Connection: This pose requires focus and mindfulness as you work through the twisting motion and maintain your breath. Practicing Marichyasana C can enhance your mind-body connection, promoting a deeper sense of self-awareness. Stress Reduction: The meditative quality of yoga combined with the twist's physical benefits can help alleviate stress and anxiety. The controlled breathing and concentration required during the pose promote a calming effect on the nervous system. Energy Flow: Twisting poses are known to stimulate the flow of energy (prana or chi) through the body's energy channels (nadis or meridians). This can lead to increased vitality and a sense of overall well-being. Internal Massage: As you twist, you create a gentle massaging effect on the internal organs, which can improve their functioning and overall health. Balanced Chakras: In yogic philosophy, twists are believed to activate and balance the energy centers known as chakras. Marichyasana C, with its twisting action, may help balance the solar plexus chakra (Manipura), which is associated with confidence, digestion, and personal power. Patience and Perseverance: This pose can be challenging, requiring patience and perseverance to achieve its full expression. Practicing it regularly can help you develop a growth mindset and a greater sense of determination. Remember, the benefits of Marichyasana C are cumulative and may take time to fully experience. As with any yoga practice, it's important to approach this pose with respect for your body's current capabilities, and not to force yourself into the full expression of the pose if it causes discomfort or strain. Always listen to your body and practice under the guidance of a qualified yoga instructor if you're new to the pose or yoga in general. 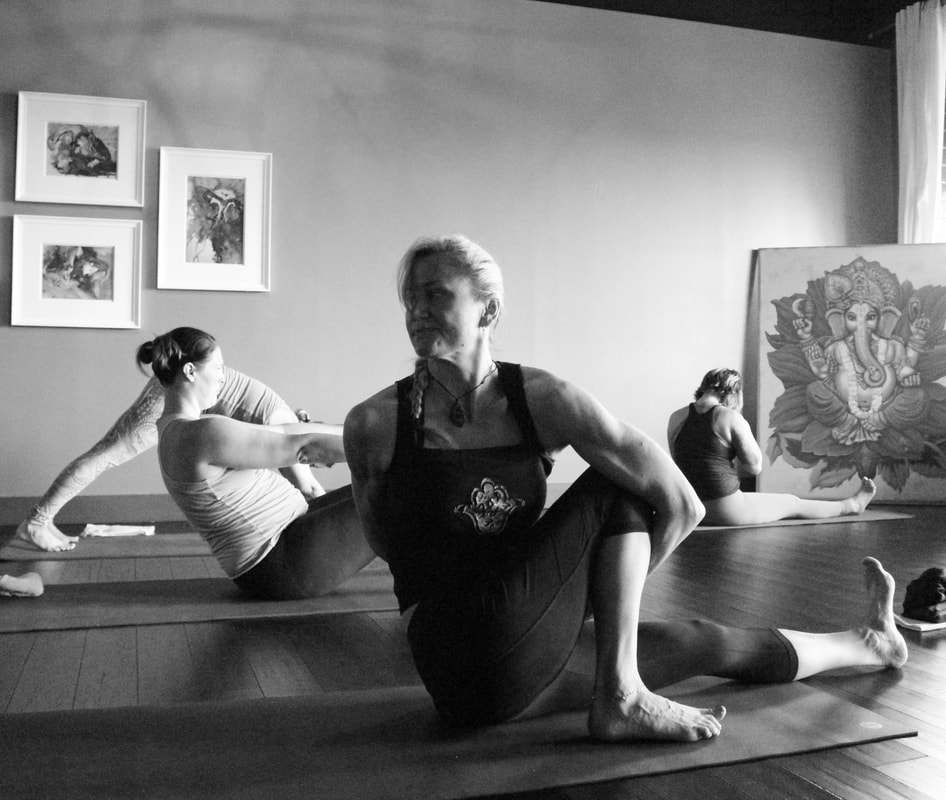 Marichyasana C Contraindications While Marichyasana C offers numerous benefits, it's important to recognize that not all yoga poses are suitable for everyone. Certain individuals may have pre-existing conditions or limitations that make practicing this pose unsafe or uncomfortable. Here are some contraindications and considerations to be aware of before attempting Marichyasana C: Spinal Issues: Individuals with severe spinal issues such as herniated discs, acute back pain, or spinal injuries should avoid or modify this pose. Twisting poses can exacerbate these conditions. Pregnancy: Pregnant individuals, especially in the second and third trimesters, should avoid deep twisting poses like Marichyasana C. It's essential to prioritize the safety of both the mother and the baby. The full expression of this posture is NOT recommended if you are pregnant. Instead, try twisting away from the bent knee. Hug your right knee with your right hand and begin rotating to the left (you will be facing away from your bent leg). However, if this variation is uncomfortable during pregnancy, omit it altogether for now. 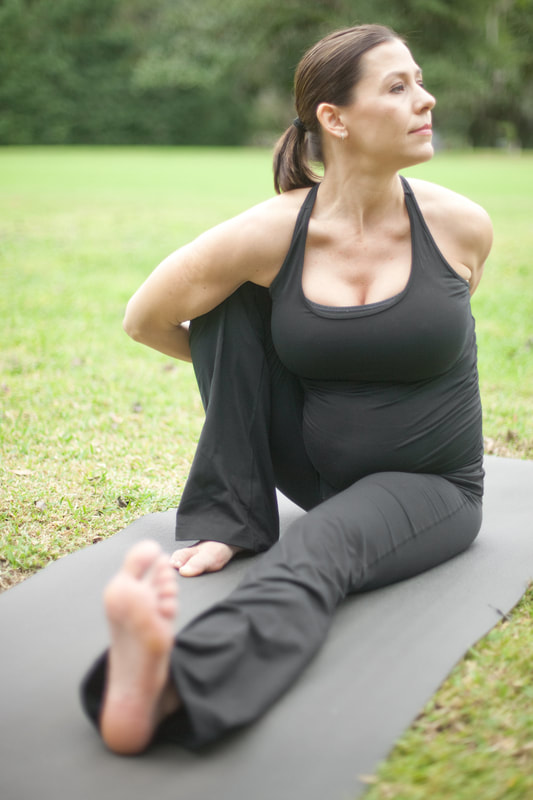 Prenatal Modification for Marichyasana C High Blood Pressure: Deep twists can temporarily raise blood pressure. If you have uncontrolled high blood pressure, it's advisable to avoid or modify this pose to prevent any adverse effects. Recent Abdominal Surgery: If you've undergone abdominal surgery (such as hernia repair) or have any abdominal conditions, consult your healthcare provider or a qualified yoga instructor before attempting deep twists. Hip or Knee Injuries: Individuals with acute or chronic hip or knee injuries should approach this pose with caution. It's crucial to avoid straining these areas. Wrist Issues: If you have wrist problems such as carpal tunnel syndrome or wrist pain, the arm positioning in Marichyasana C might aggravate the condition. Limited Range of Motion: If you have limited flexibility in the hips, shoulders, or spine, forcing yourself into the full expression of this pose can lead to strain and potential injury. Beginners: Marichyasana C is an intermediate to advanced pose. Beginners should focus on building a strong foundation in simpler poses before attempting this deeper twist. Digestive Disorders: Individuals with severe digestive disorders, such as inflammatory bowel disease, should approach deep twists cautiously. Consult with a healthcare professional before attempting this pose. Breathing Difficulties: If you have respiratory issues or find it challenging to breathe comfortably in the pose, it's best to avoid or modify it. Recent Injury: If you have a recent injury, especially in the hips, spine, or shoulders, it's wise to avoid Marichyasana C until you've fully recovered. Always prioritize your safety and well-being. If you're unsure whether Marichyasana C is appropriate for you, consult a qualified yoga instructor or a healthcare professional before attempting the pose. They can provide personalized guidance and modifications tailored to your individual needs and limitations. Remember that yoga should be a mindful and nourishing practice, and it's okay to skip or modify poses that don't align with your body's current condition. 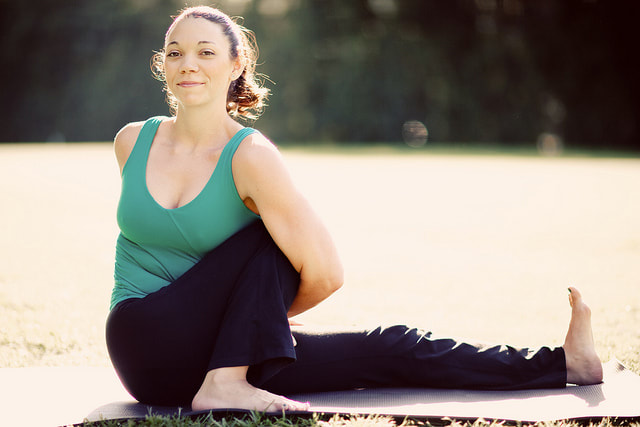 Tap here to watch a step-by-step tutorial video on Marichyasana C Step-by-Step Instructions for the Full Expression of Marichyasana C with Sanskrit Vinyasa Count We will be entering this posture from downward facing dog, having just taken a vinyasa after Marichyasana B to seated position. Sapta (Vinyasa #7): From Adho Mukha Svanasana (down dog), look forward and walk or jump your feet through and have a seat on the floor with your legs extended in front of you. Bend your right leg up and bring your right foot as close to your right glute as you can. Create a hands width of space between your inner left thigh and your right foot. Root down into your sits bones and lengthen your spine. Take your left arm over and across your bent right leg. Press your upper left arm into your outer right knee. Bend your left elbow and wrap your left arm all the way around your bent right knee. Shift your body weight up and out of your right hand, into your hips. Bring your right arm behind you to meet your left fingers or hand. If you can, bind your fingers or wrist. Breathe here for five deep breaths. Your gaze is Parsva Drishti - look over your right shoulder. Actively engage Mula Bandha (root/pelvic lock) with each inhale, and Uddiyana Bandha (naval lock) as you exhale. TIPS
Asthau (Vinyasa #8) After your fifth breath, exhale and release your arms, straighten both legs to release the posture. Bring your hands to the floor, cross your legs and lift your body up off the ground. Nava (Vinyasa #9) Exhale and jump back into Chaturanga Dandasana. Dasa (Vinyasa #10) Inhale into Urdhva Mukha Svanasana(Upward facing dog) Ekadasa (Vinyasa #11) Exhale into Adho Mukha Svanasana (Downward facing dog) Dvadasa (Vinyasa #12) From Adho Mukha Svanasana (down dog), look forward and walk or jump your feet through and have a seat on the floor with your legs extended in front of you. Bend your left leg up and bring your left foot as close to your left glute as you can. Create a hands width of space between your inner right thigh and your left foot. Root down into your sits bones and lengthen your spine. Take your right arm over and across your bent left leg. Press your upper left arm into your outer left knee. Bend your right elbow and wrap your right arm all the way around your bent left knee. Shift your body weight up and out of your left hand, into your hips. Bring your left arm behind you to meet your left fingers or hand. If you can, bind your fingers or wrist. Breathe here for five deep breaths. Your gaze is Parsva Drishti - look over your left shoulder. Actively engage Mula Bandha (root/pelvic lock) with each inhale, and Uddiyana Bandha (naval lock) as you exhale. Trayodasa (Vinyasa #13) After your fifth breath, exhale and release your arms, straighten both legs to release the posture. Bring your hands to the floor, cross your legs and lift your body up off the ground. Caturdasa (Vinyasa #14) Exhale and jump back into Chaturanga Dandasana. Pancadasa (Vinyasa #15) Inhale into Urdhva Mukha Svanasana(Upward facing dog) Sodasa (Vinyasa #16) Exhale into Adho Mukha Svanasana (Downward facing dog) If you find the full expression of Marichyasana C to be a challenge, be sure to check out the modifications for this pose below. Ashtanga Yoga's Marichyasana C is a powerful pose that encapsulates the essence of yoga: the union of body, mind, and spirit. Its multifaceted benefits make it a valuable addition to any practitioner's routine, but it's important to approach it with patience and respect for your body's limitations. As you deepen your practice, you'll find that Marichyasana C not only cultivates physical strength and flexibility but also offers a profound journey into self-awareness and stillness. Marichyasana C Modifications 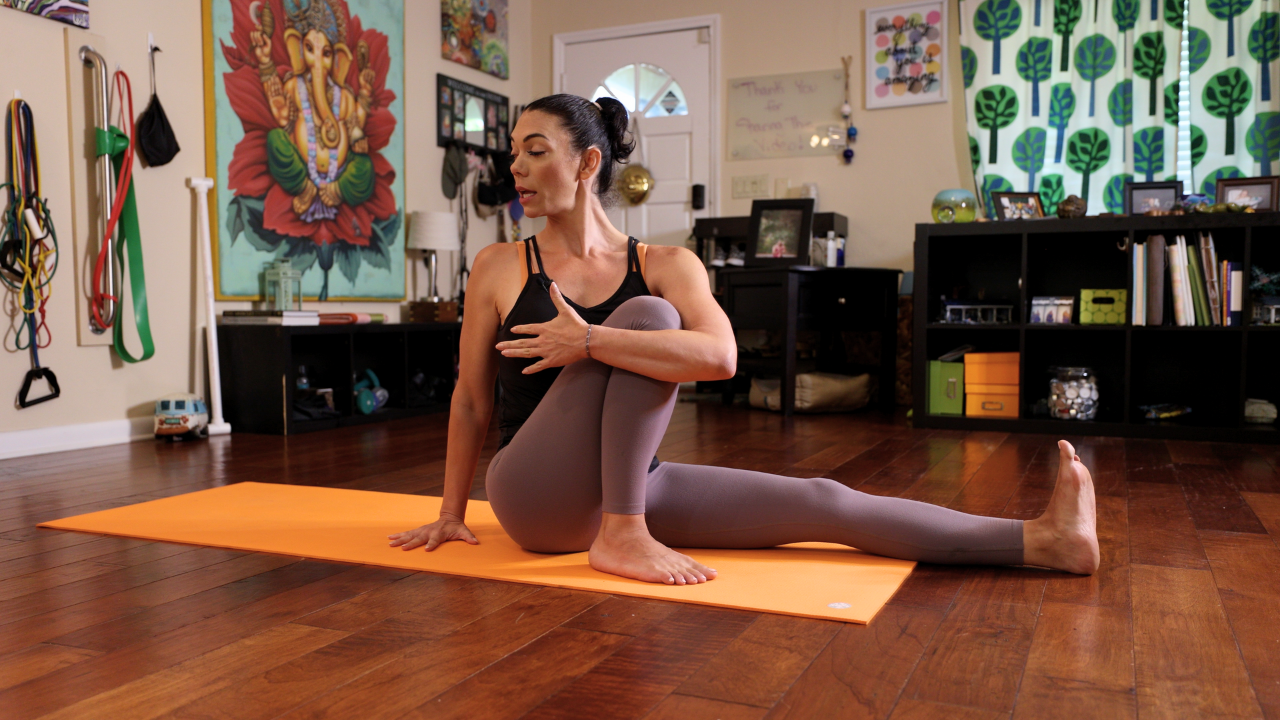 Marichyasana C Modification One (1) Variation One (1) Start this pose from Dandasana (Staff Posture). Inhale and bend your right leg up. Bring your right foot as close to your glute as possible. Make sure you leave about a hands width distance between your inner left thigh and your right foot. Lift out of your sits bones and wrap your left arm around your bent right knee. Pull the knee to your chest. Bring your right hand (or finger tips) to the floor behind your right hip to help you with spinal rotation and to balance. Push down into your right hand. Press into your right hip and foot to ground your body. Activate your left quadricep. At the same time flex your left foot. Breathe here for five deep breaths. As you inhale, work to lift your torso up and press your right hand further into the floor. This activation will help you create tensegrity or opposition of force to create greater stability. As you exhale, continue pulling your knee into your chest and extend out of your chest. Continue working to rotate and look over your right shoulder. After five deep breaths, inhale and look forward. Exhale and release your arm and right leg. Take your vinyasa. Repeat on the left side. 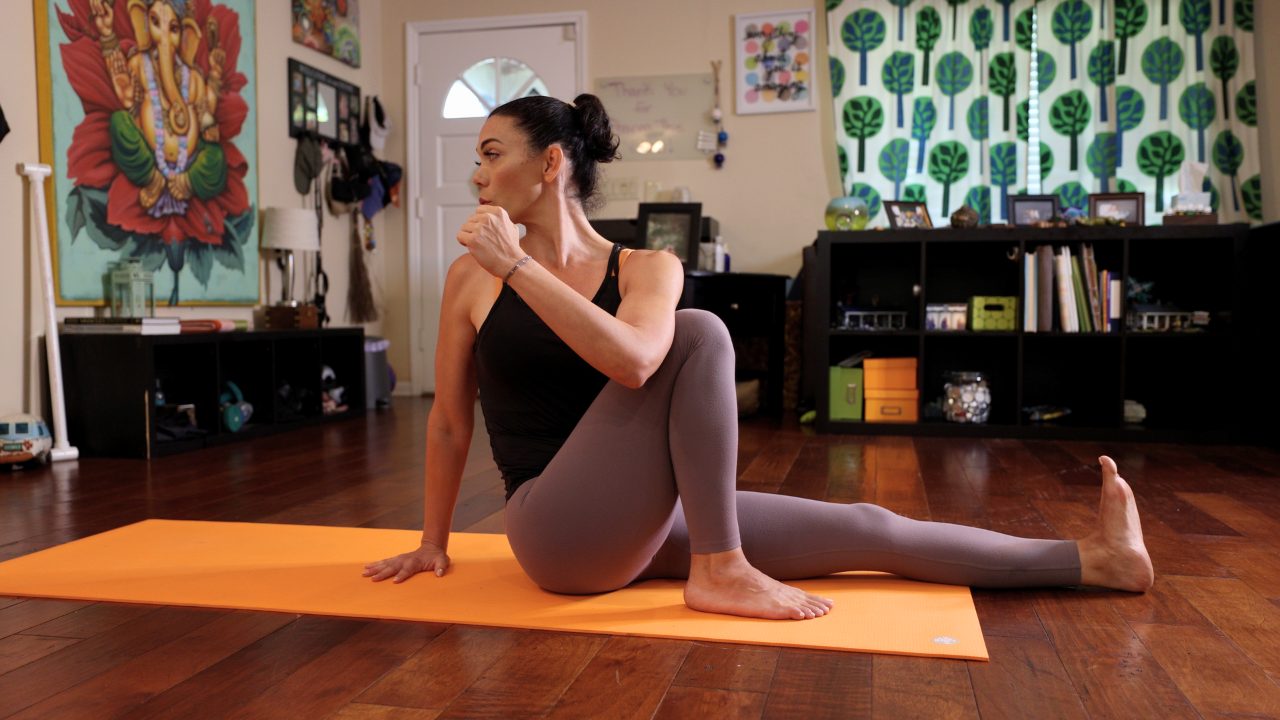 Marichyasana C Modification Two (2) Variation Two (2) Start the posture from Dandasana (Staff Posture). Bend your right leg up. Take your right foot and bring your it as close to your glute as you can. Your goal is to keep about a hands width distance between your inner left thigh and your right foot. Lift out of your sits bones and wrap your left arm OVER your bent right knee. Press the knee towards your chest. Take your right hand (or finger tips) to the floor behind you. This will help you rotate your spine and keep you balance. Root down through your right hand and ground down into your right foot and right hip. Activate your left quadricep. Flex your left foot. Breathe here for five deep breaths. Maintain activation in your body during your five breaths. As you inhale, lift your torso up and push your right hand into the floor. As you exhale, pull your knee towards your chest. Lift your chest up. Rotate your body to the and look over your right shoulder. At the end of your fifth breath, inhale and look forward. Exhale and release your arm and right leg. Take your vinyasa. Repeat on the left side. 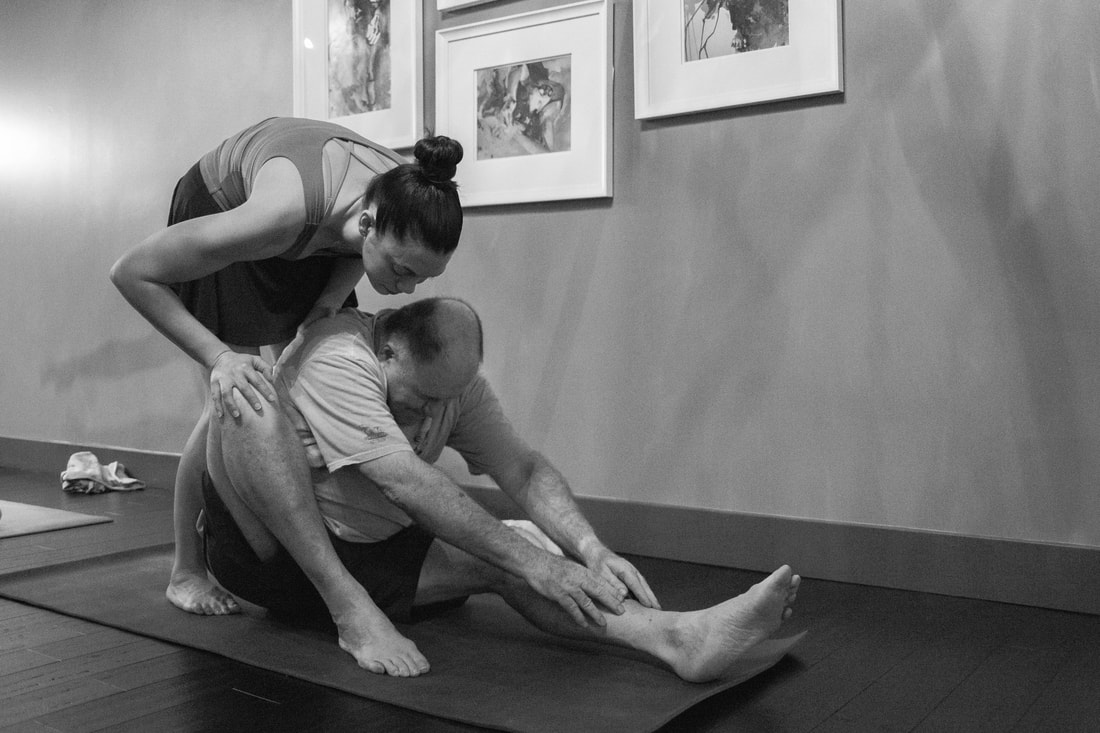 Marichyasana A - Preparatory pose for Marichyasana C Preparatory Postures: Parivrtta Trikonasana - https://youtu.be/hfxUTiIz7vQ Parivrtta Parsva Konasana - https://youtu.be/I6EnkExh_-o Marichyasana A - https://youtu.be/dhNxnf6Lk_s  Practice with The Yoga Shala If you want to join us for LIVE classes, The Yoga Shala offers virtual and in person classes every weekday morning. Owner, Krista Shirley, also offers virtual or in person private sessions (Yoga, Meditation, Breath-work, Nutrition, Life Coaching and Mentorship). Visit theyogashala.org for details. Be sure to signup for our newsletter to stay on top of local events and classes, Nysa products sales, new offerings, new products and more! We hope you find this video series helpful to you in creating or maintaining your yoga practice!  About Krista Krista Shirley is a level II authorized Ashtanga Yoga teacher. She is deeply passionate about sharing these teachings with all who wish to learn. If you want to join Krista in person she teaches daily classes at The Yoga Shala in Winter Park, Florida. She also offers virtual sessions in Yoga, Meditation, Breath-work, Nutrition, Life Coaching and Mentorship. Check out www.theyogashala.org for more details. If you do not live in Central Florida and want to find an authorized teacher in your area, check out our teacher, Sharath Jois’ website, for a list of all teachers authorized and certified by his yoga centre in India. Check out other yoga tutorials on our Youtube Channel
❤️SHOP MERCHANDISE: Nysa Products
❤️LET'S BE SOCIAL: Instagram: Krista Shirley Yoga Instagram: The Yoga Shala Facebook: The Yoga Shala Facebook: KristaShirleyYoga For other inquires please contact: krista@theyogashala.org Yoga has been a profound practice that encompasses physical, mental, and spiritual dimensions. Among its various forms, Ashtanga Yoga stands out for its structured series of postures designed to bring about holistic well-being. One of the intriguing poses within the Ashtanga Primary Series is Marichyasana B, a pose that embodies strength, flexibility, and inner exploration. In this blog post, we delve into the intricacies of Marichyasana B, its benefits, step-by-step guide, and the deeper essence it brings to your yoga practice. 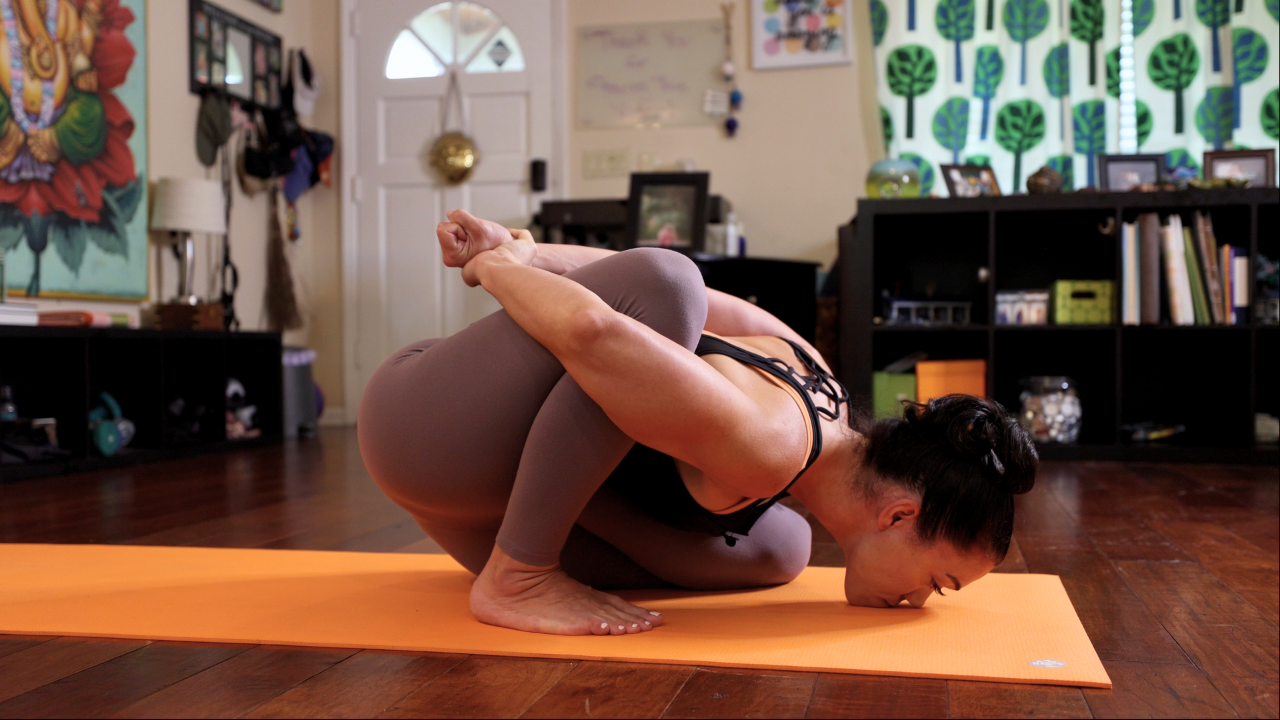 Marichyasana B (mar-ee-chee-AHS-anna), also spelled Marīcyāsana B, translates to Pose Dedicated to the Sage Maricihi. Marichyasana B is the second of four total Marichyasana poses from the Ashtanga Yoga Primary Series. This seated twist/roatation is known for its therapeutic effects on the spine, shoulders, hips, and digestive system. It requires a harmonious blend of strength, flexibility, and concentration, making it an integral part of the series that facilitates the deepening of one's practice. This is the fifteenth posture from Ashtanga Yoga’s Primary series, and the tenth seated posture. All of the Marichyasana poses (A, B, C, D) build upon each other, which prepares the practitioner for the postures that follow. Marichyasana B is similar to Marichyasana A, but in B position, one of your legs goes into half lotus. Adding lotus to the posture intensifies the stretch and complexity of this asana. If you would like to learn more about all four of the Marichyasana poses, I have written a step-by-step guide for all four Marichyasana’s (Marichyasana A, Marichyasana C and Marichyasana D). Benefits of Marichyasana B Spinal Health: Marichyasana B offers a revitalizing twist to the spine, promoting its mobility and flexibility. It helps in maintaining the health of the intervertebral discs and the surrounding muscles. Digestive Well-being: The twisting motion massages the abdominal organs, aiding digestion and improving metabolism. This can be particularly beneficial for individuals dealing with digestive issues. Detoxification: Twists in yoga are often associated with detoxification. Marichyasana B stimulates the lymphatic system, aiding in the elimination of toxins from the body. Hip Flexibility: This pose involves a deep external rotation of the hip joint, enhancing its flexibility and relieving tension in the hips. Shoulder Mobility: Marichyasana B demands an intricate interplay of shoulder movement. As you bind your hands behind your back, the pose opens up the chest and shoulders, releasing any built-up tension. Concentration and Mindfulness: Holding the pose requires focused attention on the breath and body alignment, cultivating mindfulness and deepening the mind-body connection. 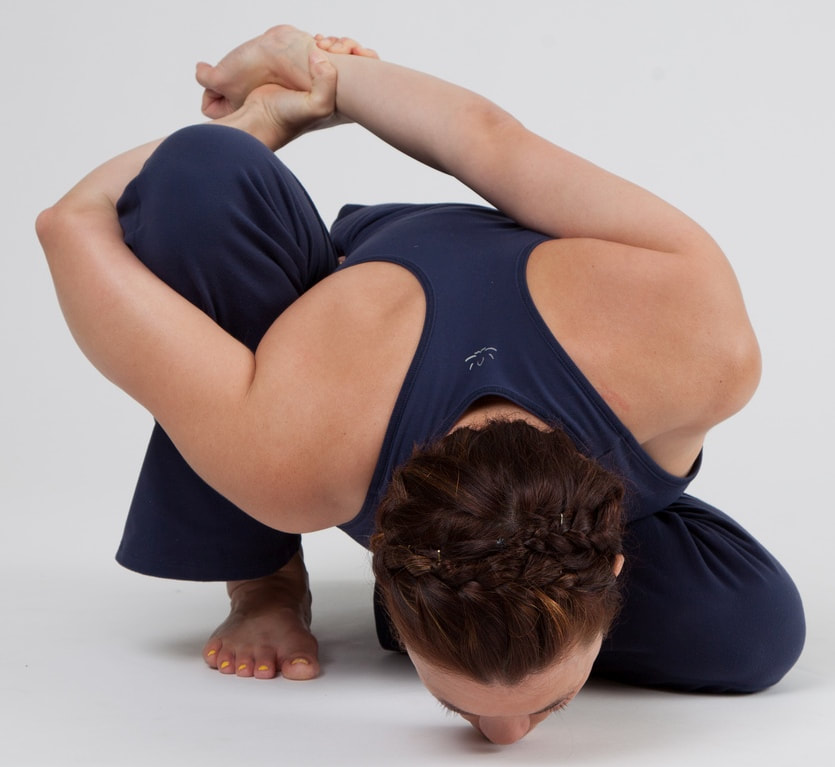 Contraindications While Marichyasana B offers numerous benefits, it's essential to practice yoga with awareness of your body's limitations and any potential contraindications. Some individuals might need to modify or avoid certain poses based on their physical conditions. Here are some contraindications and considerations for practicing Marichyasana B: Recent Abdominal Surgery: If you've had abdominal surgery, especially involving the digestive organs, it's advisable to avoid deep twists like Marichyasana B until you've fully healed. Twisting could strain the healing tissues and impede recovery. Spinal Issues: Individuals with severe spinal issues, such as herniated discs or acute back pain, should approach this pose with caution. Twists can exacerbate these conditions. It's wise to consult a healthcare professional or experienced yoga teacher before attempting this pose. Shoulder or Arm Injuries: If you have shoulder, elbow, or wrist injuries, the bind in Marichyasana B might be challenging or detrimental. Modify the pose with one of the four variations offered below. Hip Problems: If you're dealing with hip injuries or inflammation, approach the hip rotation required for this pose carefully. Be cautious and avoid forcing the movement that could worsen your condition. Pregnancy: As the abdominal area is involved in the twist, pregnant individuals should approach Marichyasana B with caution. It's often recommended to avoid deep twists during pregnancy to prevent strain on the abdominal muscles and the developing fetus. High Blood Pressure: Deep twists can momentarily raise blood pressure. If you have uncontrolled high blood pressure, consult a medical professional before practicing Marichyasana B. Vertigo or Dizziness: The twisting motion might trigger dizziness or vertigo in some individuals. If you're prone to these sensations, it's better to avoid deep twists. Limited Range of Motion: If you're new to yoga or have limited flexibility, especially in the hips or shoulders, you might find Marichyasana B challenging. Work with your body's current abilities and gradually progress with consistent practice. Be sure to explore the modifications offered below. Beginner Level: If you're a beginner in yoga, it's a good idea to practice under the guidance of an experienced teacher. They can help you understand proper alignment, modifications, and progressions. Pre-existing Conditions: If you have any pre-existing medical conditions that might be affected by deep twists, it's wise to consult your healthcare provider before attempting Marichyasana B or any other yoga pose. Remember that yoga is about honoring your body's needs and limitations. If Marichyasana B isn't accessible to you due to any of these contraindications, there are always alternative poses that can offer similar benefits without the associated risks. Always prioritize safety and listen to your body during your yoga practice. If in doubt, seek guidance from a qualified yoga instructor or healthcare professional. 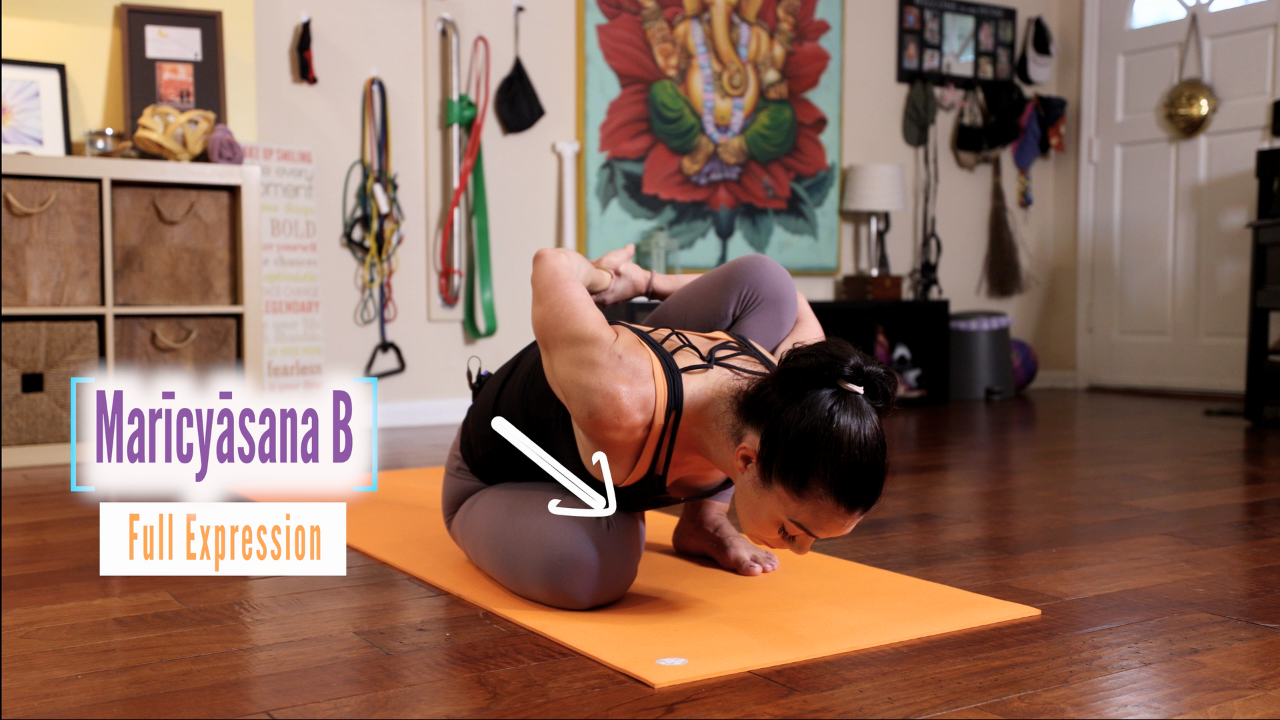 Step-by-Step Instructions for the Full Expression of Marichyasana B with Sanskrit Vinyasa Count We will be entering this posture from downward facing dog, having just taken a vinyasa after Marichyasana A to seated position. Sapta (Vinyasa #7): From Adho Mukha Svanasana (down dog), look forward and walk or jump your feet through and have a seat on the floor with your legs extended in front of you. Inhale as you bring your left leg on your right thigh in a half lotus position. From there, bend your right knee up and plant your right foot close to your right hip. Stretch your right arm forward and wrap it around your bent right knee (ensure that your right palm is facing the right and your thumb towards the floor). Bind the arm tight enough around your right leg that your shin presses into your right armpit. We want very little space between the arm and the knee. Stretch your left arm behind your back to bind your hands together. If possible, grab your wrist. Asthau (Vinyasa #8) Exhale and begin to extend forward and downward. Keep your back as flat as possible. Take five deep breaths here. Engage your root lock, Mula Banda, with each inhale. With each exhale, engage your abdominal lock, Uddiyana Banda. Focus on lifting up and out of your sits bones to extend your body up as you breathe in. And on your exhalations, focus on engaging your back to keep the shoulders back while you work to hinge or fold from your hips. The constant activation through the posture will help you deepen your body in the pose. TIP:
Nava (Vinyasa #9) Inhale, lift your head and lengthen your spine. Keep your hands bound around your feet. Exhale there. Dasa (Vinyasa #10) Inhale, bring your hands to the floor, cross your legs and lift your body up off the ground. Ekadasa (Vinyasa #11) Exhale and jump back into Chaturanga Dandasana. Dvadasa (Vinyasa #12) Inhale into Urdhva Mukha Svanasana(Upward facing dog) Trayodasa (Vinyasa #13) Exhale into Adho Mukha Svanasana (Downward facing dog) Caturdasa (Vinyasa #14) From Adho Mukha Svanasana (down dog), look forward and walk or jump your feet through and have a seat on the floor with your legs extended in front of you. Inhale as you bring your right leg on your left thigh in a half lotus position. From there, bend your left knee up and plant your left foot close to your right hip. Stretch your left arm forward and wrap it around your bent left knee (ensure that your left palm is facing the left and your thumb towards the floor). Bind the arm tight enough around your left leg that your shin presses into your left armpit. We want very little space between the arm and the knee. Stretch your right arm behind your back to bind your hands together. If possible, grab your wrist. Pancadasa (Vinyasa #15) Exhale and begin to extend forward and downward. Keep your back as flat as possible. Take five deep breaths here. Engage your root lock, Mula Banda, with each inhale. With each exhale, engage your abdominal lock, Uddiyana Banda. Focus on lifting up and out of your sits bones to extend your body up as you breathe in. And on your exhalations, focus on engaging your back to keep the shoulders back while you work to hinge or fold from your hips. The constant activation through the posture will help you deepen your body in the pose. Sodasa (Vinyasa #16) Inhale, lift your head and lengthen your spine. Keep your hands bound around your feet. Exhale there. Saptadasa (Vinyasa #17) Inhale, bring your hands to the floor, cross your legs and lift your body up off the ground. Ashtadasa (Vinyasa #18) Exhale and jump back into Chaturanga Dandasana. Ekoonavimsatih (Vinyasa #19) Inhale into Urdhva Mukha Svanasana(Upward facing dog) Vimsatih (Vinyasa #20) Exhale into Adho Mukha Svanasana (Downward facing dog) Marichyasana B Modifications 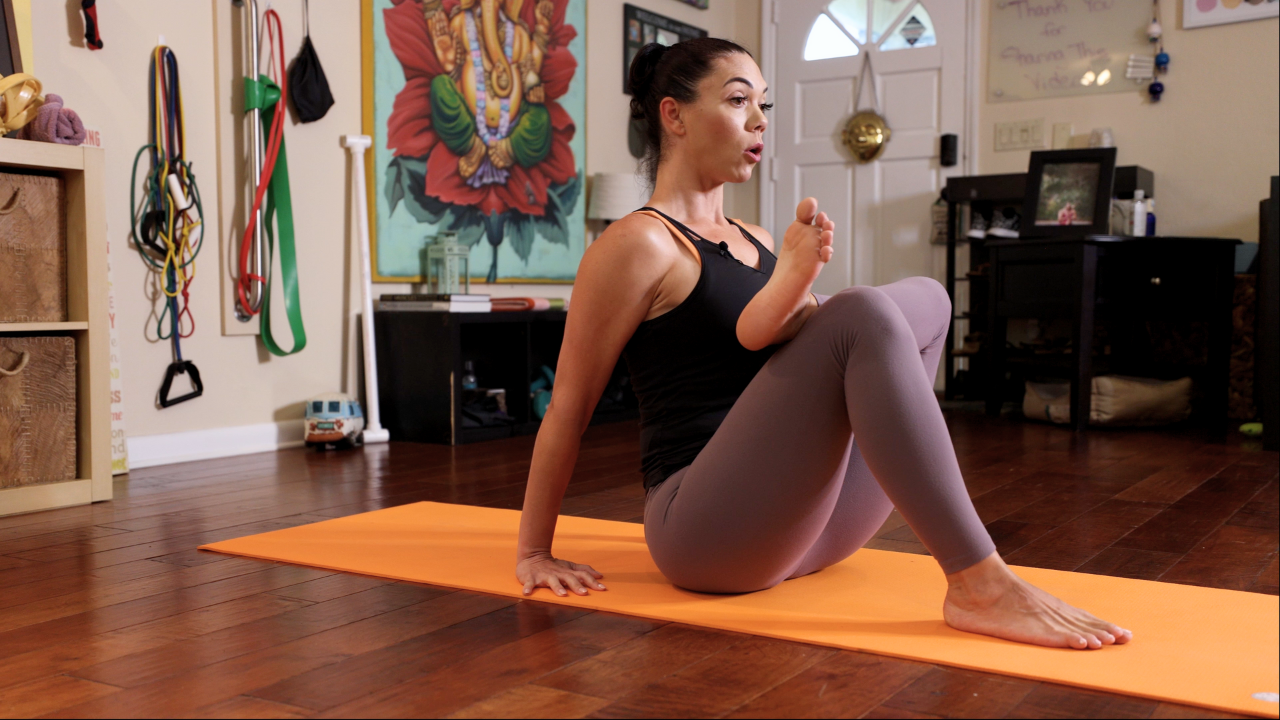 Variation One (1) If you cannot take half-lotus posture, start with this modification. Begin in Dandasana. From here, bend your right knee up and bring your ankle on top of your right quadricep, just above your right knee. Flex your left foot. Take your hands to the floor behind you. Breathe here for five deep breaths. Try to sit up tall and extend out of your lower back. Keep chest open. Engage your bandhas as you breathe. After five deep breaths, release the pose. Take your vinyasa and repeat on your left side. Or skip your vinyasa and come right to your left side. Variation Two (2) Start this variation in Dandasana. From there bring your left leg into half lotus position. Ensure your foot does not go past your right thigh as this will put undue pressure on the left knee. Then, gently draw your right leg up and bend your right knee. Either bring your hands to the floor behind you, or to your side. Breathe here for five deep breaths. Focus on pressing your pelvis forward while you work to ground your hips. Continue to flex your left foot slightly to ensure you do not over stretch your left ankle. After your fifth breath, gently stretch your right leg out. Release the left leg in half-lotus. Then, take a vinyasa. Or, if you are working to build up your stamina, you can opt to skip the vinyasa between sides. Repeat on your left side. 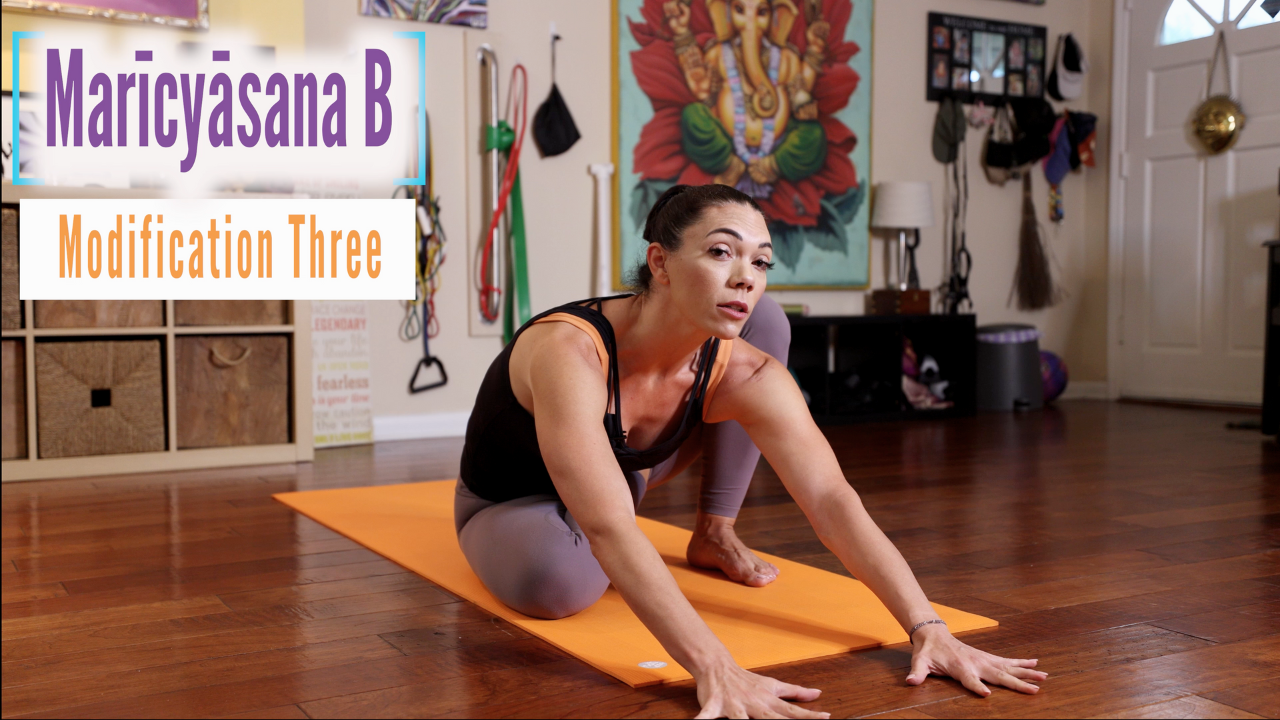 Variation Three (3) If you can comfortably do Variation #2, and you can bring your right foot close to your glute, start working with variation #3. Begin in Dandasana. From there bring your left leg into half lotus position. Ensure your foot does not go past your right thigh as this will put undue pressure on the left knee. Then, gently draw your right leg up and bend your right knee. Try to balance there in space without your hands on the floor. If you can, try to lift up out of your sits bones to balance your left glute. Squeeze your inner left thigh. This will keep your half-lotus from drifting too far to the left. Ground down into your left (half-lotus leg) and your right foot. From there begin to extend your torso forward over your half lotus leg. Place your hands on the floor. Take five deep breaths. After your fifth breath, inhale to lengthen. Exhale and begin to stretch your right leg out and release your half lotus. Take your vinyasa. Or, if you are getting fatigued, skip the Vinyasa between sides. Repeat on your left side. 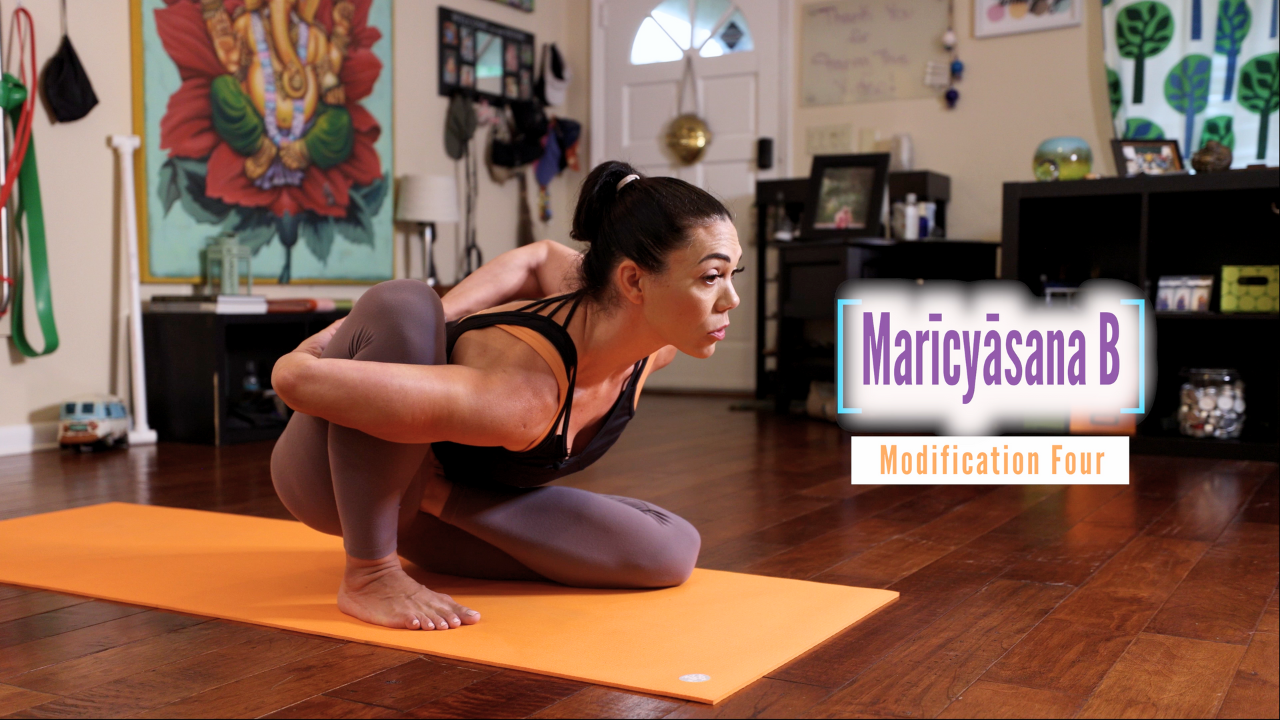 Variation Four (4) Modification four is extremely close to the full expression of Marichyasana B. Start in Dandasana. Bring your left leg into half lotus. Then, bend your right knee up. Stretch your right arm forward and wrap it around your bent right leg. Reach your left arm back behind your body. Bind your hands together. Try to engage your upper back muscles. This will help you open your chest and draw your hands closer to each other. Engage your thighs. Root down through your right foot. Lengthen your spine and lengthen out through your neck. Fold forward towards the floor. If you are not able to bring your forehead or chin to the floor without rounding your upper back, do not fold yet. If you keep working with this modification you will eventually be able to bind your left wrist with your right hand. Breathe here for five deep breaths. After your fifth exhale, inhale to extend your spine. Exhale and release the bind. Stretch your right leg out and release your half lotus. Take your vinyasa. Repeat on the left side. No matter what variation of the pose you choose, move slowly through the posture, acknowledge your limits, and respect your bodies limitations. Finding the Deeper Essence Beyond the physical benefits, Marichyasana B offers an opportunity for self-discovery and growth. The pose's challenging nature encourages practitioners to confront their limitations with patience and humility. The journey towards attaining the full expression of the pose is a process that mirrors the broader journey of life – embracing challenges, adapting, and progressing at one's own pace.  Preparatory Postures: Ardha Baddha Padma Paścimottānāsana - https://youtu.be/LaBIrCHRBJ4 Ardha Padmasana - https://youtu.be/lOUduZu4G6k Padmasana - https://youtu.be/lOUduZu4G6k Yoga Mudrasana - https://youtu.be/lOUduZu4G6k  Practice with The Yoga Shala If you want to join us for LIVE classes, The Yoga Shala offers virtual and in person classes every weekday morning. Owner, Krista Shirley, also offers virtual or in person private sessions (Yoga, Meditation, Breath-work, Nutrition, Life Coaching and Mentorship). Visit theyogashala.org for details. Be sure to signup for our newsletter to stay on top of local events and classes, Nysa products sales, new offerings, new products and more! We hope you find this video series helpful to you in creating or maintaining your yoga practice! 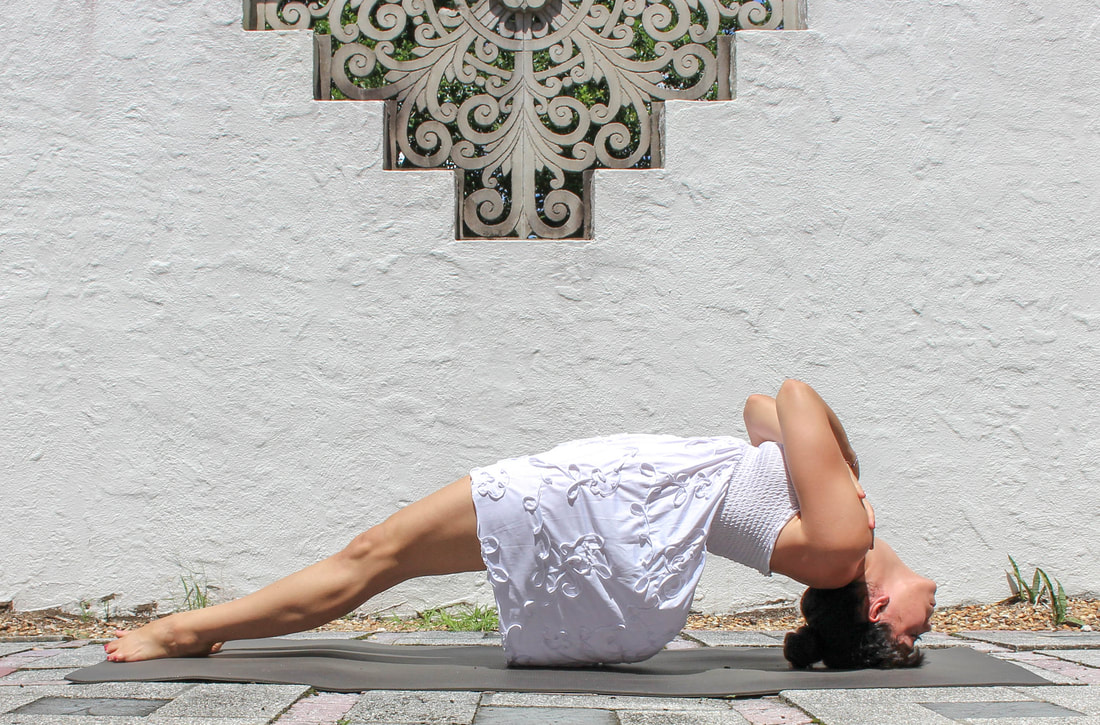 About Krista Krista Shirley is a level II authorized Ashtanga Yoga teacher. She is deeply passionate about sharing these teachings with all who wish to learn. If you want to join Krista in person she teaches daily classes at The Yoga Shala in Winter Park, Florida. She also offers virtual sessions in Yoga, Meditation, Breath-work, Nutrition, Life Coaching and Mentorship. Check out www.theyogashala.org for more details. If you do not live in Central Florida and want to find an authorized teacher in your area, check out our teacher, Sharath Jois’ website, for a list of all teachers authorized and certified by his yoga centre in India. Check out other Yoga Tutorials on our Youtube Channel
❤️SHOP MERCHANDISE: Nysa Products
❤️LET'S BE SOCIAL: Instagram: Krista Shirley Yoga Instagram: The Yoga Shala Facebook: The Yoga Shala Facebook: KristaShirleyYoga For other inquires please contact: krista@theyogashala.org Yoga Pose Marichyasana A is the first of four Marīcyāsana poses from the Ashtanga Yoga Primary Series. Also spelled Marīcyāsana A (mar-ee-chee-AHS-anna), Marichyasana translates to the Pose Dedicated to the Sage Maricihi. Marichyasana A is the fourteenth pose of the Ashtanga Yoga Primary series, and the ninth seated posture in that series. All four Marichyasana poses (A, B, C, D) build upon one another to prepare the practitioner for the postures to come. Marichyasana A & B are forward bends (straight and lotus leg positions) and C & D are rotations or twists (straight leg and lotus leg positions). If you would like to learn about each of the Marichyasana postures, I have written a step-by-step guide for all four of the Marichyasana poses of the Ashtanga Primary Series (Marichyasana B, Marichyasana C and Marichyasana D). 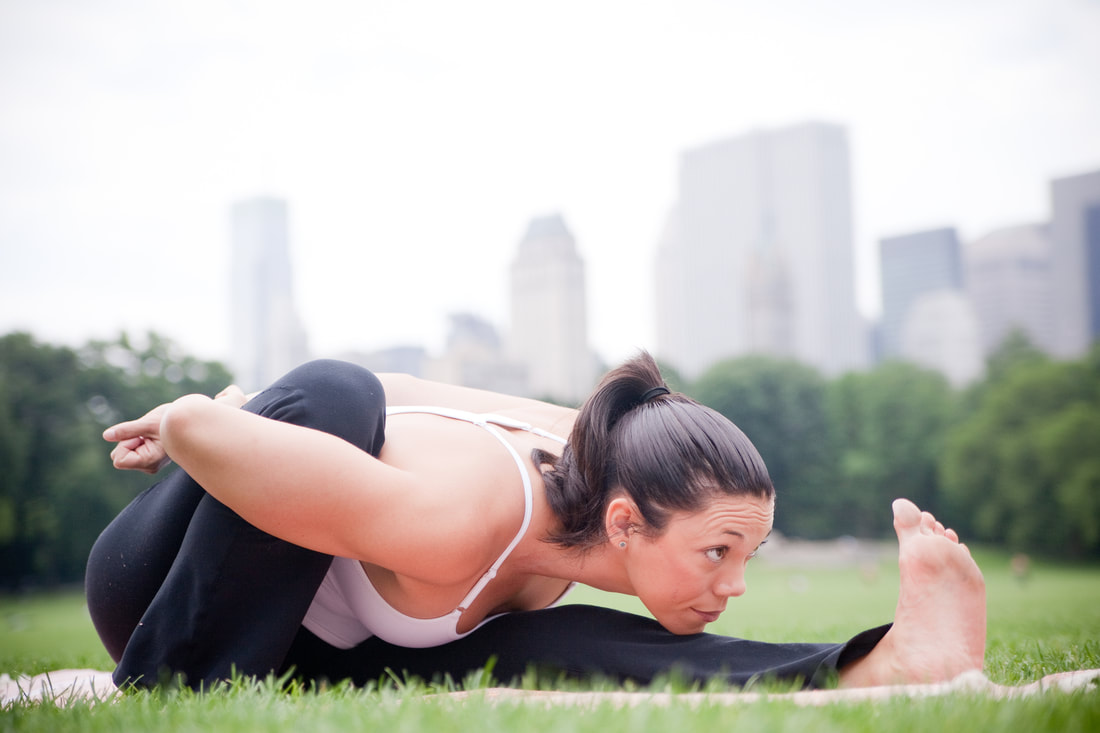 Benefits of Marichyasana A Spinal Flexibility: Marichyasana involves a deep spinal twist, which helps to increase the flexibility of your spine. This can improve your overall posture and relieve tension in the back and shoulders. Digestive Health: The twisting action in Marichyasana stimulates the abdominal organs, including the digestive system. This can aid in digestion, alleviate constipation, and enhance the overall function of the digestive tract. Detoxification: The twisting motion in Marichyasana helps to wring out and stimulate the internal organs, promoting detoxification and improved circulation. This can assist the body in eliminating waste and toxins. Improved Lung Capacity: The chest expansion and deep breathing associated with Marichyasana can enhance lung capacity and oxygen intake. This can be especially beneficial for respiratory health. Stress Relief: Practicing Marichyasana requires concentration and mindful breathing, which can help calm the mind and reduce stress and anxiety. Increased Flexibility: The pose stretches the hamstrings, hips, and shoulders, which can contribute to greater overall flexibility and range of motion. Enhanced Energy Flow: Twisting poses like Marichyasana are believed to stimulate the flow of energy (prana) through the body's energy channels (nadis). This can help balance the body's energy and promote a sense of vitality. Improved Spinal Mobility: Marichyasana involves a rotation of the spine, which can help maintain and improve spinal mobility and prevent stiffness. Strengthened Core Muscles: The engagement of the core muscles is necessary to maintain balance and stability in Marichyasana. Regular practice can help strengthen and tone the core muscles. Mind-Body Connection: Marichyasana requires focus and concentration as you align your body and maintain the pose. This can help cultivate a stronger mind-body connection and improve overall awareness. Therapeutic Benefits: Marichyasana ariations can offer specific therapeutic benefits, such as relieving menstrual discomfort, reducing lower back pain, and aiding in digestion. Remember that yoga poses should be practiced mindfully and with proper alignment. It's a good idea to learn and practice Marichyasana under the guidance of a qualified yoga instructor, especially if you're new to yoga or have any pre-existing health conditions. As with any physical practice, it's important to listen to your body and not force yourself into a position that feels uncomfortable or painful. 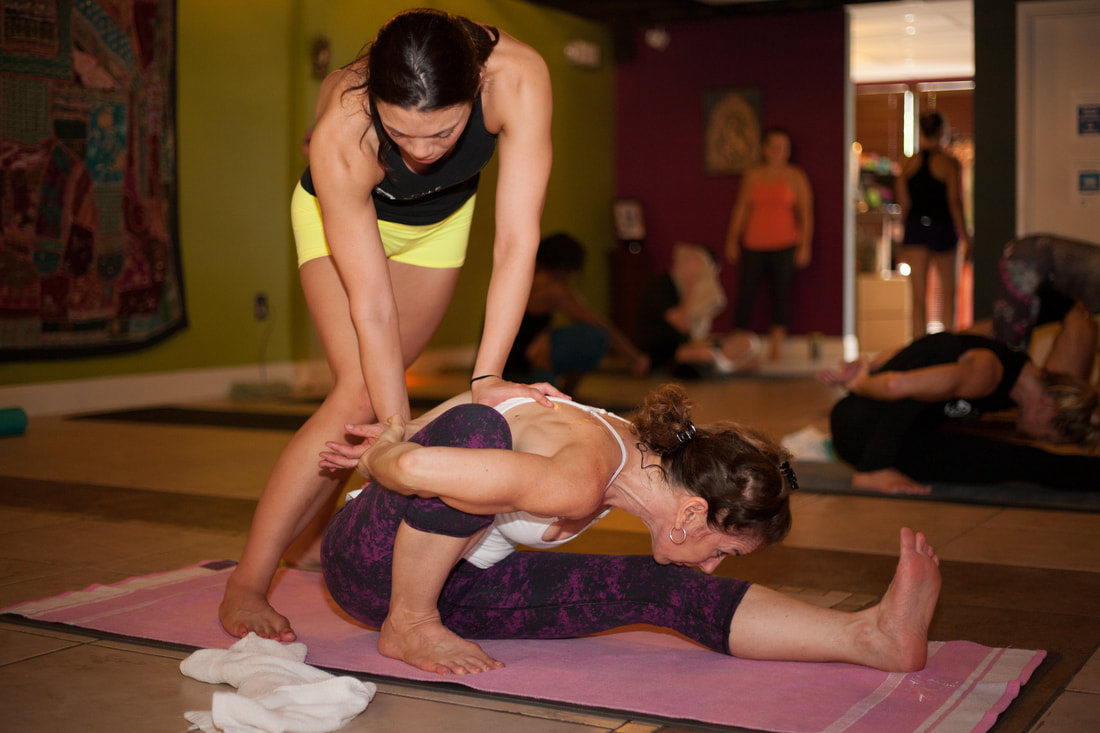 Contraindications While Marichyasana can offer numerous benefits, it's important to be aware of potential contraindications, especially if you have certain health conditions or limitations. Here are some contraindications and precautions to consider before practicing Marichyasana or its variations: Spinal Issues: Individuals with severe spinal injuries, herniated discs, or other serious spinal conditions should approach Marichyasana with caution or avoid it altogether. Twisting poses like Marichyasana can put strain on the spine and exacerbate existing issues. Pregnancy: Deep twisting poses, including Marichyasana, are generally not recommended during pregnancy, particularly in the second and third trimesters. Twisting can compress the abdomen and potentially affect the growing fetus. High Blood Pressure: Twisting poses can temporarily raise blood pressure. If you have uncontrolled high blood pressure or hypertension, it's best to avoid deep twists like Marichyasana, as they could potentially increase your blood pressure further. Recent Abdominal Surgery: If you've had recent abdominal surgery, particularly involving the digestive organs, it's advisable to avoid deep twisting poses until you've fully recovered and received clearance from your healthcare provider. Hip or Knee Injuries: If you have acute hip or knee injuries, Marichyasana may put strain on these areas and worsen the injuries. Consult with a medical professional or experienced yoga instructor to determine whether modifications are appropriate. Ankle or Foot Issues: If you have ankle or foot injuries or limitations, be cautious with Marichyasana variations that involve bending and placing weight on the legs. Inflammatory Bowel Conditions: If you have conditions like Crohn's disease or ulcerative colitis, deep twisting poses could potentially aggravate symptoms. Consult your healthcare provider before attempting these poses. Vertigo or Dizziness: The twisting motion in Marichyasana may cause dizziness or vertigo in some individuals. If you are prone to these sensations, practice the pose with extra care or consider avoiding it. Elderly Individuals: Older adults with limited flexibility or mobility should practice Marichyasana with modifications or under the guidance of a skilled yoga instructor, as deep twists can strain muscles and joints. Remember that each person's body is unique, and what might be suitable for one individual might not be appropriate for another. It's always wise to consult with a qualified healthcare provider or an experienced yoga instructor before attempting any yoga pose, especially if you have underlying health conditions or concerns. They can provide personalized guidance and help you adapt the pose to your individual needs and limitations. 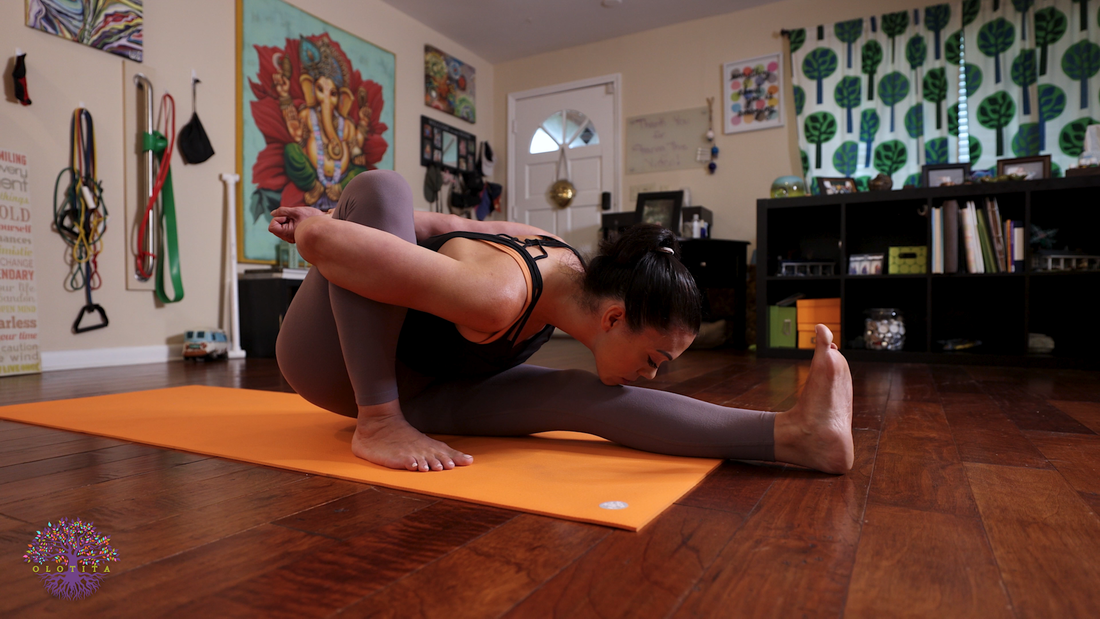 Step-by-Step Instructions for the Full Expression of Marichyasana A (Sanskrit Vinyasa Count) We will be entering this posture from downward facing dog, having just taken a vinyasa after Janu Sirsasana C to seated position. Sapta (Vinyasa #7): From Adho Mukha Svanasana (down dog), look forward and walk or jump your feet through and have a seat on the floor with your legs extended in front of you. Keep your left leg extended forward and inhale as you bend your right knee up. Place your right foot on the floor a hands width distance away from your inner left thigh. Pull the right foot close to your pelvis. Reach your right arm forward and wrap the right arm around your bent right knee (near the shin). Then reach your left arm behind your back to bind your hands. If you can grab the left wrist with the right hand. Extend your spine, lift your chest. Asthau (Vinyasa #8) Exhale and fold forward out over your straight left leg. Be sure you maintain flexion in your left foot, engage the left quadricep and press your left heel forward as you press your tailbone backward. Throughout the posture work to slightly internally rotate your left leg to keep it from falling out to the left. Bring your chin to your chin if you can. Look towards your toes (Padhayoragrai drishti). During the posture, work to keep your chest open and your shoulders back to avoid rounding your shoulders or back. Breathe here for five deep breaths. With each inhale, elongate your spine, lifting your chest slightly. Nava (Vinyasa #9) Inhale, lift your head and lengthen your spine. Keep your hands bound around your feet. Exhale there. Dasa (Vinyasa #10) Inhale, bring your hands to the floor, cross your legs and lift your body up off the ground. Ekadasa (Vinyasa #11) Exhale and jump back into Chaturanga Dandasana. Dvadasa (Vinyasa #12) Inhale into Urdhva Mukha Svanasana(Upward facing dog) Trayodasa (Vinyasa #13) Exhale into Adho Mukha Svanasana (Downward facing dog) Caturdasa (Vinyasa #14) From Adho Mukha Svanasana (down dog), look forward and walk or jump your feet through and have a seat on the floor with your legs extended in front of you. Keep your right leg extended forward and inhale as you bend your left knee up. Place your left foot on the floor a hands width distance away from your inner right thigh. Pull the left foot close to your pelvis. Reach your left arm forward and wrap the right arm around your bent left knee (near the shin). Then reach your right arm behind your back to bind your hands. If you can grab the right wrist with the left hand. Extend your spine, lift your chest. Pancadasa (Vinyasa #15) Exhale and fold forward out over your straight right leg. Be sure you maintain flexion in your right foot, engage the right quadricep and press your right heel forward as you press your tailbone backward. Throughout the posture work to slightly internally rotate your right leg to keep it from falling out to the right. Bring your chin to your chin if you can. Look towards your toes (Padhayoragrai drishti). During the posture, work to keep your chest open and your shoulders back to avoid rounding your shoulders or back. Breathe here for five deep breaths. With each inhale, elongate your spine, lifting your chest slightly. Sodasa (Vinyasa #16) Inhale, lift your head and lengthen your spine. Keep your hands bound around your feet. Exhale there. Saptadasa (Vinyasa #17) Inhale, bring your hands to the floor, cross your legs and lift your body up off the ground. Ashtadasa (Vinyasa #18) Exhale and jump back into Chaturanga Dandasana. Ekoonavimsatih (Vinyasa #19) Inhale into Urdhva Mukha Svanasana(Upward facing dog) Vimsatih (Vinyasa #20) Exhale into Adho Mukha Svanasana (Downward facing dog) Modifications The instructions above are for getting into the full expression of Marichyasana A. However, if you find you are unable to practice the full expression of this posture, there are several wonderful variations or modifications you can take to start where you are and safely work towards the full expression of the posture.  Variation One (1) Start with your legs extended out in front of you. Sit tall and bend your right knee. Bring both arms around the bent right knee and clasp your hands together if you can. Stay here for five deep breaths. Try to ground your sits bones and lift and lengthen out of your lower back. Keep your left foot flexed and your left quadricep engaged. This modification will help you strengthen and open your lower back. Over time this modification will help open your body so that you can fold forward with a flat back. If your hip flexors are very tight/short this is a great modification for you. 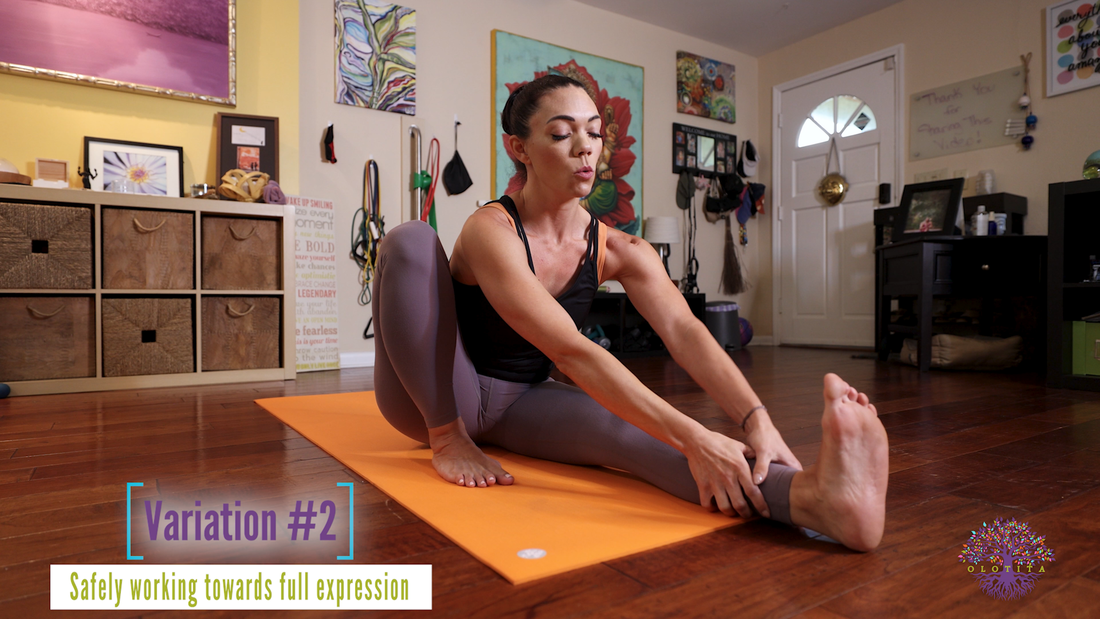 Variation Two (2) In variation two, start with your legs stretch out in front of you. Keep your left leg extended and bend your right knee up. Work to ground your right foot into the floor and press your right leg towards your right side body. If your foot is grounded and your knee is pressing towards your right rib cage, reach both arms forward to grab your left shin. Some students may find the right side body is tight and they are not able to reach as far with the right arm as the left. Please note that it is important to grab the shins tightly with the hands and engage your latissimus dorsi. This will allow for engagement of the upper body and allow gravity to help you stretch your body forward (tensegrity). Press your chest up. Pull your hands down. At the same time, press your sits bones back towards the ground. Press your right knee towards your ribs. Take five deep breaths here. Work to maintain length in your spine. DO NOT round your back or your shoulders. This modificaton can help relieve chronic lower back pain. 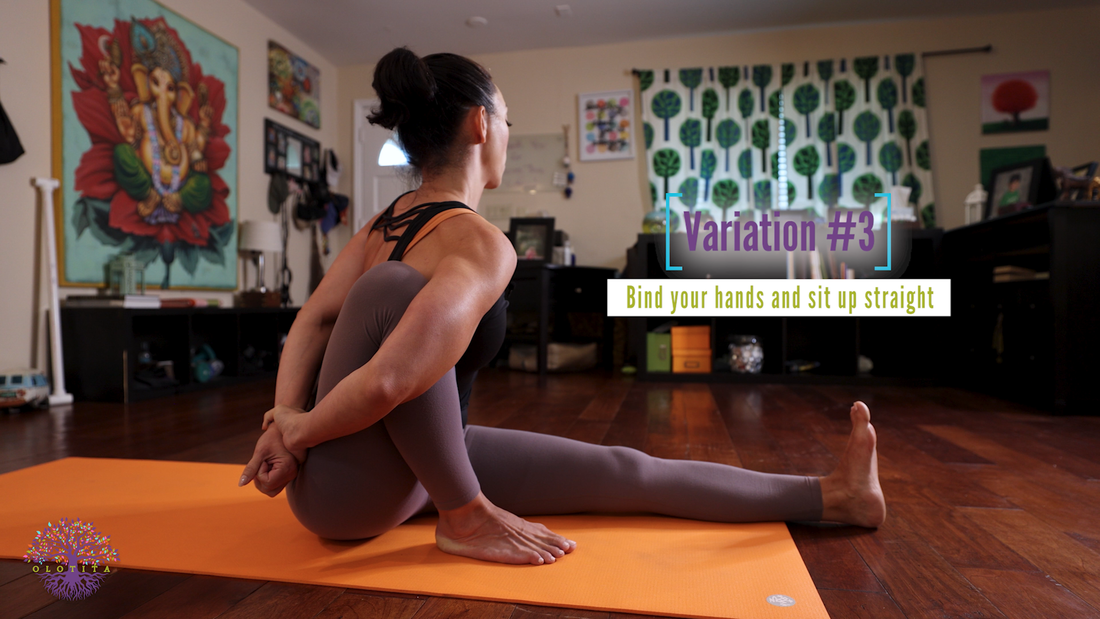 Variation Three (3) Variation three is ideal for students who can bind their hands behind their back but cannot fold forward with a flat back, or cannot keep the shoulders from rounding while you fold forward. Try this instead: Start with your legs extended out in front of you. Bend your right knee up and actively extend your left leg. Wrap your right arm around your right leg and your left arm behind you. Grab your fingers or wrist. Instead of folding forward, sit up tall and try to engage your back (rhomboids, trapezius and latissimus dorsi). At the same time, slightly rotate your upper body to the left. Take five deep breaths here. DO NOT round your body here. Focus on lengthening your torso to rotate and twist so you get better extension. Keep your breathe steady and bandhas active. This variation will help you safely strengthen the muscles of your back. It will also assist in opening the muscles of your chest so you can eventually fold forward with a flat back and open chest. 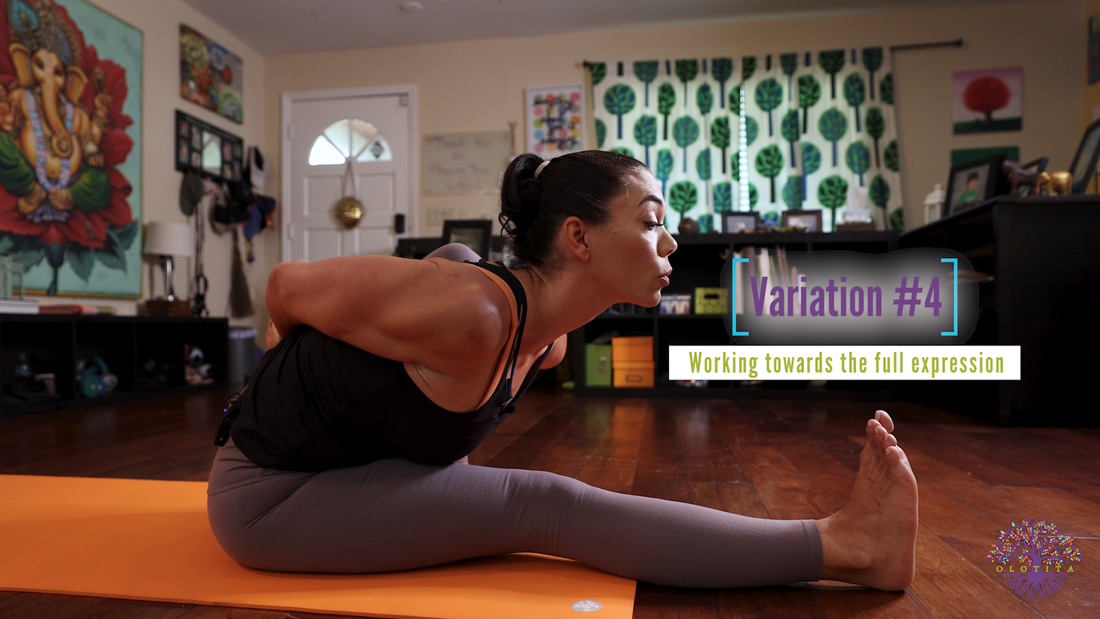 Variation Four (4) Variation four is for those who are able to do variation three with no trouble. This modification is close to the full expression. Start with your legs extended in front of you. Keep your left leg extended and bend your right knee up. Wrap your right arm around your bent right knee and take your left arm behind you. Bind your hands. Engage your back muscles and try to externally rotate your shoulders backward as you begin to fold forward, slightly. Work to lengthen and open your chest. DO NOT round your back or shoulders. Everything in this modification is focused on extension. It is alright if your forehead doesn’t touch your shin. If you practice this variation consistently, you’ll soon find yourself in the full expression of Marichyasana A, with a flat back and open chest!  Common Mistakes
No matter what variation of the pose you choose, move slowly through the posture, acknowledge your limits, and respect your bodies limitations.  Practice with The Yoga Shala If you want to join us for LIVE classes, The Yoga Shala offers virtual and in person classes every weekday morning. Owner, Krista Shirley, also offers virtual or in person private sessions (Yoga, Meditation, Breath-work, Nutrition, Life Coaching and Mentorship). Visit theyogashala.org for details. Be sure to signup for our newsletter to stay on top of local events and classes, Nysa products sales, new offerings, new products and more! We hope you find this video series helpful to you in creating or maintaining your yoga practice.  About Krista Krista Shirley is a level II authorized Ashtanga Yoga teacher. She is deeply passionate about sharing these teachings with all who wish to learn. If you want to join Krista in person she teaches daily classes at The Yoga Shala in Winter Park, Florida. She also offers virtual sessions in Yoga, Meditation, Breath-work, Nutrition, Life Coaching and Mentorship. Check out www.theyogashala.org for more details. If you do not live in Central Florida and want to find an authorized teacher in your area, check out our teacher, Sharath Jois’ website, for a list of all teachers authorized and certified by his yoga centre in India. Explore other yoga tutorials on Ashtanga Yoga postures
❤️SHOP MERCHANDISE: Nysa Products
❤️LET'S BE SOCIAL: Instagram: Krista Shirley Yoga Instagram: The Yoga Shala Facebook: The Yoga Shala Facebook: KristaShirleyYoga For other inquires please contact: krista@theyogashala.org Ashtanga Yoga, a traditional and dynamic practice, consists of six series of postures designed to enhance physical strength, flexibility, and mental clarity. The Primary Series, also known as Yoga Chikitsa, lays the foundation for the more advanced sequences. Among the postures in this series is Janu Sirsasana C, a seated forward bend that offers numerous benefits to the body and mind. In this comprehensive guide, we will discuss the safest way to correctly practice this posture, contraindications, benefits, modifications and more! 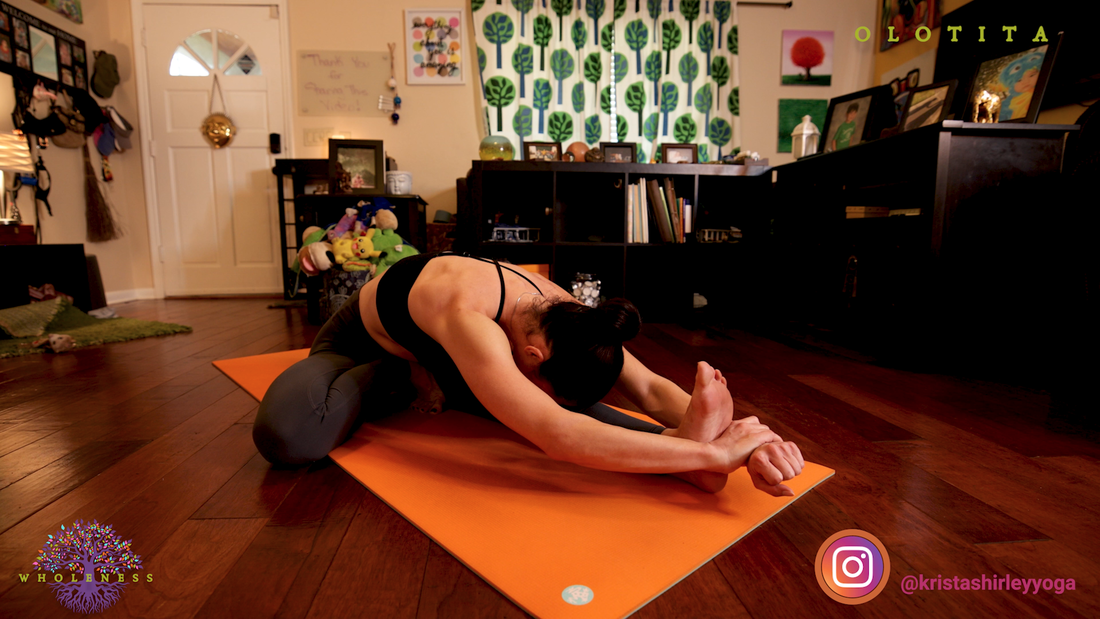 Like Janu Sirsasana B, Janu Sirsasana C is a unique posture in the Primary Series. I lovingly call Janu Sirsasana C the toe crusher posture. Chiefly because this asana requires that you press the heel of your foot into your inner thigh while you press the rest of your toes into the floor. Janu Sirsasana C provides a wonderful stretch in your hamstring, your back, hips and side body. This pose also opens the foot and ankle and is a great hip opener. And just like Janu Sirsasana A & B, Janu Sirsasana C helps you incorporate concepts of tensegrity in more subtle ways to ground your body as you begin to hinge forward in the posture. 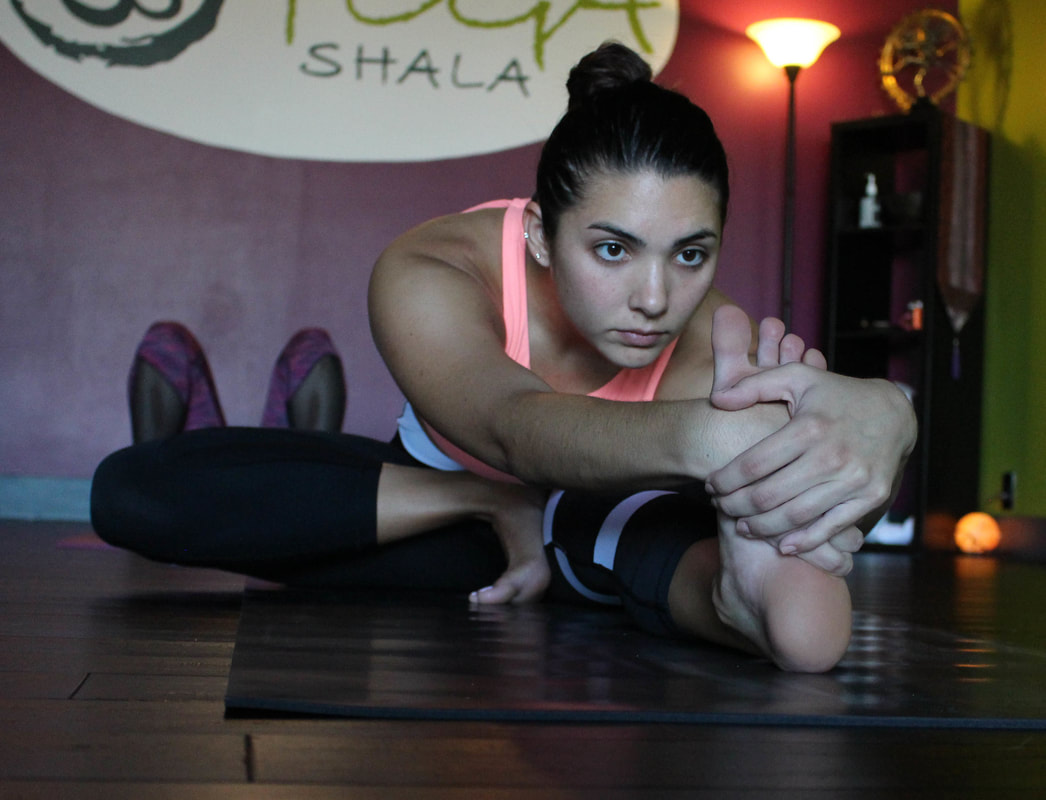 Benefits of Janu Sirsasana C Janu Sirsasana C, a key pose in the Ashtanga Yoga Primary Series, offers a multitude of benefits for both the physical body and the mind. Incorporating this pose into your practice can contribute to your overall health and well-being. Stretches Hamstrings and Calves: Janu Sirsasana C involves a deep stretch in the hamstrings and calves of the extended leg. Regular practice helps improve flexibility in these muscle groups, leading to better mobility in daily activities and other physical exercises. Hip and Groin Opening: The posture also facilitates a gentle opening of the hips and groin. By targeting these areas, the pose helps alleviate tension, enhance flexibility, and improve the range of motion in the hip joints. Spinal Flexibility: As you fold forward, Janu Sirsasana C encourages spinal flexion. This flexion lengthens and stretches the entire length of the spine, improving spinal flexibility and relieving tension in the back muscles. Abdominal Massage and Digestive Benefits: The forward bend in this pose creates a gentle compression of the abdominal region. This compression massages the abdominal organs, including the digestive organs like the liver and kidneys. Such stimulation can aid digestion and support healthy organ function. Stress and Anxiety Reduction: Janu Sirsasana C, like many forward bends, has a calming effect on the nervous system. The focus on the breath and the gentle nature of the pose help activate the parasympathetic nervous system, reducing stress and anxiety levels. Mindfulness and Mental Clarity: As you hold the pose and direct your attention to your breath and body, Janu Sirsasana C promotes mindfulness. This mindfulness practice enhances mental clarity, concentration, and self-awareness. Kidney and Liver Stimulation: The pose's compression also stimulates the kidneys and liver, aiding in detoxification and promoting healthy organ function. Lower Back Relief: Regular practice of Janu Sirsasana C can help alleviate lower back discomfort. The pose encourages the release of tension in the lower back muscles and promotes a healthier alignment of the spine. Preparation for Seated Poses: Janu Sirsasana C serves as a preparatory pose for other seated forward bends. As you become more comfortable in this pose, you'll find it easier to perform more advanced variations. Mind-Body Connection: This pose fosters a deep connection between the body and the mind. The conscious breathing and attention to alignment create a harmonious union, enhancing your overall yoga practice. Increased Energy Flow: The stretching and compression in Janu Sirsasana C stimulate the flow of energy (prana) throughout the body. This revitalizes the body and leaves you feeling invigorated. Patience and Self-Acceptance: Mastering Janu Sirsasana C requires patience and self-acceptance. As you work through the pose's challenges, you'll cultivate qualities of patience, discipline, and self-love. Incorporating Janu Sirsasana C into your regular yoga practice can have a profound impact on your physical and mental well-being. Remember that the benefits of this pose are best achieved through consistent practice, proper alignment, and a mindful approach. Always listen to your body and practice with respect for your own limitations. 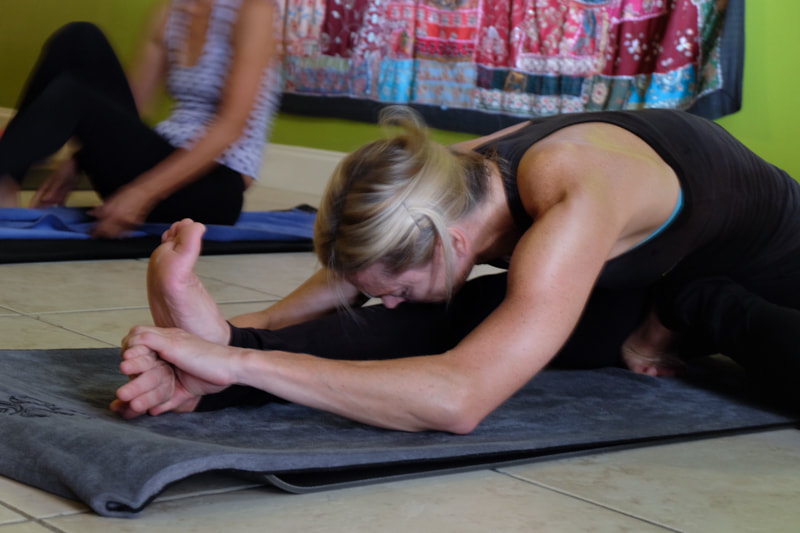 Contraindications While Janu Sirsasana C offers numerous benefits, it's important to recognize that not every yoga pose is suitable for everyone. There are certain contraindications and precautions to consider before practicing Janu Sirsasana C or any other yoga pose. It's always advisable to consult with a healthcare professional or a qualified yoga instructor if you have any existing medical conditions or concerns. Here are some contraindications and precautions to be aware of: Knee Injuries: If you have a knee injury or chronic knee pain, Janu Sirsasana C may exacerbate your condition. Putting pressure on the knee joint could lead to discomfort or further injury. Instead, opt for gentler knee-friendly modifications that don't involve deep knee flexion. Hamstring Injuries: Individuals with hamstring injuries, strains, or tightness should approach Janu Sirsasana C cautiously. Overstretching the already injured or tight muscles could impede the healing process. Consider modifying the pose or avoiding it until your hamstrings have recovered. Lower Back Issues: People with lower back problems, such as herniated discs or chronic pain, should approach this pose carefully. Folding forward may exacerbate lower back discomfort. If you have such issues, consult a yoga instructor or medical professional for appropriate modifications or alternative poses. Pregnancy: During pregnancy, the body undergoes various changes, and certain yoga poses may not be suitable. Janu Sirsasana C can put pressure on the abdomen and may not be comfortable or safe for pregnant individuals, especially in the later stages of pregnancy. Consider taking one of the modifications below if you are uncomfortable taking the full expression of Janu Sirsasana C. High Blood Pressure: Individuals with high blood pressure should exercise caution when practicing forward bends, as they can affect blood pressure levels. Janu Sirsasana C involves a forward bend that may cause a sudden drop in blood pressure, potentially leading to dizziness or discomfort. Recent Abdominal Surgery: If you've undergone recent abdominal surgery, including surgeries like appendectomy or abdominal hernia repair, Janu Sirsasana C might strain the healing tissues. It's important to avoid putting unnecessary stress on the surgical site. Ankle or Hip Injuries: Injuries to the ankles or hips can affect your ability to practice Janu Sirsasana C comfortably. The pose involves hip and ankle flexibility, which might be limited due to injuries. It's crucial to approach your yoga practice mindfully and with awareness of your body's limitations. If you have any of the above-mentioned conditions or concerns, it's advisable to seek guidance from a qualified yoga instructor who can provide modifications or alternatives tailored to your needs. Additionally, consulting a healthcare professional before starting a new yoga practice is highly recommended, especially if you have any pre-existing medical conditions. 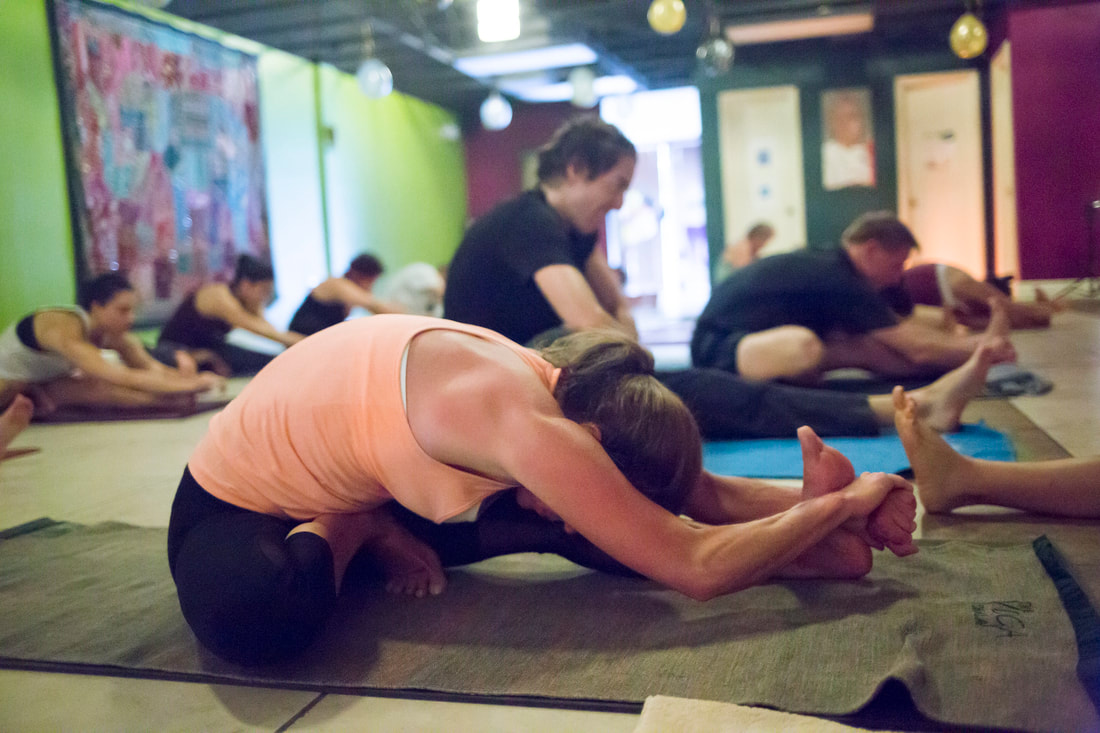 Step-by-Step Guide to Janu Sirsasana C with Sanskrit Vinyasa count We will be entering this posture from downward facing dog, having just taken a vinyasa after Janu Sirsasana B to seated position. Sapta (Vinyasa #7): From Adho Mukha Svanasana (down dog), look forward and walk or jump your feet through and have a seat on the floor with your legs extended in front of you. Take the right foot with your hands and guide the ball of the right foot onto the floor close to your body. In this position your toes will be pressing down into the ground. From there begin pressing the heel of your right foot into your inner left thigh. The right heel should be close to the pubic bone. The knee is at a 45 degree angle whereby the right thigh is pressing forwards at a diagonal. Lengthen your spine and stretch both arms forward and grab your left foot with both hands. Left foot is flexed. Head up. Tip: This foot position will likely be a challenge for you in the beginning. If you struggle to place your foot easily, try lifting your right leg up and taking your right arm under the right leg so you can grab the heel of your right foot with your left hand and the top of your right foot with your right hand. From there you can start drawing or guiding the right foot towards your left inner thigh. This should help you get the foot closer to the inner thigh of your left leg. 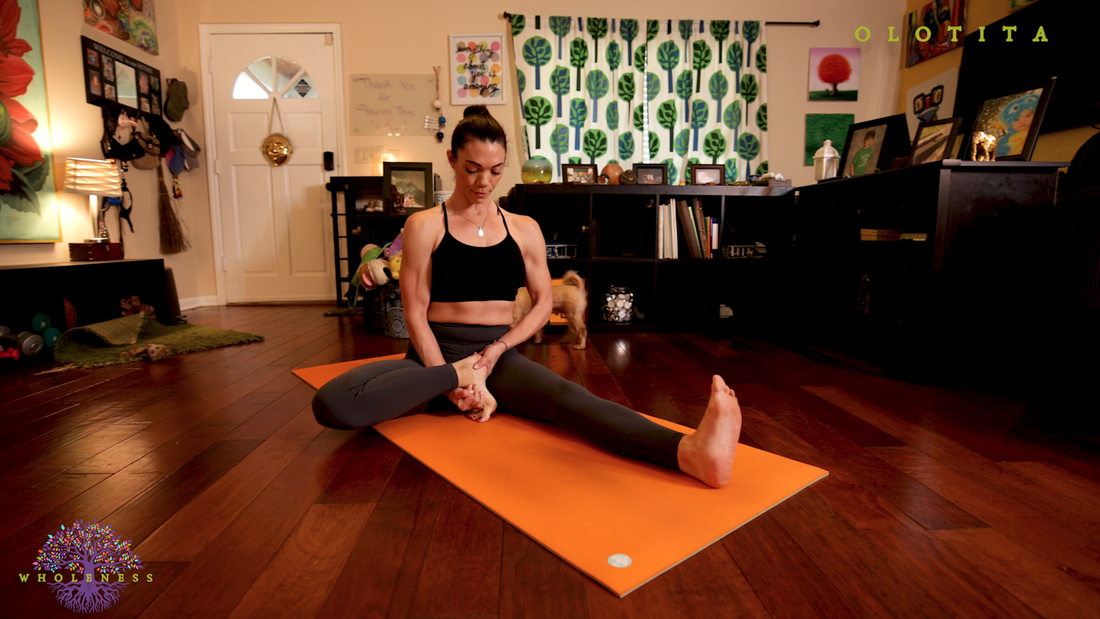 Asthau (Vinyasa #8) Exhale and fold forward out over your straight left leg. Be sure you maintain flexion in your left foot, engage the left quadricep and press your left heel forward as you press your tailbone backward. Bring your chin to your chin if you can. Look towards your toes (Padhayoragrai drishti). During the posture, maintain active pressure from your right heel into your inner left thigh to help stabilize the pressure and create oppositional force, which protects the right knee. Breathe here for five deep breaths. With each inhale, elongate your spine, lifting your chest slightly. 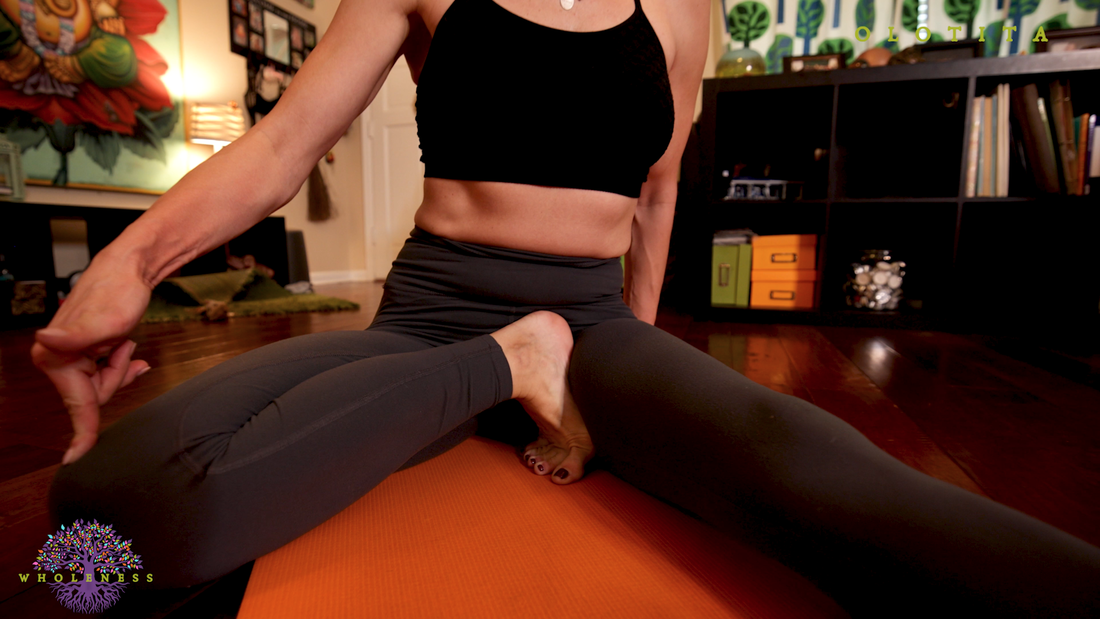 Nava (Vinyasa #9) Inhale, lift your head and lengthen your spine. Keep your hands bound around your feet. Exhale there. Dasa (Vinyasa #10) Inhale, bring your hands to the floor, cross your legs and lift your body up off the ground. Ekadasa (Vinyasa #11) Exhale and jump back into Chaturanga Dandasana. Dvadasa (Vinyasa #12) Inhale into Urdhva Mukha Svanasana(Upward facing dog) Trayodasa (Vinyasa #13) Exhale into Adho Mukha Svanasana (Downward facing dog) Caturdasa (Vinyasa #14) From Adho Mukha Svanasana (down dog), look forward and walk or jump your feet through and have a seat on the floor with your legs extended in front of you. Take the left foot with your hands and guide the ball of the left foot onto the floor close to your body and begin pressing the heel of your left foot into your inner right thigh. The knee is at a 45 degree angle whereby the left thigh is pressing forwards at a diagonal. Lengthen your spine and stretch both arms forward and grab your right foot with both hands. Right foot is flexed. Head up. Pancadasa (Vinyasa #15) Exhale and fold forward out over your straight right leg. Be sure you maintain flexion in your right foot, engage the right quadricep and press your right heel forward as you press your tailbone backward. Bring your chin to your chin if you can. Look towards your toes (Padhayoragrai drishti). During the posture, maintain active pressure from your left heel into your inner right thigh to help stabilize the pressure and create oppositional force, which protects the left knee. Breathe here for five deep breaths. With each inhale, elongate your spine, lifting your chest slightly. Sodasa (Vinyasa #16) Inhale, lift your head and lengthen your spine. Keep your hands bound around your feet. Exhale there. Saptadasa (Vinyasa #17) Inhale, bring your hands to the floor, cross your legs and lift your body up off the ground. Ashtadasa (Vinyasa #18) Exhale and jump back into Chaturanga Dandasana. Ekoonavimsatih (Vinyasa #19) Inhale into Urdhva Mukha Svanasana(Upward facing dog) Vimsatih (Vinyasa #20) Exhale into Adho Mukha Svanasana (Downward facing dog) Tips and Considerations
.Modifications Modifications are essential in yoga to ensure that poses are accessible and safe for practitioners of all levels and physical conditions. If you're new to Janu Sirsasana C or have specific limitations, the following modifications can help you experience the benefits of the pose while avoiding strain or discomfort. As always, listen to your body and make adjustments that work for you. If you want to work with modifications for Janu Sirsasana C, I encourage you to check out our yoga tutorial on this asana where we provide three modifications of this asana to help you work your way to the full expression without rounding your lower back, over stretching your hamstrings or losing your active engagement. But even more importantly, the first two modifications help you keep your body more upright and teach you how to use your upper body to work to open the foot and ankle. The full expression can feel like too much pressure, or a crushing sensation in your foot, if you try to attempt the full expression the first time you take the posture. So please go slowly and build up your bodies ability to sustain this posture through the variations provided. Click here to access our yoga tutorial on Janu Sirsasana C. 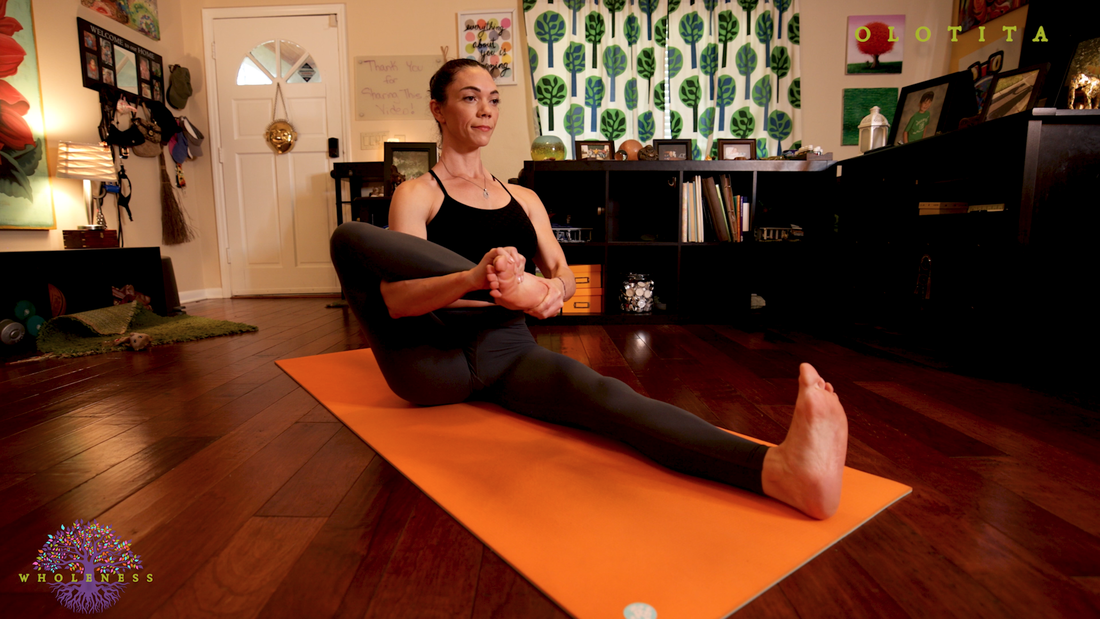 No matter what you do, please do not fold forward in this seated posture until your foot is pressing into your inner thigh with your toes pressing into the floor. Also ensure your knee is at a 45 degree angle with your knee touching the ground. If you fold forward with your knee lifted off the ground, you will put too much undue pressure on your knee! Know that the more you take the posture, the more comfortable you’ll become with it. Janu Sirsasana C, a fundamental posture in the Ashtanga Yoga Primary Series, offers a range of benefits for the body and mind. By following this step-by-step guide and practicing regularly with mindfulness, you can gradually deepen your practice and experience the transformative effects of this powerful asana. Remember that yoga is a personal journey, so be kind to yourself and embrace the progress you make along the way.  Practice with The Yoga Shala If you want to join us for LIVE classes, The Yoga Shala offers virtual and in person classes every weekday morning. Owner, Krista Shirley, also offers virtual or in person private sessions (Yoga, Meditation, Breath-work, Nutrition, Life Coaching and Mentorship). Visit theyogashala.org for details. Be sure to signup for our newsletter to stay on top of local events and classes, Nysa products sales, new offerings, new products and more! We hope you find this video series helpful to you in creating or maintaining your yoga practice! 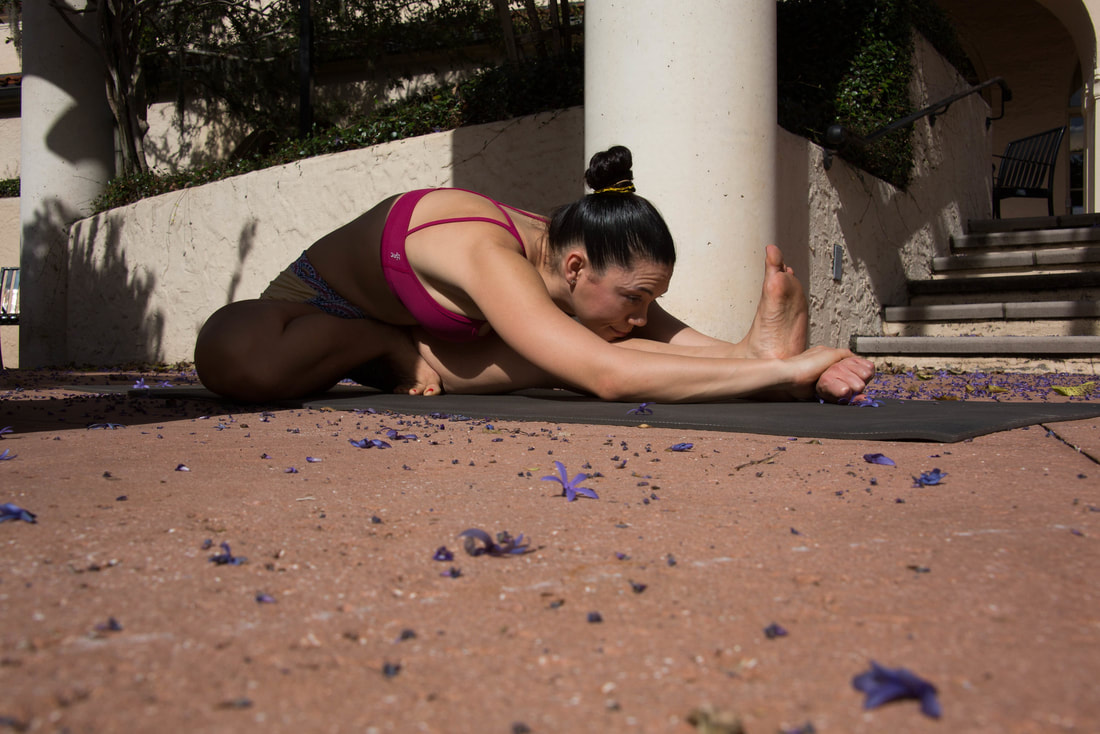 About Krista Krista Shirley is a level II authorized Ashtanga Yoga teacher. She is deeply passionate about sharing these teachings with all who wish to learn. If you want to join Krista in person she teaches daily classes at The Yoga Shala in Winter Park, Florida. She also offers virtual sessions in Yoga, Meditation, Breath-work, Nutrition, Life Coaching and Mentorship. Check out www.theyogashala.org for more details. If you do not live in Central Florida and want to find an authorized teacher in your area, check out our teacher, Sharath Jois’ website, for a list of all teachers authorized and certified by his yoga centre in India.
❤️SHOP MERCHANDISE: Nysa Products
❤️LET'S BE SOCIAL: Instagram: Krista Shirley Yoga Instagram: The Yoga Shala Facebook: The Yoga Shala Facebook: KristaShirleyYoga For other inquires please contact: krista@theyogashala.org Janu Sirsasana B is also known as Head-to-Knee Pose B. This forward-bending pose is found in the Ashtanga Yoga Primary Series seated sequence. Janu Sirsasana B offers numerous physical and mental benefits, including increased flexibility, improved digestion, and a sense of calmness. n this blog post, we will provide a comprehensive step-by-step guide to help you master Janu Sirsasana B and integrate it into your Ashtanga Yoga routine 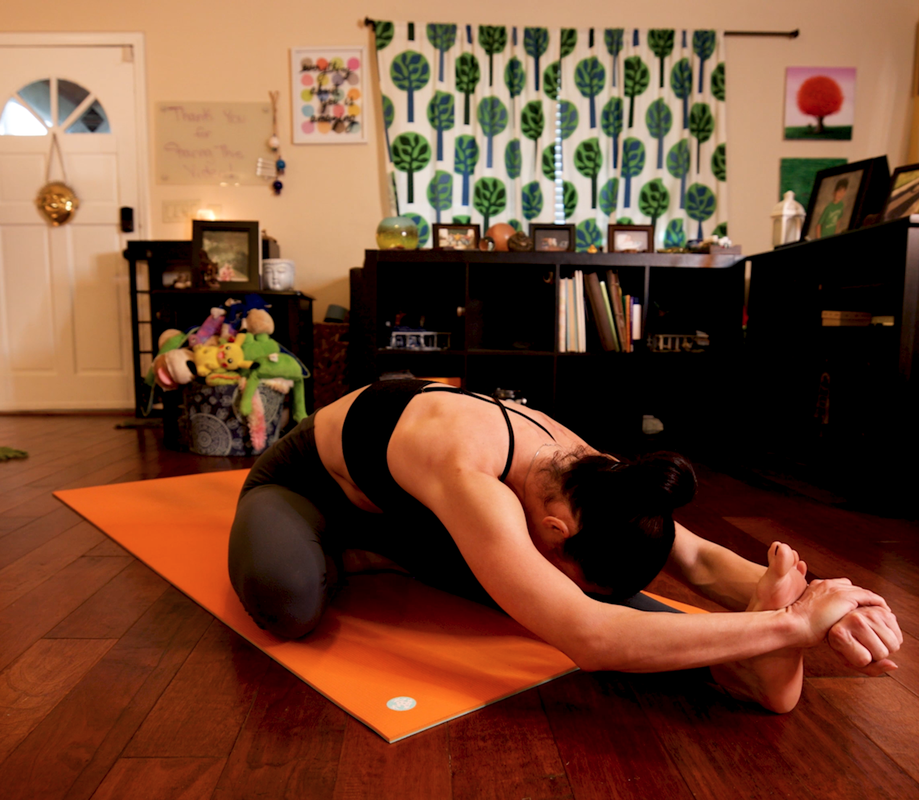 Benefits of Janu Sirsasana B Improved Flexibility: Janu Sirsasana B primarily targets the hamstrings, hip flexors, and lower back, gradually increasing flexibility in these areas over time. Stress Relief: The forward fold encourages relaxation and can help reduce stress and anxiety. The breath-focused practice during the pose promotes a sense of calmness. Digestive Health: The gentle compression of the abdomen in the forward fold stimulates digestion and can alleviate digestive issues. Strengthened Back: While the pose involves a forward fold, it also engages the muscles of the back and core, contributing to a stronger and more stable spine. Stretch for the Groin: The position of the bent leg stretches the inner thigh muscles (adductors) and can help alleviate tension in the groin area. Improved Blood Circulation: As you fold forward, blood flow is redirected towards the head, which can have a positive impact on circulation and provide a rejuvenating effect. Mind-Body Connection: Practicing Janu Sirsasana B encourages mindfulness and concentration as you focus on your breath and body alignment, fostering a deeper mind-body connection. Energizing: Though the pose is calming, it can also offer a subtle energy boost, revitalizing the body and mind. 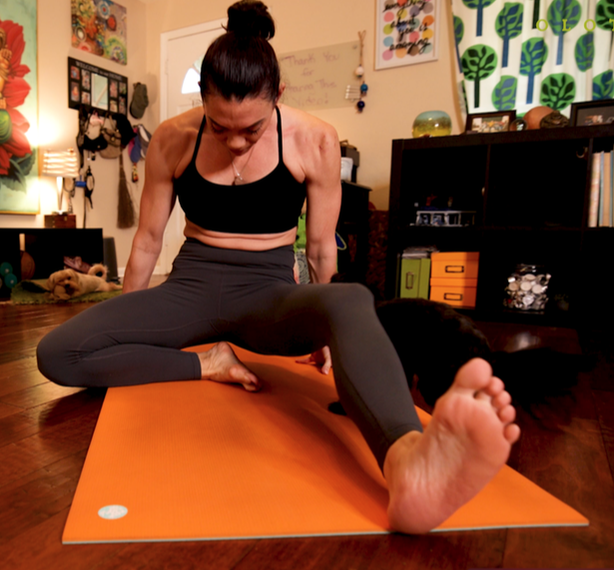 Contraindications and Precautions While Janu Sirsasana B offers numerous benefits, there are certain situations in which the pose should be approached with caution or avoided altogether: Injury or Recent Surgery: If you have a recent injury, surgery, or chronic condition affecting your hamstrings, hips, or lower back, it's advisable to consult a healthcare professional before attempting the pose. Hamstring Injury: Individuals with severe hamstring injuries or strains should avoid deep forward folds, as it may exacerbate the injury. Consider modifications or gentle hamstring stretches instead. Knee Issues: If you have knee pain or discomfort, be mindful of how you bend the knee of the extended leg. Lower Back Problems: Those with lower back issues, such as herniated discs or sciatica, should approach Janu Sirsasana B with caution. Focus on maintaining a neutral spine and avoid rounding excessively. Pregnancy: Pregnant women should avoid deep forward folds like Janu Sirsasana B, especially in later stages of pregnancy. Instead, they can practice gentle stretches and modified poses under the guidance of a prenatal yoga instructor. High Blood Pressure: Individuals with uncontrolled high blood pressure should approach forward folds with care, as the position can affect blood pressure. Keep the fold gentle and avoid excessive compression of the abdomen. Diarrhea or Menstruation: During these times, it's recommended to avoid deep forward folds, as they can increase pressure on the abdomen and interfere with natural bodily functions. Osteoporosis: If you have osteoporosis or osteopenia, it's important to be cautious with forward folds to prevent excessive stress on the spine. A more gentle variation might be suitable. Always prioritize safety and listen to your body when practicing Janu Sirsasana B or any yoga pose. If you have any underlying health concerns, it's advisable to consult a qualified yoga instructor or healthcare professional before attempting the pose to ensure it's appropriate for your individual circumstances. Remember that yoga is about honoring your body's needs and limitations. 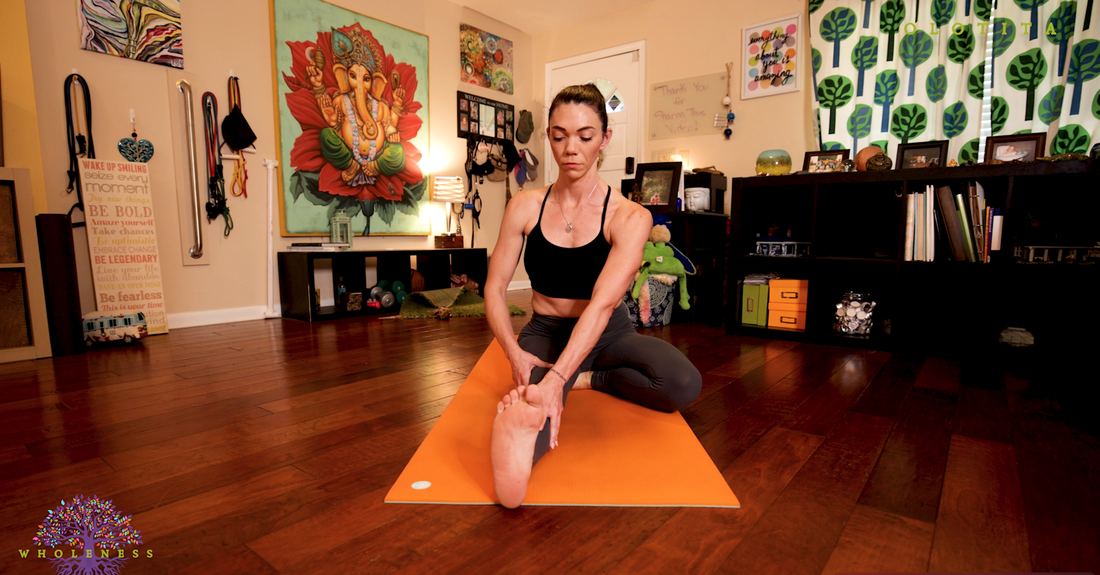 Step-by-Step Guide to Janu Sirsasana B with Sanskrit Vinyasa count We will be entering this posture from downward facing dog, having just taken a vinyasa after Janu Sirsasana A to seated position. Sapta (Vinyasa #7): From Adho Mukha Svanasana (down dog), look forward and walk or jump your feet through and have a seat on the floor with your legs extended in front of you. Inhale, bend your right knee and drop your right knee down and out to the right at a 60 degree angle from your hip. Bring your right foot to your inner left thigh. Then lift up and sit on your right foot (your heel should be resting on your anus). Lengthen your spine and stretch both arms forward and grab your left foot with both hands. Left foot is flexed. Head up. Asthau (Vinyasa #8) Exhale and fold forward out over your straight left leg. Be sure you maintain flexion in your left foot, engage the left quadricep and press your heel forward as you press your tailbone backward. Bring your chin to your chin if you can. Look towards your toes (Padhayoragrai drishti). Breathe here for five deep breaths. With each inhale, elongate your spine, lifting your chest slightly. Adjustments and Alignment Tips:
Breathing:
Nava (Vinyasa #9) Inhale, lift your head and lengthen your spine. Keep your hands bound around your feet. Exhale there. Dasa (Vinyasa #10) Inhale, bring your hands to the floor, cross your legs and lift your body up off the ground. Ekadasa (Vinyasa #11) Exhale and jump back into Chaturanga Dandasana. Dvadasa (Vinyasa #12) Inhale into Urdhva Mukha Svanasana(Upward facing dog) Trayodasa (Vinyasa #13) Exhale into Adho Mukha Svanasana (Downward facing dog) Caturdasa (Vinyasa #14) From Adho Mukha Svanasana (down dog), look forward and walk or jump your feet through and have a seat on the floor with your legs extended in front of you. Inhale, bend your left knee and drop your left knee down and out to the right. Bring your left foot to your inner right thigh. Then lift up and sit on your left foot (your heel should be resting on your anus). Lengthen your spine and stretch both arms forward and grab your right foot with both hands. Right foot is flexed. Head up. Pancadasa (Vinyasa #15) Exhale and fold forward out over your straight left leg. Be sure you maintain flexion in your right foot, engage the right quadricep and press your heel forward as you press your tailbone backward. Bring your chin to your chin if you can. Look towards your toes (Padhayoragrai drishti). Breathe here for five deep breaths. With each inhale, elongate your spine, lifting your chest slightly. Sodasa (Vinyasa #16) Inhale, lift your head and lengthen your spine. Keep your hands bound around your feet. Exhale there. Saptadasa (Vinyasa #17) Inhale, bring your hands to the floor, cross your legs and lift your body up off the ground. Ashtadasa (Vinyasa #18) Exhale and jump back into Chaturanga Dandasana. Ekoonavimsatih (Vinyasa #19) Inhale into Urdhva Mukha Svanasana(Upward facing dog) Vimsatih (Vinyasa #20) Exhale into Adho Mukha Svanasana (Downward facing dog) Tips and Considerations
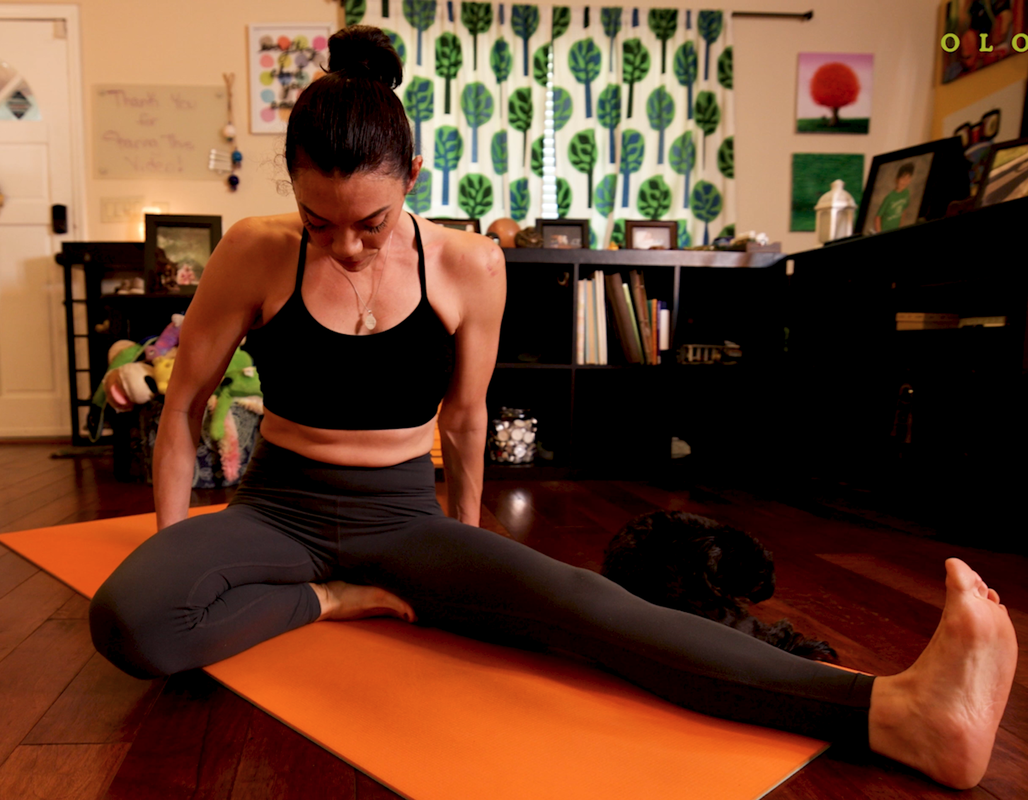 Modifications for Janu Sirsasana B Yoga is all about meeting your body where it is and making the practice work for you. If you're working on building flexibility or have certain limitations, there are several modifications and variations for Janu Sirsasana B that can help you experience the benefits of the pose while staying safe. Here are a few options: Bent Knee Variation: If you have knee issues or tight hamstrings, you can modify the pose by bending the extended leg slightly. This reduces the strain on the hamstring and provides more space for a comfortable forward fold. Modified foot position: If you are unable to sit directly on your foot (or it causes pain), simply sit on your hamstring. Half Janu Sirsasana B: Instead of folding all the way forward, focus on maintaining a long spine and gentle stretch. This variation can help you work on flexibility over time without going into a deep fold. Breathing Focus: Sometimes, even a gentle stretch can provide benefits. Focus on your breath and the sensation of the stretch, rather than aiming for a specific depth in the forward fold. Remember that the goal of yoga is not to force your body into a shape, but to cultivate awareness, strength, and flexibility over time. Experiment with these modifications to find the variation that suits your current abilities and needs. As your practice evolves, you might find that you gradually need fewer modifications, but always prioritize safety and comfort. If you're unsure about which modifications are appropriate for you, consider working with a qualified yoga instructor who can provide personalized guidance. 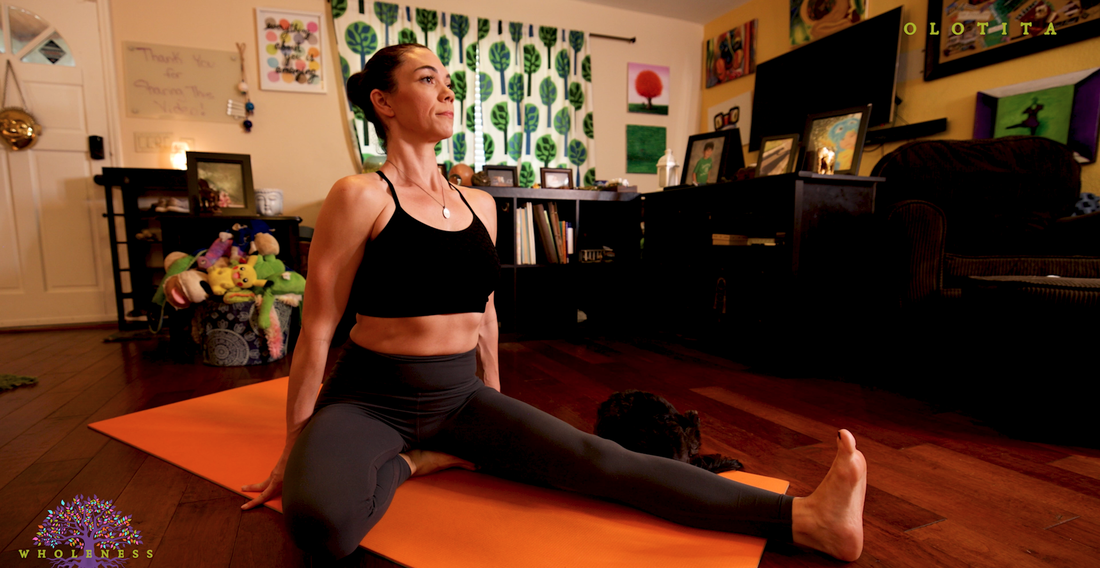 Janu Sirsasana B is a beautiful pose that embodies the balance between effort and surrender in yoga practice. By following this step-by-step guide and incorporating the pose into your Ashtanga Yoga routine, you can gradually enhance your flexibility, release tension, and experience the many physical and mental benefits that this pose has to offer. Remember, yoga is a journey, and each step you take brings you closer to a deeper connection with your body and mind.  Practice with The Yoga Shala If you want to join us for LIVE classes, The Yoga Shala offers virtual and in person classes every weekday morning. Owner, Krista Shirley, also offers virtual or in person private sessions (Yoga, Meditation, Breath-work, Nutrition, Life Coaching and Mentorship). Visit theyogashala.org for details. Be sure to signup for our newsletter to stay on top of local events and classes, Nysa products sales, new offerings, new products and more! We hope you find this video series helpful to you in creating or maintaining your yoga practice! 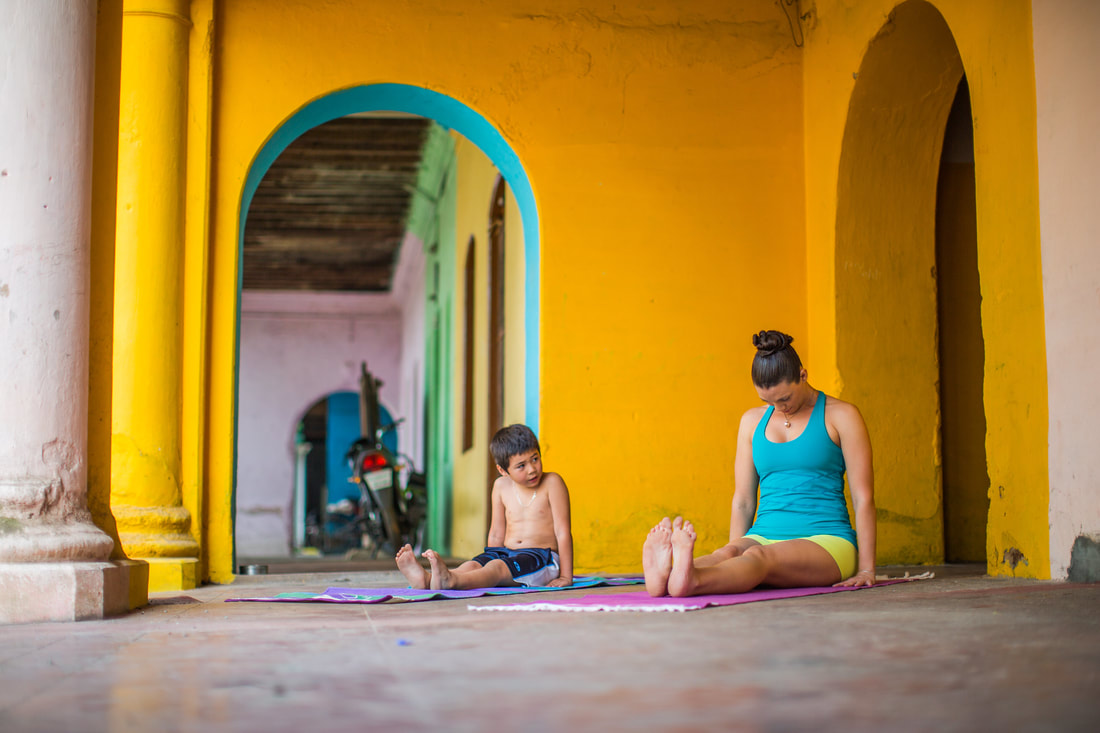 About Krista Krista Shirley is a level II authorized Ashtanga Yoga teacher. She is deeply passionate about sharing these teachings with all who wish to learn. If you want to join Krista in person she teaches daily classes at The Yoga Shala in Winter Park, Florida. She also offers virtual sessions in Yoga, Meditation, Breath-work, Nutrition, Life Coaching and Mentorship. Check out www.theyogashala.org for more details. If you do not live in Central Florida and want to find an authorized teacher in your area, check out our teacher, Sharath Jois’ website, for a list of all teachers authorized and certified by his yoga centre in India.
❤️SHOP MERCHANDISE: Nysa Products
❤️LET'S BE SOCIAL: Instagram: Krista Shirley Yoga Instagram: The Yoga Shala Facebook: The Yoga Shala Facebook: KristaShirleyYoga For other inquires please contact: krista@theyogashala.org Ashtanga Yoga is a dynamic and traditional form of yoga that involves a specific sequence of poses designed to align the body, calm the mind, and strengthen the spirit. Janu Sirsasana A, also known as Head-to-Knee Pose A, is one of the asanas (poses) from the Ashtanga Yoga Primary Series. This is the eleventh pose of the Ashtanga Yoga Primary series, and the sixth seated posture in that series. Janu Sirsasana A offers numerous benefits, including stretching the hamstrings, improving flexibility, and promoting a sense of introspection. In this comprehensive guide, we'll walk you through the steps to achieve Janu Sirsasana A effectively. I’ve also written a blog post exploring Janu Sirsasana B and C from the Primary Series. Click here to access Janu Sirsasana B post, and here to access Janu Sirsasana C. 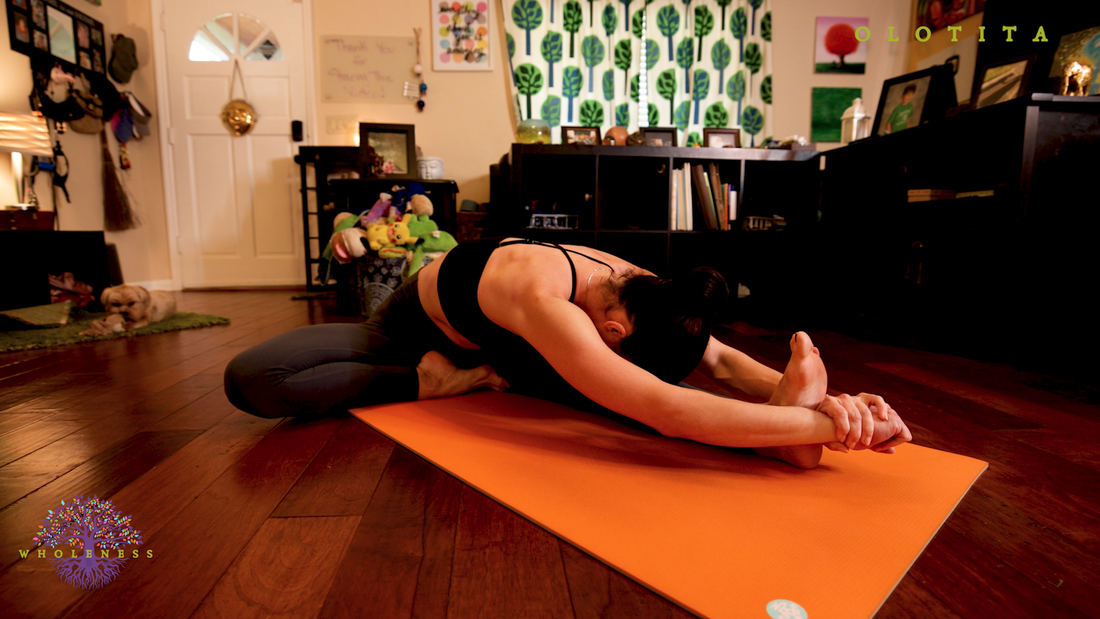 Benefits of Janu Sirsasana A Before diving into the practice itself, let's explore some of the benefits that Janu Sirsasana A has to offer: Hamstring Stretch: This pose deeply stretches the hamstrings, helping to improve flexibility and release tension in the back of the legs. Side body Stretch: When practiced with bent leg at 90 degree angle, this is a delightful stretch for the side of your body. Consistently practicing this posture will lengthen the latissimus dorsi and serratus anterior, the rotator cuffs, and hips. Spinal Flexibility: Janu Sirsasana A encourages the spine to flex forward, promoting suppleness in the back muscles and maintaining a healthy spine. Digestive Stimulation: The pose massages the abdominal organs, aiding digestion and promoting overall digestive health. Calming Effect: Janu Sirsasana A is a forward-bending pose, which has a soothing and calming effect on the nervous system, reducing stress and anxiety. Blood Circulation: Janu Sirsasana A can improve blood circulation to the pelvic region and lower abdomen, which can have positive effects on reproductive health. Introspection: The pose invites a sense of turning inward and introspection, allowing for self-reflection and mindful awareness. 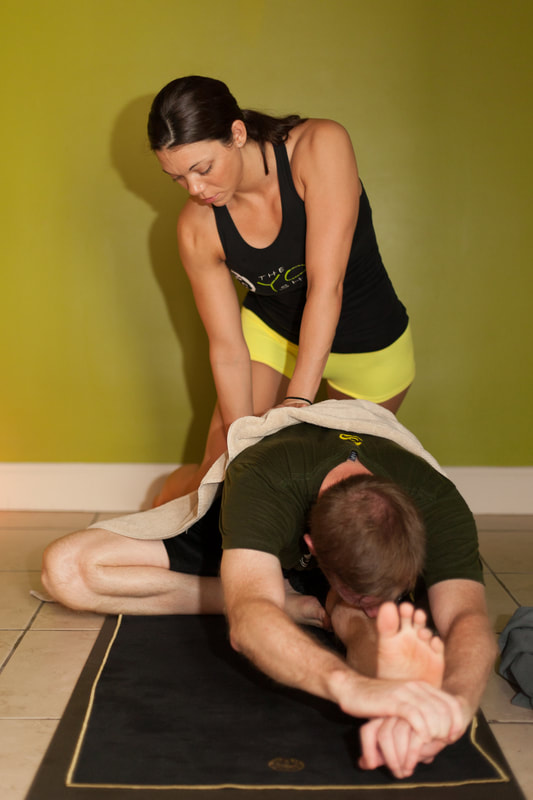 Contraindications and Precautions While Janu Sirsasana A offers numerous benefits, there are certain conditions and situations in which it might not be suitable or require modifications: Hamstring or Back Injuries: Individuals with acute hamstring injuries or lower back issues should approach this pose cautiously. Consult a healthcare professional or a qualified yoga instructor advice before taking this posture. And be sure that when you start this posture, you begin with a modification to safely allow the body to open over time. Knee Injuries: If you have knee injuries, be careful when bending the knee of the extended leg. Consider taking one of the modifications offered below or avoid this pose altogether if it causes discomfort. Pregnancy: Pregnant women should modify this pose by keeping the knees slightly bent and avoiding deep forward bends that could strain the abdominal muscles. High Blood Pressure: If you have high blood pressure, approach this pose with caution. Avoid excessive forward folding and keep your head elevated to prevent a sudden drop in blood pressure. Diarrhea or Menstruation: During periods of diarrhea or menstruation, it's advisable to skip or modify this pose, as the forward fold can create discomfort. Recent Abdominal Surgery: If you've had recent abdominal surgery, consult your healthcare provider before attempting this pose, as it involves pressure on the abdomen. The Angles of the Janu Sirsasana Postures Angles for your foot position will make even more sense once we explore Janu Sirsasana B and C in posts. In Janu Sirsasana A, we seek a 90 degree angle from your knee. Consequently, we are to bring our toes to touch our opposite inner thigh. This ensure we don't press the entire foot into the opposite thigh. By using this angle, you are taking the posture correctly. In turn this gives you a delicious and safe stretch of your entire side body and Latissimus Dorsi. In Janu Sirsasana B, we will take a slightly smaller angle, around 60 degrees. Comparatively, in Janu Sirsasna C we aspire to create a 45 degree angle. Now, let's delve into the step-by-step instructions for practicing Janu Sirsasana A:  Step-by-Step Guide to Janu Sirsasana A (Sanskrit Vinyasa Count) We will be entering this posture from downward facing dog, having just taken a vinyasa after Trianga Mukhaikapada Paschimottanasana to seated position. Sapta (Vinyasa #7): From Adho Mukha Svanasana (down dog), look forward and walk or jump your feet through and have a seat on the floor with your legs extended in front of you. Inhale, bend your right knee and drop your right knee down and out to the right. Take your knee out to 90 degree angle from your hip and draw the toes of your right foot in to touch your inner left thigh. Lengthen your spine and stretch both arms forward and grab your left foot with both hands. Left foot is flexed. Head up. Asthau (Vinyasa #8) Exhale and fold forward out over your straight left leg. Be sure you maintain flexion in your left foot, engage the left quadricep and press your heel forward as you press your tailbone backward. Bring your chin to your chin if you can. Look towards your toes (Padhayoragrai drishti). Breathe here for five deep breaths. With each inhale, elongate your spine, lifting your chest slightly. Adjustments and Alignment Tips:
Breathing:
Nava (Vinyasa #9) Inhale, lift your head and lengthen your spine. Keep your hands bound around your feet. Exhale there. Dasa (Vinyasa #10) Inhale, bring your hands to the floor, cross your legs and lift your body up off the ground. Ekadasa (Vinyasa #11) Exhale and jump back into Chaturanga Dandasana. Dvadasa (Vinyasa #12) Inhale into Urdhva Mukha Svanasana(Upward facing dog) Trayodasa (Vinyasa #13) Exhale into Adho Mukha Svanasana (Downward facing dog) Caturdasa (Vinyasa #14) From Adho Mukha Svanasana (down dog), look forward and walk or jump your feet through and have a seat on the floor with your legs extended in front of you. Inhale, bend your left knee and drop your left knee down and out to the left. Take your knee out to 90 degree angle from your hip and draw the toes of your left foot in to touch your inner right thigh. Lengthen your spine and stretch both arms forward and grab your left foot with both hands. Right foot is flexed. Head up. Pancadasa (Vinyasa #15) Exhale and fold forward out over your straight right leg. Be sure you maintain flexion in your right foot, engage the right quadricep and press your heel forward as you press your tailbone backward. Bring your chin to your chin if you can. Look towards your toes (Padhayoragrai drishti). Breathe here for five deep breaths. With each inhale, elongate your spine, lifting your chest slightly. Sodasa (Vinyasa #16) Inhale, lift your head and lengthen your spine. Keep your hands bound around your feet. Exhale there. Saptadasa (Vinyasa #17) Inhale, bring your hands to the floor, cross your legs and lift your body up off the ground. Ashtadasa (Vinyasa #18) Exhale and jump back into Chaturanga Dandasana. Ekoonavimsatih (Vinyasa #19) Inhale into Urdhva Mukha Svanasana(Upward facing dog) Vimsatih (Vinyasa #20) Exhale into Adho Mukha Svanasana (Downward facing dog) Tips and Modifications Modifications are essential in yoga to make poses accessible to a wider range of practitioners and to accommodate individual needs and limitations. Here are some modifications for Janu Sirsasana A: Focus on the Upper Body: If hamstring flexibility is a challenge, focus on elongating your spine and reaching your chest forward, rather than aiming to touch your foot. This modification can still provide a good stretch without overexerting your hamstrings. Bent Knee Variation: If you have tight hamstrings or discomfort in the knee of the extended leg, you can choose to keep the knee slightly bent. This modification can reduce strain on the hamstring and make the pose more accessible. Wall Support: Practicing Janu Sirsasana A with your back against a wall can help you maintain proper alignment. The wall can serve as a support, allowing you to focus on the forward fold without worrying about balance. Precautions:
Janu Sirsasana A offers a range of physical, mental, and emotional benefits. As you practice this pose regularly, you'll likely notice improvements in your flexibility, concentration, and overall well-being. Remember that yoga is a journey, and each practice is an opportunity to deepen your connection with your body and mind. Enjoy the process, and allow Janu Sirsasana A to be a gateway to greater self-awareness and tranquility.  Practice with The Yoga Shala If you want to join us for LIVE classes, The Yoga Shala offers virtual and in person classes every weekday morning. Owner, Krista Shirley, also offers virtual or in person private sessions (Yoga, Meditation, Breath-work, Nutrition, Life Coaching and Mentorship). Visit theyogashala.org for details. Be sure to signup for our newsletter to stay on top of local events and classes, Nysa products sales, new offerings, new products and more! We hope you find this video series helpful to you in creating or maintaining your yoga practice! 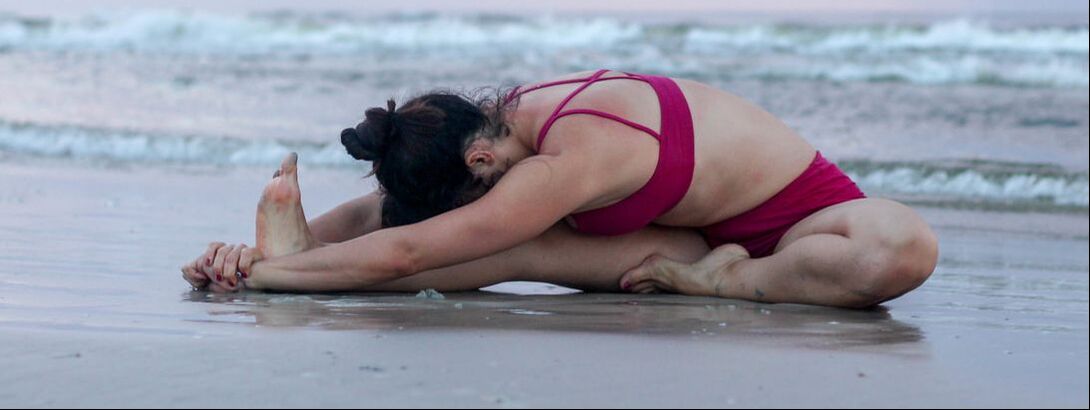 About Krista Krista Shirley is a level II authorized Ashtanga Yoga teacher. She is deeply passionate about sharing these teachings with all who wish to learn. If you want to join Krista in person she teaches daily classes at The Yoga Shala in Winter Park, Florida. She also offers virtual sessions in Yoga, Meditation, Breath-work, Nutrition, Life Coaching and Mentorship. Check out www.theyogashala.org for more details. If you do not live in Central Florida and want to find an authorized teacher in your area, check out our teacher, Sharath Jois’ website, for a list of all teachers authorized and certified by his yoga centre in India.
❤️SHOP MERCHANDISE: Nysa Products
❤️LET'S BE SOCIAL: Instagram: Krista Shirley Yoga Instagram: The Yoga Shala Facebook: The Yoga Shala Facebook: KristaShirleyYoga For other inquires please contact: krista@theyogashala.org Mastering Trianga Mukhaikapada Paschimottanasana: A Guide from the Ashtanga Yoga Primary Series12/14/2023 Ashtanga Yoga, a dynamic and rigorous style of yoga, offers a sequence of postures that progressively challenge both the body and mind. Trianga Mukhaikapada Paschimottanasana, a mouthful to pronounce but a rewarding pose to master, is part of the Ashtanga Yoga Primary Series. In this blog post, we will delve into the nuances of this asana, its benefits, step-by-step instructions, modifications, and precautions. Understanding Trianga Mukhaikapada Paschimottanasana: Trianga Mukhaikapada Paschimottanasana, often abbreviated as Trianga Paschimottanasana, is a seated forward bend that involves an intense stretch of the hamstring and back muscles. The name itself provides insight into the pose:
The combination of these components highlights the essence of the pose, where one leg faces forward while the other extends to the side, creating a triangular shape. 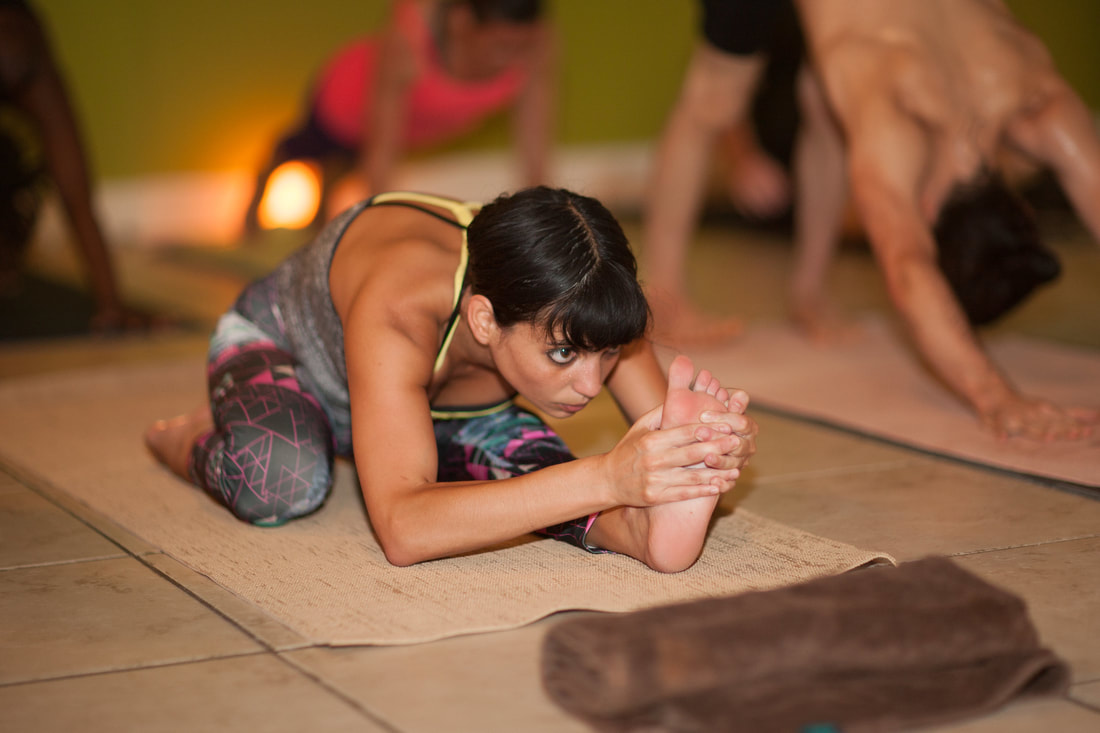 Benefits of Trianga Mukhaikapada Paschimottanasana Hamstring Flexibility: This asana deeply stretches the hamstrings, helping to increase flexibility and range of motion in the back of the thighs. Spinal Mobility: The forward bend promotes flexibility in the spine, especially the lumbar and thoracic regions, leading to improved posture and reduced back stiffness. Hip Opening: The extended leg position opens the hips and groin, providing relief from tightness and enhancing hip joint mobility. Stress Relief: The calming effect of forward bends like Trianga Paschimottanasana soothes the nervous system, promoting relaxation and reducing stress and anxiety. Digestive Stimulation: The compression of the abdomen massages the digestive organs, aiding digestion and promoting healthy bowel movements. Circulation: The pose improves blood flow to the pelvic region, helping to alleviate menstrual discomfort and support reproductive health. Mindfulness: Practicing this pose requires concentration and awareness of the body, cultivating mindfulness and mental clarity. Calming the Mind: The inward focus encouraged during this pose can have a meditative quality, promoting a sense of calmness and tranquility. 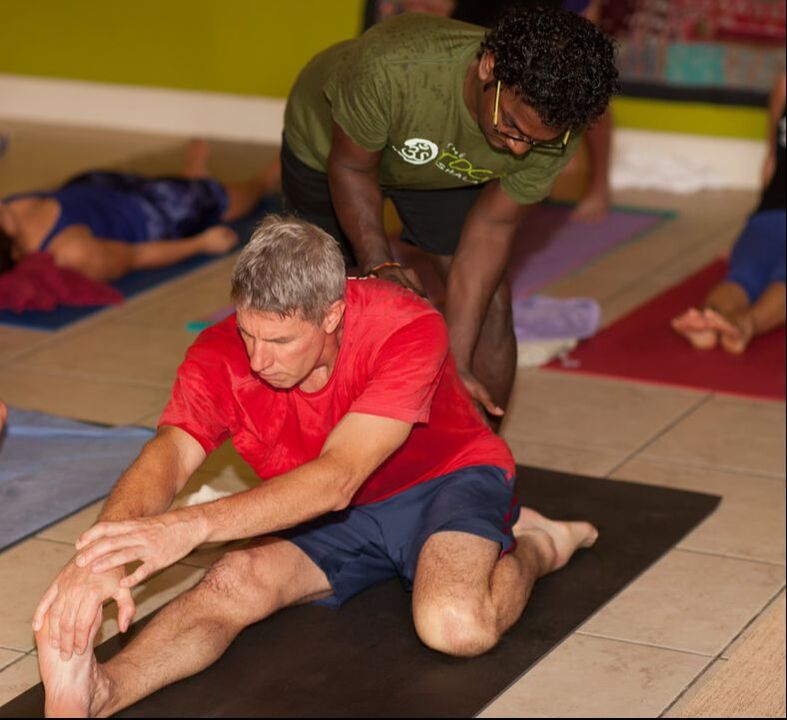 Contraindications and Precautions: Back Injuries: Individuals with lower back injuries or conditions like herniated discs should approach this pose cautiously. It's important to maintain a neutral spine and avoid excessive rounding. Hamstring Injuries: If you have acute hamstring injuries, approach the pose with care and avoid overstretching the injured area. Knee Issues: Individuals with knee problems, especially in the bent knee, should modify this posture to support the knee and avoid excessive strain. Pregnancy: Pregnant individuals should modify the pose by widening the legs slightly to accommodate the growing belly. It's advisable to consult a prenatal yoga instructor or healthcare provider before attempting this pose. High Blood Pressure: Those with high blood pressure should avoid holding the pose for extended periods and can consider modifications. Insomnia: If you have insomnia or other sleep disorders, avoid practicing this pose close to bedtime, as it can be stimulating for some individuals. Osteoporosis: Individuals with osteoporosis should avoid deep forward bends that could strain the spine. Modifying the pose with props or under the guidance of a qualified instructor is recommended. Neck Issues: If you experience neck discomfort or tension, keep your gaze slightly forward rather than looking down to avoid strain on the neck. Click here to watch the YouTube tutorial for Trianga Mukhaikapada Paschimottanasana 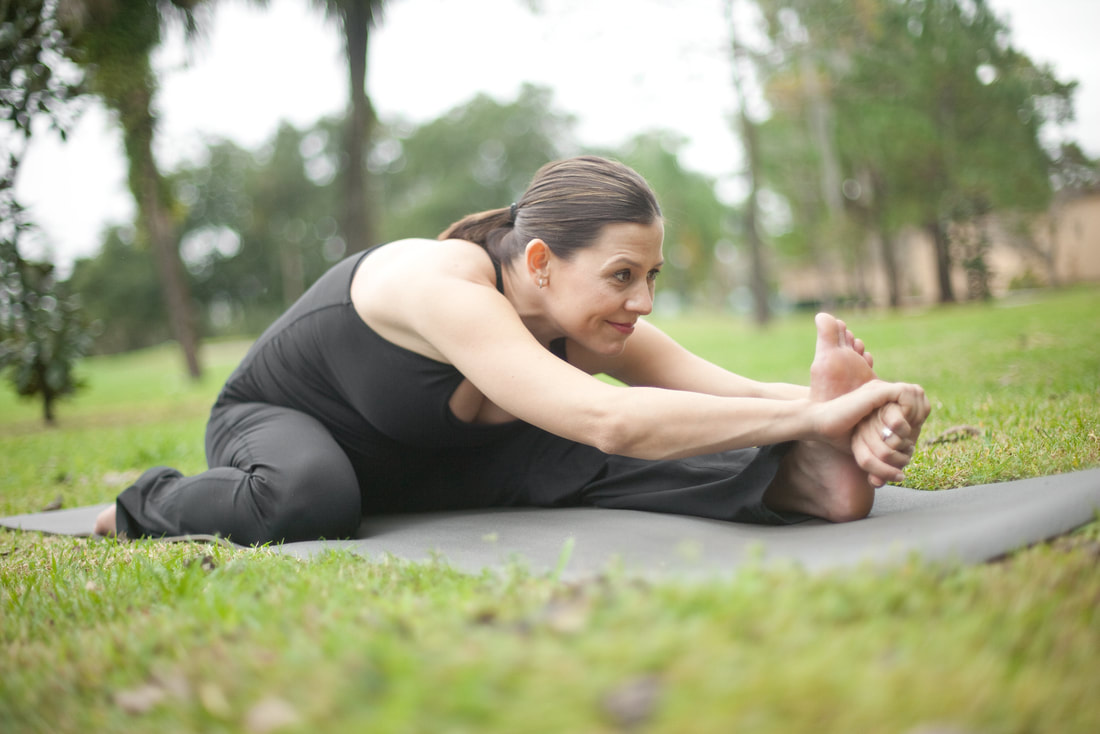 Step by Step Instructions for Trianga Mukhaikapada Paschimottanasana with Sanskrit Vinyasa Count We will be entering this posture from downward facing dog, having just taken a vinyasa after Ardha Baddha Padma Paschimottanasana to seated position. Sapta (Vinyasa #7): From Adho Mukha Svanasana (down dog), look forward and walk or jump your feet through and have a seat on the floor with your legs extended in front of you (or for more advanced version, jump through with your right leg bent backwards and your left leg extended straight out in front of you. Inhale, bend your right knee backwards so the top of your right foot is pressing into the ground. Try to ground through both sits bones. Stretch both arms forward and grab your left foot with both hands. Left foot is flexed. Head up. Asthau (Vinyasa #8) Exhale and fold forward out over your straight left leg. Be sure you maintain flexion in your left foot, engage the left quadricep and press your heel forward as you press your tailbone backward. Bring your chin to your chin if you can. Look towards your toes (Padhayoragrai drishti). Breathe here for five deep breaths. With each inhale, elongate your spine, lifting your chest slightly. Adjustments and Alignment Tips:
Breathing:
Nava (Vinyasa #9) Inhale, lift your head and lengthen your spine. Keep your hands bound around your feet. Exhale there. Dasa (Vinyasa #10) Inhale, bring your hands to the floor, cross your legs and lift your body up off the ground. (Or for a more advanced exit, press your hands on the floor and jump back right from position). Ekadasa (Vinyasa #11) Exhale and jump back into Chaturanga Dandasana. Dvadasa (Vinyasa #12) Inhale into Urdhva Mukha Svanasana(Upward facing dog) Trayodasa (Vinyasa #13) Exhale into Adho Mukha Svanasana (Downward facing dog) Caturdasa (Vinyasa #14) From Adho Mukha Svanasana (down dog), look forward and walk or jump your feet through and have a seat on the floor with your legs extended in front of you (or for more advanced version, jump through with your left leg bent backwards and your right leg extended straight out in front of you. Inhale, bend your left knee backwards so the top of your left foot is pressing into the ground. Try to ground through both sits bones. Stretch both arms forward and grab your left foot with both hands. Right foot is flexed. Head up. Pancadasa (Vinyasa #15) Exhale and fold forward out over your straight right leg. Be sure you maintain flexion in your right foot, engage the right quadricep and press your heel forward as you press your tailbone backward. Bring your chin to your chin if you can. Look towards your toes (Padhayoragrai drishti). Breathe here for five deep breaths. With each inhale, elongate your spine, lifting your chest slightly. Sodasa (Vinyasa #16) Inhale, lift your head and lengthen your spine. Keep your hands bound around your feet. Exhale there. Saptadasa (Vinyasa #17) Inhale, bring your hands to the floor, cross your legs and lift your body up off the ground. (Or for a more advanced exit, press your hands on the floor and jump back right from position). Ashtadasa (Vinyasa #18) Exhale and jump back into Chaturanga Dandasana. Ekoonavimsatih (Vinyasa #19) Inhale into Urdhva Mukha Svanasana(Upward facing dog) Vimsatih (Vinyasa #20) Exhale into Adho Mukha Svanasana (Downward facing dog) Modifications Modifications can make Trianga Mukhaikapada Paschimottanasana more accessible to practitioners of varying levels of flexibility and those with certain physical limitations. Here are some modifications you can consider: Modified Foot Position: If you find it impossible to turn your foot off the bent leg, allow the side of the foot to touch the floor instead. Just make sure it does not cause any discomfort to you knee. In this modification, do not fold forward but instead work to sit tall and ground your sits bones. Place your hands on the floor and press down into them to help you shift your weight to ground your sits bones. Bent Knee: If your hamstrings are tight, allow a slight bend in the knee of the extended leg. This modification reduces strain on the lower back and hamstrings and allows you to focus on maintaining a straight spine. Wall Support: Perform the pose with your back against a wall. This can provide support and prevent you from rounding your back excessively. Use the wall as a reference point to maintain a straight spine. Focus on Breathing: Regardless of the variation you choose, prioritize deep and mindful breathing. Focus on the inhalation and exhalation to help release tension and gradually deepen the stretch. Honor Your Body Remember, the goal is to create a comfortable and safe practice that works for your body. Experiment with these modifications and find what works best for you. As your flexibility improves over time, you might find that you can gradually reduce the use of props and explore deeper variations of the pose. Always practice within your limits and honor your body's needs. If you're unsure about which modifications are suitable for you, consider consulting a qualified yoga instructor for guidance. Choose which variation of Trianga Mukhaikapada Paschimottanasana will be most appropriate for you. Doing so will enable you to approach this posture in a safe and accessible way. Moreover, if you keep working with these modifications on a consistent basis (minimum 3x week) you will slowly work your way through the modifications offered. Consequently you will eventually work your way up to the full expression of the posture. Click here to watch the YouTube tutorial for Trianga Mukhaikapada Paschimottanasana  Practice with The Yoga Shala If you want to join us for LIVE classes, The Yoga Shala offers virtual and in person classes every weekday morning. Owner, Krista Shirley, also offers virtual or in person private sessions (Yoga, Meditation, Breath-work, Nutrition, Life Coaching and Mentorship). Visit theyogashala.org for details Be sure to signup for our newsletter to stay on top of local events and classes, Nysa products sales, new offerings, new products and more! We hope you find this video series helpful to you in creating or maintaining your yoga practice! 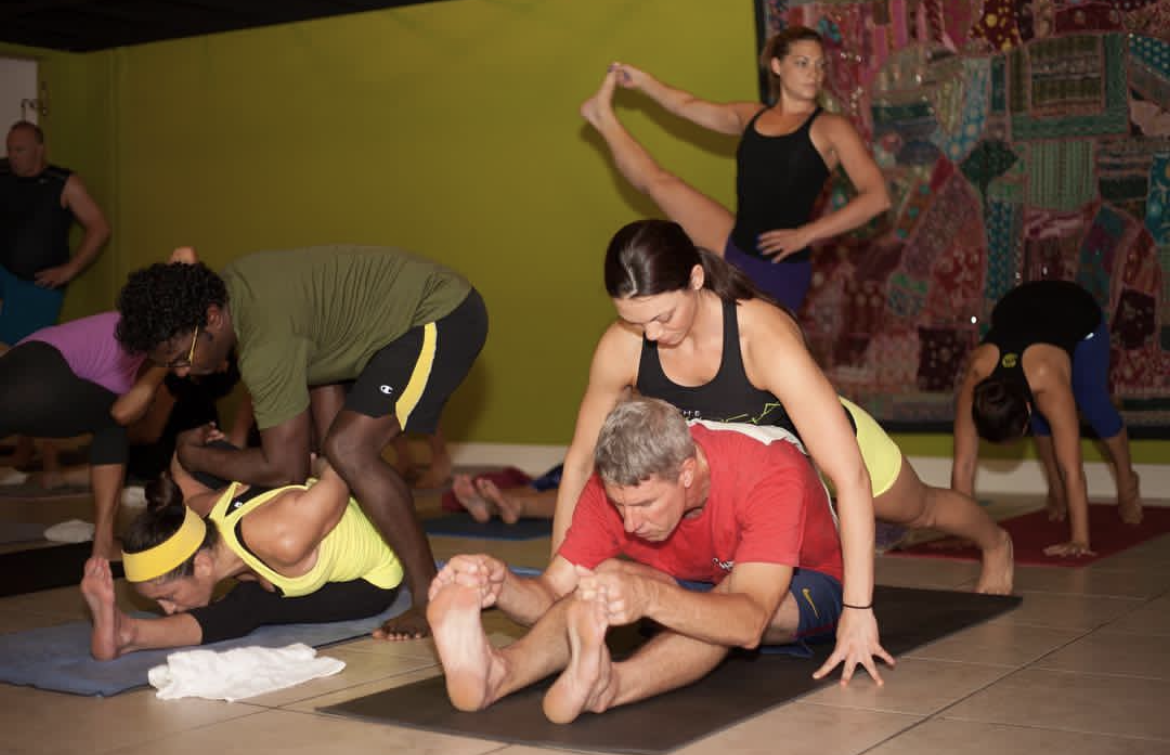 About Krista Krista Shirley is a level II authorized Ashtanga Yoga teacher. She is deeply passionate about sharing these teachings with all who wish to learn. If you want to join Krista in person she teaches daily classes at The Yoga Shala in Winter Park, Florida. She also offers virtual sessions in Yoga, Meditation, Breath-work, Nutrition, Life Coaching and Mentorship. Check out www.theyogashala.org for more details. If you do not live in Central Florida and want to find an authorized teacher in your area, check out our teacher, Sharath Jois’ website, for a list of all teachers authorized and certified by his yoga centre in India.
❤️SHOP MERCHANDISE: Nysa Products
❤️LET'S BE SOCIAL: Instagram: Krista Shirley Yoga Instagram: The Yoga Shala Facebook: The Yoga Shala Facebook: KristaShirleyYoga For other inquires please contact: krista@theyogashala.org 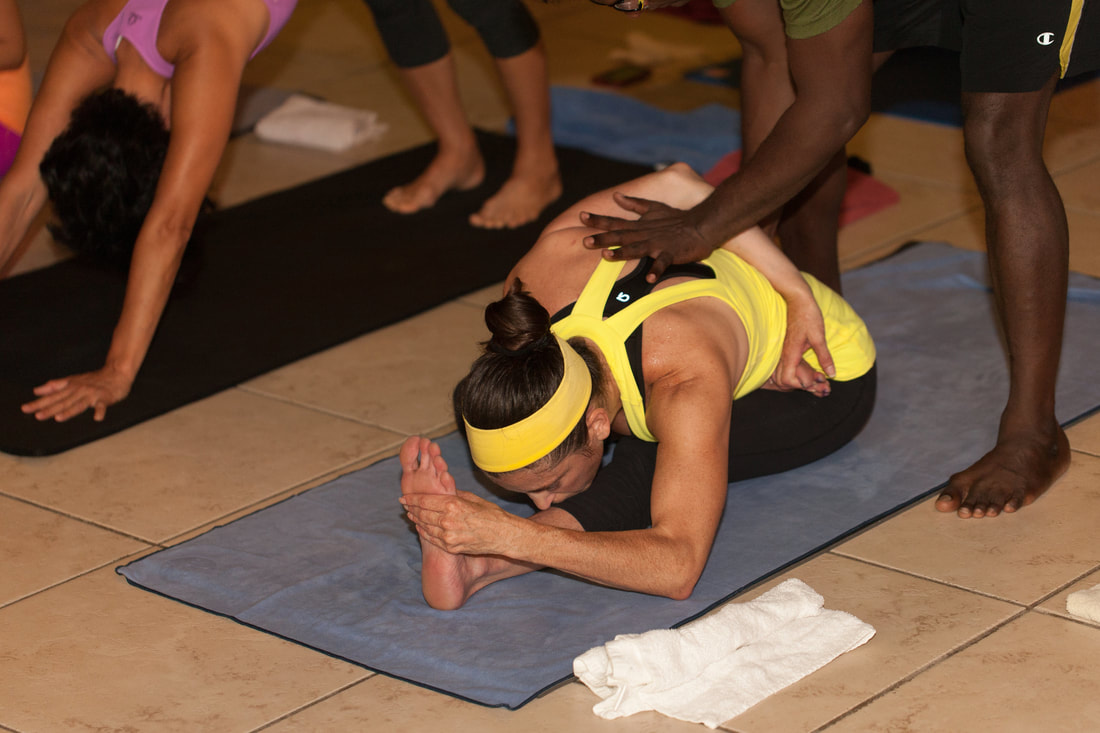 Ashtanga Yoga is a traditional practice that follows a systematic sequence of postures, aiming to synchronize breath with movement. The first series in Ashtanga is known as the Primary Series or Yoga Chikitsa. In this blog post, we'll explore primary series yoga posture, Ardha Baddha Padma Pascimottanasana. Ardha Baddha Padma Pascimottanasana (half-bound lotus forward folding posture) is the fourth seated posture in the Ashtanga Yoga Primary Series. This pose is the first seated posture to incorporate a half-lotus and the first seated posture where we attempt to bind our hand to our foot. We will break down the full expression of this asana with correct vinyasa count. Then we will explore some modifications/variations for Ardha Baddha Padma Pascimottanasana. Many students find they are unable to take the full expression the first time they attempt it. If this pose is challenging for you, please be patient with your body and work with modifications that will safely help you work up to the full expression over time. Remember that yoga is a journey, and regular practice combined with patience will help you deepen your practice over time. 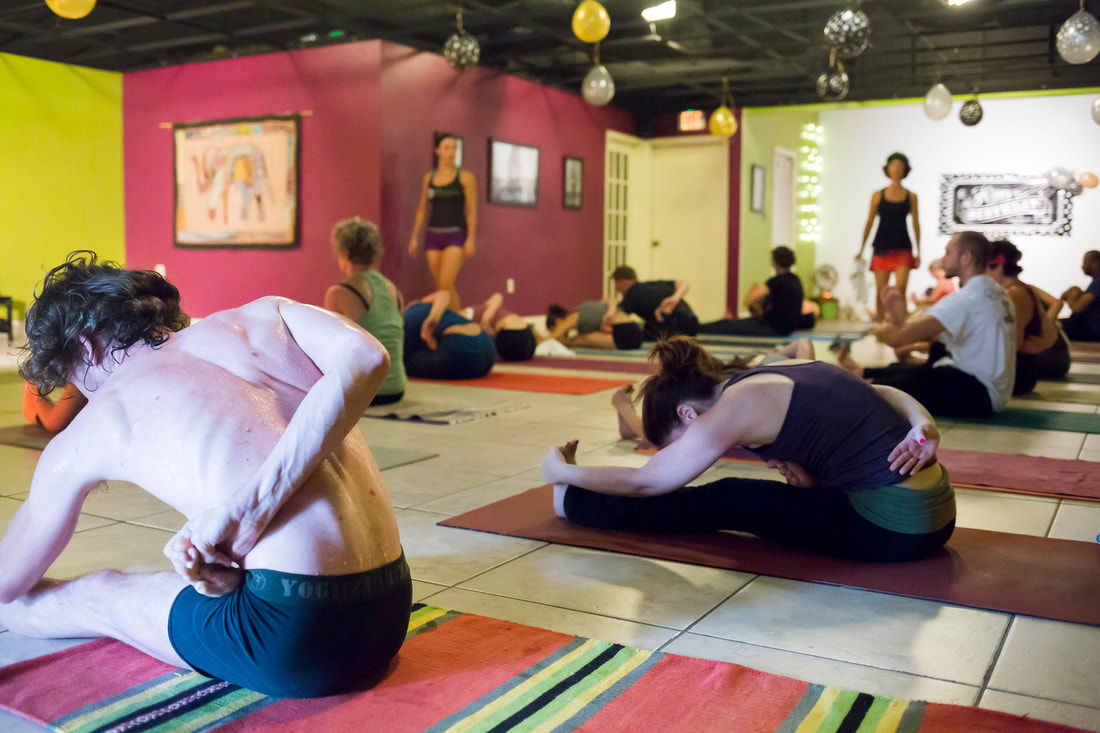 Benefits of Ardha Baddha Padma Pascimottanasana Improved Flexibility: This pose stretches the hamstrings, hip flexors, and groins, gradually increasing flexibility in these areas. Hip Opening: The half-lotus position and the hip rotation involved in the pose help open up the hips, promoting mobility and alleviating tightness. Strengthened Spine: Ardha Baddha Padma Pascimottanasana encourages a lengthening of the spine, which strengthens the back muscles and improves posture. Digestive Stimulation: The forward fold compresses the abdominal organs, stimulating digestion and aiding in the detoxification process. Calming the Mind: The mindful breathing and deep stretching of this pose can have a calming effect on the nervous system, reducing stress and anxiety. Energetic Alignment: This pose encourages the flow of energy (prana) through the body, promoting balance and vitality. Click here to watch the YouTube tutorial for Ardha Baddha Padma Paschimottanasana 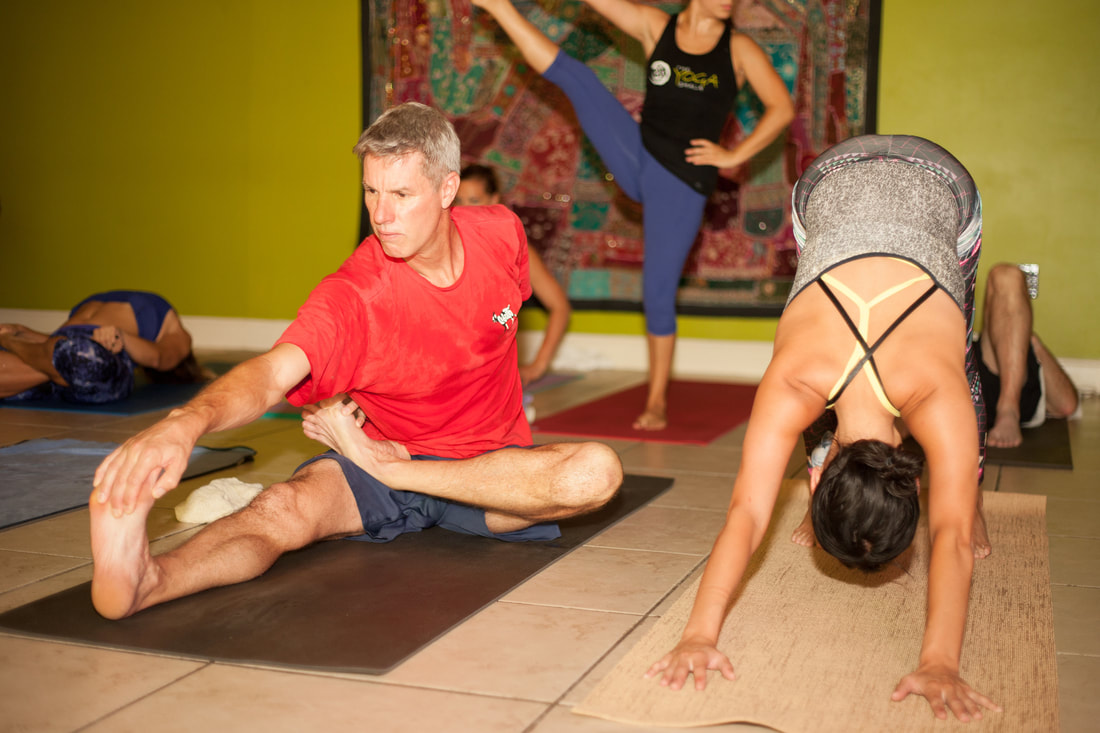 Contraindications While Ardha Baddha Padma Paschimottanasana offers numerous benefits, there are certain conditions and situations in which this pose should be avoided or practiced with caution: Knee or Hip Injuries: If you have any knee or hip injuries or discomfort, especially in the knee of the bent leg, avoid or modify the pose. Ensure that the leg is comfortable in the half-lotus position without straining the joints. See modifications below. Sciatica: Individuals with sciatica may find this pose aggravating. Consult with a yoga instructor or healthcare professional before attempting it. Pregnancy: Pregnant individuals should avoid deep forward bends, as they can put pressure on the abdomen and disrupt blood flow to the uterus. It's recommended to practice a modified version or skip this pose during pregnancy. See modifications below. High Blood Pressure: People with uncontrolled high blood pressure should practice with caution, as the forward fold may lead to a sudden increase in blood pressure. Keep the forward bend shallow. Lower Back Issues: If you have lower back issues, practice with caution and start with modifications listed below. Ankle or Foot Injuries: If you have ankle or foot injuries, avoid placing your foot on the thigh of the opposite leg. Instead, practice one of the variations of this pose. Always prioritize your body's comfort and safety in any yoga practice. If you have any medical conditions or concerns, it's advisable to consult a healthcare professional or a qualified yoga instructor before attempting new poses. They can provide personalized guidance and modifications to ensure that your practice is safe and beneficial. Step-by-Step Instructions for practicing Ardha Baddha Padma Paschimottanasana (with Vinyasa Count) We will be entering this posture from downward facing dog, having just taken a vinyasa after Purvottanasana to seated position. Sapta (Vinyasa #7): From Adho Mukha Svanasana (down dog), look forward and walk or jump your feet through and have a seat on the floor with your legs extended in front of you. Inhale, bend your right knee and bring your right heel toward your perineum (the space between your anus and genitals). This is the half-lotus position. On the same inhale, take your right arm behind you and around your body and clasp the big toe of your right foot with your right thumb, index and middle finger. Asthau (Vinyasa #8) Exhale and fold forward out over your straight left leg. Grab your left foot with your left hand. Be sure you maintain flexion in your left foot, engage the left quadricep and press your heel forward as you press your tailbone backward. Bring your chin to your chin if you can. Look towards your toes (Padhayoragrai drishti). Breathe here for five deep breaths. With each inhale, elongate your spine, lifting your chest slightly. Adjustments and Alignment Tips:
Breathing:
Nava (Vinyasa #9) Inhale, lift your head and lengthen your spine. Keeping your left hand to your left foot and right hand to your right foot. Exhale there. Dasa (Vinyasa #10) Inhale, bring your hands to the floor, cross your legs and lift your body up off the ground. Ekadasa (Vinyasa #11) Exhale and jump back into Chaturanga Dandasana. Dvadasa (Vinyasa #12) Inhale into Urdhva Mukha Svanasana(Upward facing dog) Trayodasa (Vinyasa #13) Exhale into Adho Mukha Svanasana (Downward facing dog) Caturdasa (Vinyasa #14) From Adho Mukha Svanasana (down dog), look forward and walk or jump your feet through and have a seat on the floor with your legs extended in front of you. Inhale, bend your left knee and bring your left heel toward your perineum (the space between your anus and genitals). This is the half-lotus position. On the same inhale, take your left arm behind you and around your body and clasp the big toe of your right foot with your right thumb, index and middle finger. Pancadasa (Vinyasa #15) Exhale and fold forward out over your straight right leg. Grab your right foot with your right hand. Be sure you maintain flexion in your left foot, engage the left quadricep and press your heel forward as you press your tailbone backward. Bring your chin to your chin if you can. Look towards your toes (Padhayoragrai drishti). Breathe here for five deep breaths. With each inhale, elongate your spine, lifting your chest slightly. Sodasa (Vinyasa #16) Inhale, lift your head and lengthen your spine. Keeping your left hand to your left foot and right hand to your right foot. Exhale there. Saptadasa (Vinyasa #17) Inhale, bring your hands to the floor, cross your legs and lift your body up off the ground. Ashtadasa (Vinyasa #18) Exhale and jump back into Chaturanga Dandasana. Ekoonavimsatih (Vinyasa #19) Inhale into Urdhva Mukha Svanasana(Upward facing dog) Vimsatih (Vinyasa #20) Exhale into Adho Mukha Svanasana (Downward facing dog) Modifciations Modifications are essential to ensure that yoga poses are accessible and safe for practitioners of all levels and abilities. Here are some modifications for Ardha Baddha Padma Pascimottanasana: Modification One (1):  Start with both legs straight out on the floor in front of you. Inhale and lift your right leg up, internally rotate the right leg from knee to foot and grab the right knee with the right hand. Place the left hand on the right foot. Breathe here five deep breaths. Work to lift out of your sits bones and extend your spine up. At the same time, strongly grip your hands to your knee and foot and pull your elbows back to help you engage your back. After five deep breaths, switch sides. Modification Two (2): 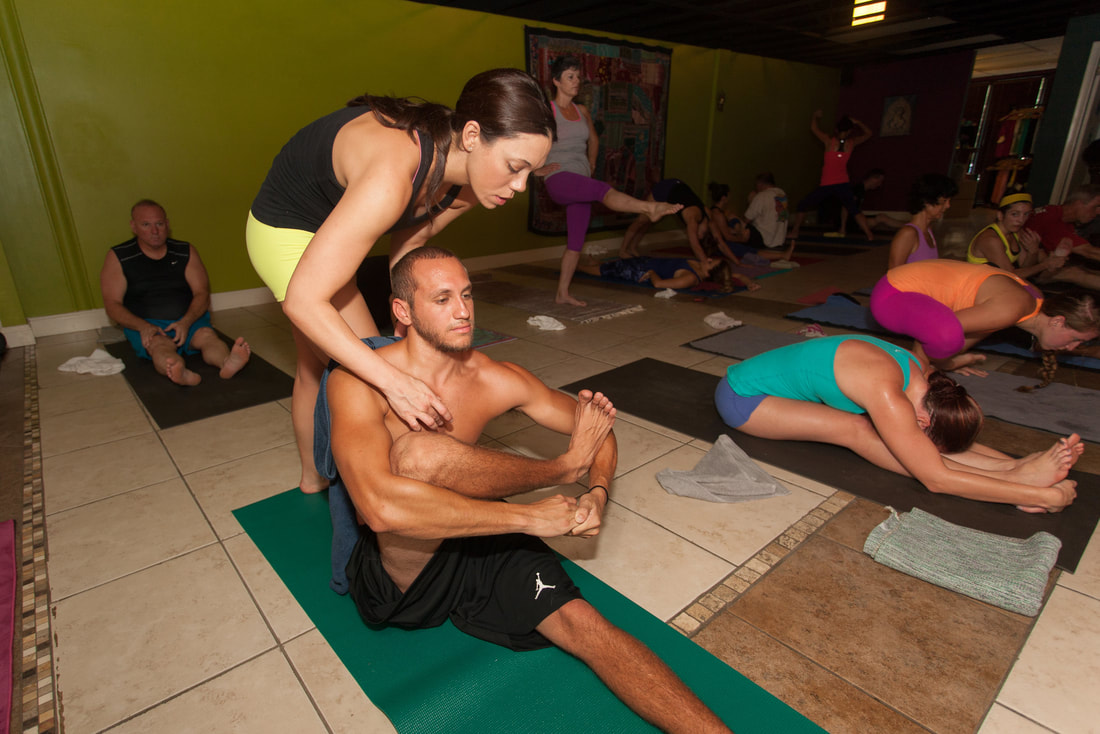 Start with both legs straight out in front of you. Inhale and lift your right leg up, internally rotate the right leg from knee to foot and wrap your arms around your right leg. If you can, interlace your fingers/hands together. Flex both feet and work to press your right foot into your left arm. Simultaneously work to press your left arm into our right foot. Sit up tall. Breathe here five deep breaths. Work to lift out of your sits bones and extend your spine up. Work to activate your mid back by gently squeezing your shoulder blades together. After five deep breaths, switch sides. Modification Three (3): Start with both legs straight out in front of you. Inhale and work to bring your right foot into half-lotus position (bring your right foot on top of your left thigh, toes pointing towards your hip). Grip your right foot with your left hand and gently pull the foot back toward your hip. Bend your left elbow and engage your back. Extend your right arm out in front of you, thumb up. As you exhale start to take your right arm back behind you, but keep your arm extended here. You are working to open your line of fascia in your pectoralis area. Sit up tall. Take five deep breaths here. With each inhale work to sit taller. With each exhale work to take your right arm further back, deepening the stretch in your chest. After five deep breaths, switch sides. Ardha Baddha Padma Pascimottanasana offers an opportunity to cultivate focus, flexibility, and mindfulness. By following the step-by-step guide and vinyasa count, you can confidently integrate this pose into your Ashtanga Yoga practice. Remember that yoga is a journey. Enjoy your practice! Click here to watch the YouTube tutorial for Ardha Baddha Padma Paschimottanasana  Practice with The Yoga Shala If you want to join us for LIVE classes, The Yoga Shala offers virtual and in person classes every weekday morning. Owner, Krista Shirley, also offers virtual or in person private sessions (Yoga, Meditation, Breath-work, Nutrition, Life Coaching and Mentorship). Visit theyogashala.org for details. Be sure to signup for our newsletter to stay on top of local events and classes, Nysa products sales, new offerings, new products and more! We hope you find this video series helpful to you in creating or maintaining your yoga practice! About Krista Krista Shirley is a level II authorized Ashtanga Yoga teacher. She is deeply passionate about sharing these teachings with all who wish to learn. If you want to join Krista in person she teaches daily classes at The Yoga Shala in Winter Park, Florida. She also offers virtual sessions in Yoga, Meditation, Breath-work, Nutrition, Life Coaching and Mentorship. Check out www.theyogashala.org for more details. If you do not live in Central Florida and want to find an authorized teacher in your area, check out our teacher, Sharath Jois’ website, for a list of all teachers authorized and certified by his yoga centre in India. Check out other yoga tutorials on our youtube channel
❤️SHOP MERCHANDISE: Nysa Products
❤️LET'S BE SOCIAL: Instagram: Krista Shirley Yoga Instagram: The Yoga Shala Facebook: The Yoga Shala Facebook: KristaShirleyYoga For other inquires please contact: krista@theyogashala.org Ashtanga Yoga is a dynamic and transformative practice that encompasses a sequence of postures designed to harmonize the body, mind, and spirit. One of the first seated poses in the Ashtanga Yoga Primary series seated sequence is Purvottanasana. Purvottanasana translates to upward plank pose or eastern bend stretch. This powerful asana engages the entire body and offers a multitude of benefits, from strengthening the arms and legs to opening the heart and stretching the front of the body. In this blog post, we will break down the steps and provide a vinyasa count to help you master Purvottanasana. 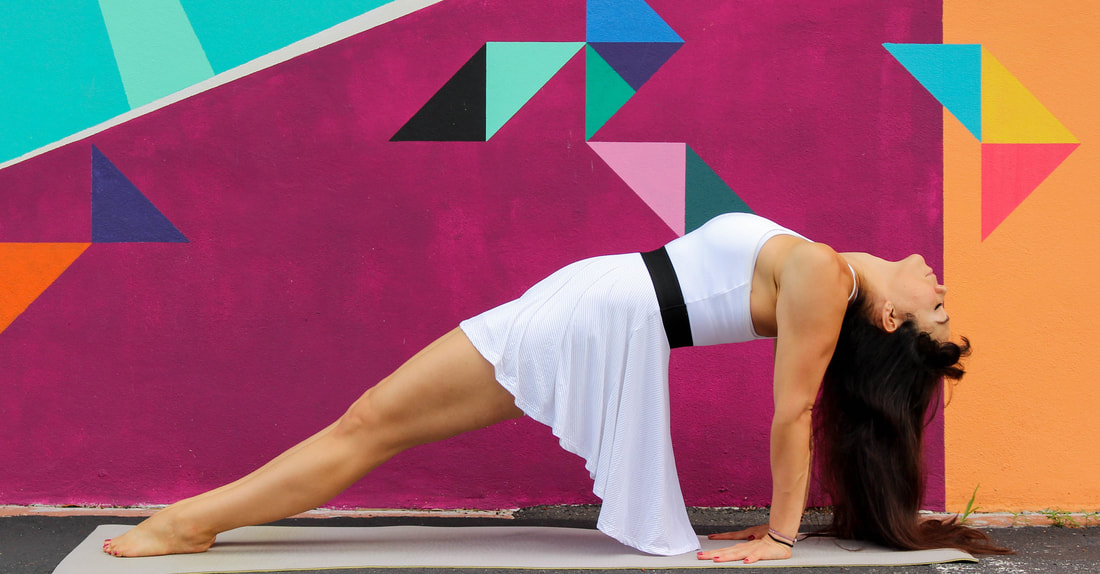 Benefits of Purvottanasana Purvottanasana, or Upward Plank Pose, is a powerful yoga posture that offers a wide range of physical, mental, and energetic benefits. Integrating this pose into your practice can have a positive impact on your overall well-being. Here are some of the key benefits: Strengthens Upper Body: Purvottanasana is an excellent pose for building strength in the arms, wrists, and shoulders. The weight-bearing nature of the pose helps to tone and strengthen these muscles, enhancing stability and balance. Opens the Chest and Shoulders: The pose encourages the chest to expand, leading to improved posture and lung capacity. It also stretches and opens the front of the shoulders, which is particularly beneficial for individuals who spend long hours sitting or working at a computer. Stretches the Front Body: Purvottanasana stretches the front of the body, including the abdomen, hip flexors, and quadriceps. This can alleviate tightness in these areas, promoting greater flexibility and mobility. Activates Core Muscles: Engaging the core muscles is essential for maintaining stability and balance in Purvottanasana. Regular practice of the pose helps to strengthen the abdominal muscles and improve core awareness. Boosts Energy Flow: This pose stimulates the energetic pathways in the body, promoting the flow of prana (life force energy). As a result, it can help invigorate the body and mind, increasing overall vitality. Improves Digestion: The gentle compression of the abdomen in Purvottanasana can aid in improving digestion and metabolism. It can also help relieve gas and bloating. Enhances Spinal Health: The pose encourages a gentle backbend, promoting spinal flexibility and counteracting the effects of hunching over or sitting for extended periods. Develops Mental Focus: Balancing in Purvottanasana requires concentration and mindfulness. Regular practice can enhance your ability to focus and remain present in the moment. Click here to watch a Yoga tutorial breaking down Purvottanasana  Contraindications and Cautions While Purvottanasana offers numerous benefits, there are certain conditions and situations in which this pose should be approached with caution or avoided altogether: Wrist Issues: Individuals with wrist injuries, carpal tunnel syndrome, or acute wrist pain should be cautious when practicing Purvottanasana. Consider starting with a modification for this posture. Shoulder Problems: Those with shoulder injuries, rotator cuff issues, or chronic shoulder pain should approach the pose with care. It's advisable to consult a healthcare professional or a knowledgeable yoga instructor before attempting the pose. Heart Conditions: Individuals with heart conditions, high blood pressure, or any other cardiovascular concerns should approach this pose cautiously. This backbend and inversion-like position can impact blood pressure, so it's best to consult a healthcare provider before practicing. Carpal Tunnel Syndrome: If you have carpal tunnel syndrome or experience numbness and tingling in the hands, consider using padding under the palms or modifying the pose to reduce pressure on the wrists. Pregnancy: Pregnant individuals should approach Purvottanasana with caution. As the abdomen stretches in the pose, it might be uncomfortable for some. Neck Issues: Individuals with neck injuries or chronic neck pain should avoid dropping the head back in Purvottanasana. Instead, they can keep the neck in a neutral position to prevent strain. Remember, your safety and well-being are paramount. Always listen to your body, practice mindfully, and consult a medical professional or experienced yoga instructor if you have any concerns or pre-existing conditions. By practicing Purvottanasana mindfully and with proper alignment, you can enjoy its benefits while minimizing the risk of injury. 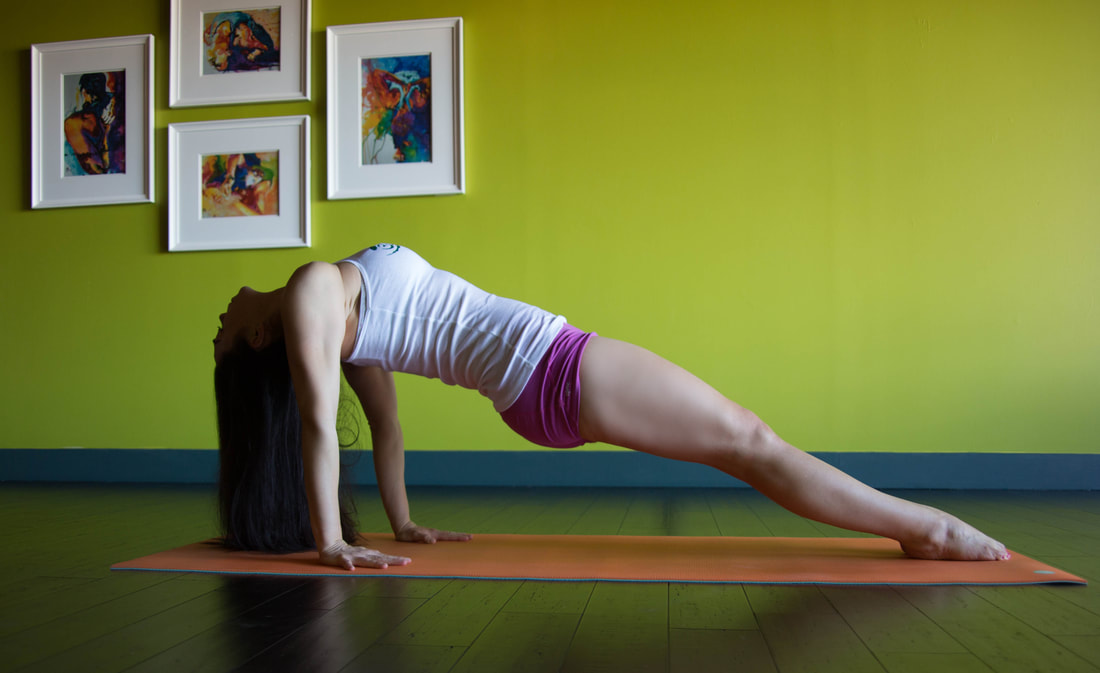 Step-by-Step Guide to Purvottanasana with Sanskrit Vinyasa count We will be entering this posture from downward facing dog, having just taken a vinyasa after Paschimottanasana to seated position. Sapta (Vinyasa #7): From Adho Mukha Svanasana (down dog), look forward and walk or jump your feet through and have a seat on the floor with your legs extended in front of you. Take both hands back behind you, palms down, fingers facing forward. Exhale there. Asthau (Vinyasa #8) Inhale, and press your hands and feet down into the floor as you lift your pelvis upward. Press out of the feet and legs. Take your head back and look down the tip of your nose (Nasagrai Dristhi). Take five deep breaths. Nava (Vinyasa #9) Exhale and lower down. Dasa (Vinyasa #10) Inhale, bring your hands to the floor, cross your legs and lift your body up off the ground. Ekadasa (Vinyasa #11) Exhale and jump back into Chaturanga Dandasana. Dvadasa (Vinyasa #12) Inhale into Urdhva Mukha Svanasana(Upward facing dog) Trayodasa (Vinyasa #13) Exhale into Adho Mukha Svanasana (Downward facing dog) Modifications Modifications can make yoga poses accessible to a wider range of practitioners, allowing them to experience the benefits without straining or risking injury. Here are some modifications for Purvottanasana (Upward Plank Pose): Bent Knee Variation: For individuals with limited hamstring flexibility or lower back sensitivity, you can practice Purvottanasana with your knees bent. Keep your feet on the ground and focus on lifting your hips and opening your chest. This modification reduces strain on the lower back and hamstrings. 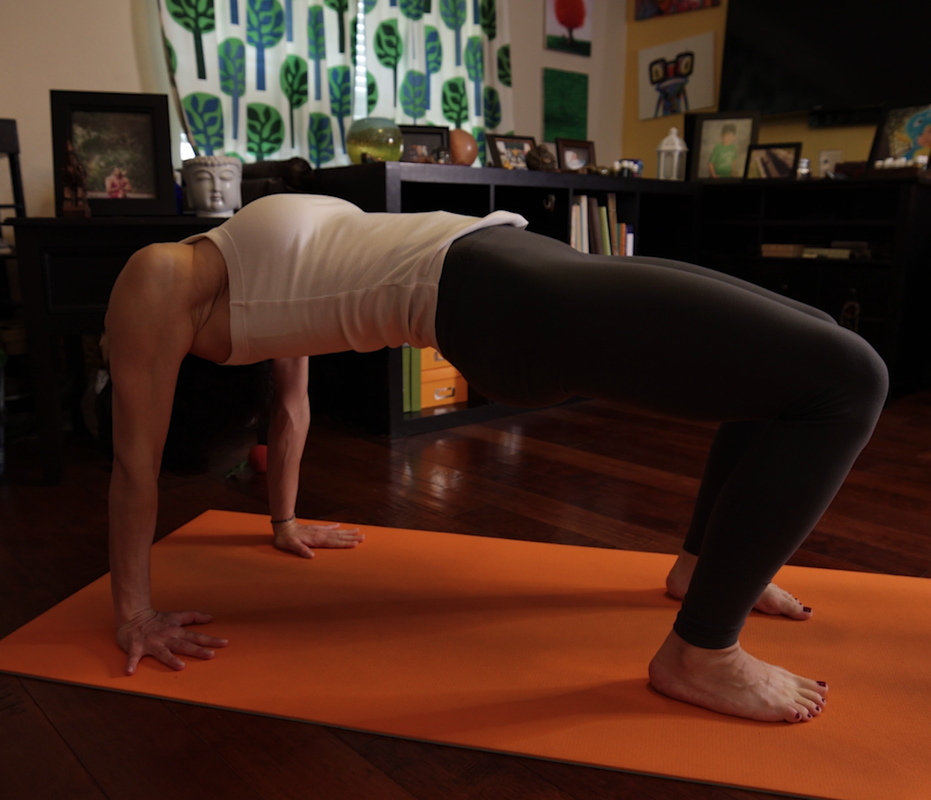 Wall Support: Practicing Purvottanasana against a wall can provide extra support. Begin by sitting against the wall with your hands behind you, fingers pointing towards your feet. Press into your hands and feet to lift your hips while leaning against the wall. This variation helps you focus on engagement and alignment without the risk of falling backward. Assisted Variation: If wrist discomfort is an issue, you can practice Purvottanasana with the assistance of a partner or yoga teacher. They can gently hold your wrists to provide support as you lift your hips. This minimizes pressure on the wrists while allowing you to experience the pose's benefits. Modified Chest Lift: If opening the chest fully is challenging, focus on lifting the hips while keeping your hands behind you. You can gently roll your shoulders back without lifting the chest too much. This modified version still engages the muscles of the upper body and helps you work on the pose gradually. Remember that modifications are meant to enhance your practice, not to "dilute" the pose. Choose the modification that suits your current level of flexibility, strength, and comfort. Over time, as your body becomes more accustomed to the pose, you can gradually explore deeper variations and eventually work towards the full expression of Purvottanasana. Always prioritize proper alignment, breath, and safety in your practice. If you're unsure about which modification is best for you, consult a qualified yoga instructor for guidance.  Purvottanasana is a pose that demands both strength and flexibility, making it a wonderful addition to your yoga practice. Remember, yoga is a journey, and it's important to listen to your body and progress at your own pace. Regular practice, patience, and proper alignment are key to mastering Purvottanasana and reaping its incredible benefits. If you're new to Ashtanga Yoga or have any concerns, consider practicing under the guidance of a certified yoga instructor. Enjoy the process of deepening your practice and discovering the transformative effects of Purvottanasana!  Practice with The Yoga Shala If you want to join us for LIVE classes, The Yoga Shala offers virtual and in person classes every weekday morning. Owner, Krista Shirley, also offers virtual or in person private sessions (Yoga, Meditation, Breath-work, Nutrition, Life Coaching and Mentorship). Visit theyogashala.org for details. Be sure to signup for our newsletter to stay on top of local events and classes, Nysa products sales, new offerings, new products and more! We hope you find this video series helpful to you in creating or maintaining your yoga practice! 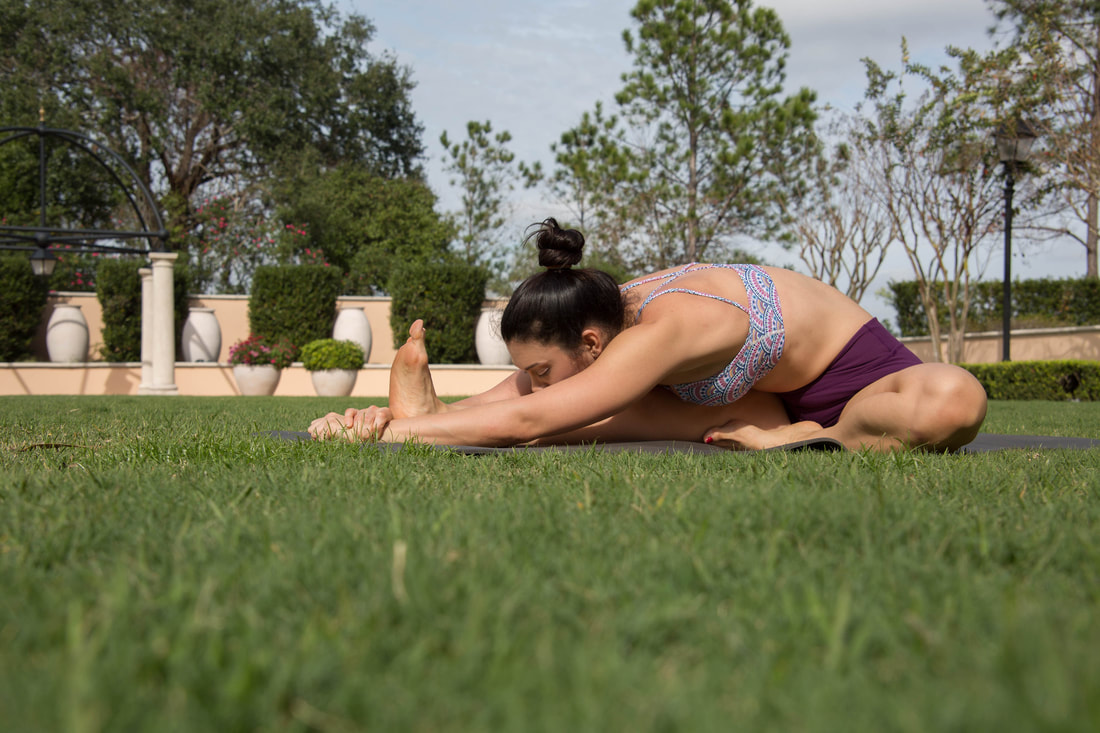 About Krista Krista Shirley is a level II authorized Ashtanga Yoga teacher. She is deeply passionate about sharing these teachings with all who wish to learn. If you want to join Krista in person she teaches daily classes at The Yoga Shala in Winter Park, Florida. She also offers virtual sessions in Yoga, Meditation, Breath-work, Nutrition, Life Coaching and Mentorship. Check out www.theyogashala.org for more details. If you do not live in Central Florida and want to find an authorized teacher in your area, check out our teacher, Sharath Jois’ website, for a list of all teachers authorized and certified by his yoga centre in India.
❤️SHOP MERCHANDISE: Nysa Products
❤️LET'S BE SOCIAL: Instagram: Krista Shirley Yoga Instagram: The Yoga Shala Facebook: The Yoga Shala Facebook: KristaShirleyYoga For other inquires please contact: krista@theyogashala.org Ashtanga Yoga, a dynamic and traditional yoga practice, is revered for its structured series of postures that synchronize breath and movement. One of the foundational poses in this system is Dandasana, also known as Staff Pose. This is the first seated posture of the Ashtanga Yoga Primary Series. In this blog post, we'll look at both Dandasana and Paschimottanasana and learn how to practice it with the Sanskrit Vinyasa Count, which adds a touch of authenticity and depth to your practice. Understanding Dandasana & Paschimottanasana Dandasana and Paschimottanasna serve as a building block for many other asanas in the Ashtanga Yoga series. These poses may appear simple, but they require precision and engagement of various muscle groups. 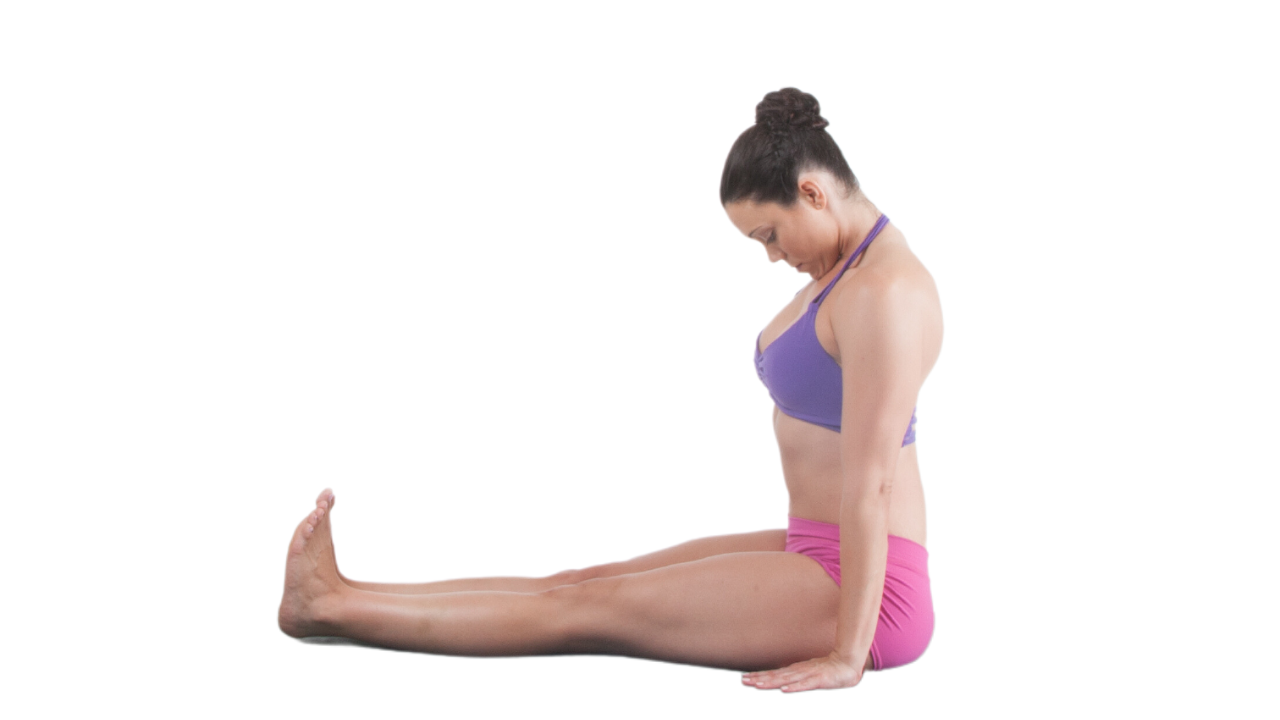 Dandasana - Staff Posture Benefits of Dandasana & Paschimottanasana Improved Posture: Dandasana encourages you to sit with a straight spine and an upright posture. This alignment helps in strengthening the muscles of the back, shoulders, and core, promoting better overall posture. Regular practice Paschimottanasana helps correct rounded shoulders and hunched posture by opening and elongating the spine. It encourages the natural curvature of the spine, promoting better alignment. Core Strength: Engaging the muscles of the abdomen and lower back is essential to maintain the pose correctly. Regular practice of Dandasana helps to tone and strengthen the core muscles, providing stability and support to your spine. Hamstring Flexibility: In Dandasana, your legs are extended straight in front of you. This stretches the hamstrings (the muscles at the back of your thighs) and helps to improve their flexibility over time. Flexible hamstrings can alleviate lower back tension and reduce the risk of injuries. Paschimottanasana targets the hamstrings and lower back, gradually increasing flexibility in these areas. As you deepen your forward fold over time, you'll notice improved range of motion in the hips and hamstrings. Enhanced Spinal Health: The elongation of the spine in Dandasana promotes healthy spinal alignment and decompression. It helps to counteract the negative effects of slouching, which can lead to discomfort and spinal issues. Improved Digestion: Sitting in Dandasana & Paschimottanasana encourages an open chest and an elongated torso. This can aid in improving digestion by allowing more space for your internal organs and facilitating better digestion and elimination. And the forward fold in Paschimottanasana compresses the abdominal region, stimulating the digestive organs. This can help improve digestion, alleviate constipation, and enhance overall gut health. Energy Flow: Practicing Dandasana helps to stimulate the flow of energy (prana) in your body. When the spine is aligned and the breath is regulated, the energy channels (nadis) are believed to open up, creating a balanced and harmonious flow of energy throughout the body. While Paschimottanasana is associated with stimulating the Svadhisthana (sacral) and Manipura (solar plexus) chakras, which are believed to influence creativity, self-confidence, and willpower. Calmness, Grounding and Focus: Dandasana is a seated posture that lends itself well to meditation and introspection. As you sit with an attentive presence, focusing on your breath and alignment, you can experience a sense of calmness and increased mental clarity. The act of folding forward creates a sense of introspection and introspective focus. Paschimottanasana encourages turning inward and cultivating a sense of grounding and presence. Preparation for Other Asanas: Dandasana serves as a foundational pose for more advanced asanas. Proper alignment and engagement in Dandasana help prepare the body for poses that require similar principles, such as seated forward bends and inversions. And regular practice of Paschimottanasana prepares the body for more advanced forward folds and seated poses in the Ashtanga Yoga sequence. Mind-Body Connection: The practice of Dandasana and Paschimottanasana encourage a mindful connection between your breath and movement. The focused awareness required during the pose enhances your mind-body connection, promoting a sense of presence and self-awareness. Relaxation and Stress Relief: Although Dandasana requires effort, it is a relatively calm and grounding pose. The combination of steady breathing and physical alignment can promote relaxation and alleviate stress and tension. And Paschimottanasana is often recommended for relieving symptoms of menstrual discomfort, as it can soothe abdominal cramps and lower back pain. Stretching the Back Body & Releasing Lower Back Tension: Paschimottanasana provides a deep stretch to the entire back body, including the spine, hamstrings, calves, and the muscles along the spine. This elongation helps release tension and improve flexibility in these areas. For individuals with lower back discomfort, Paschimottanasana can offer relief by gently stretching the muscles in the lower back and promoting relaxation in that area. Massaging Internal Organs: The compression of the abdomen in the forward fold massages the internal organs, promoting detoxification, improved blood circulation, and the optimal functioning of organs. Incorporating Dandasana and Paschimottanasana into your yoga practice, especially within the context of the Ashtanga Yoga system, can provide you with a solid foundation for your journey toward physical strength, flexibility, and inner harmony. Remember that consistency is key – the benefits of these postures become more pronounced as you integrate them into your routine over time. Click here to watch a Yoga tutorial breaking down Dandasana and Paschimottanasana 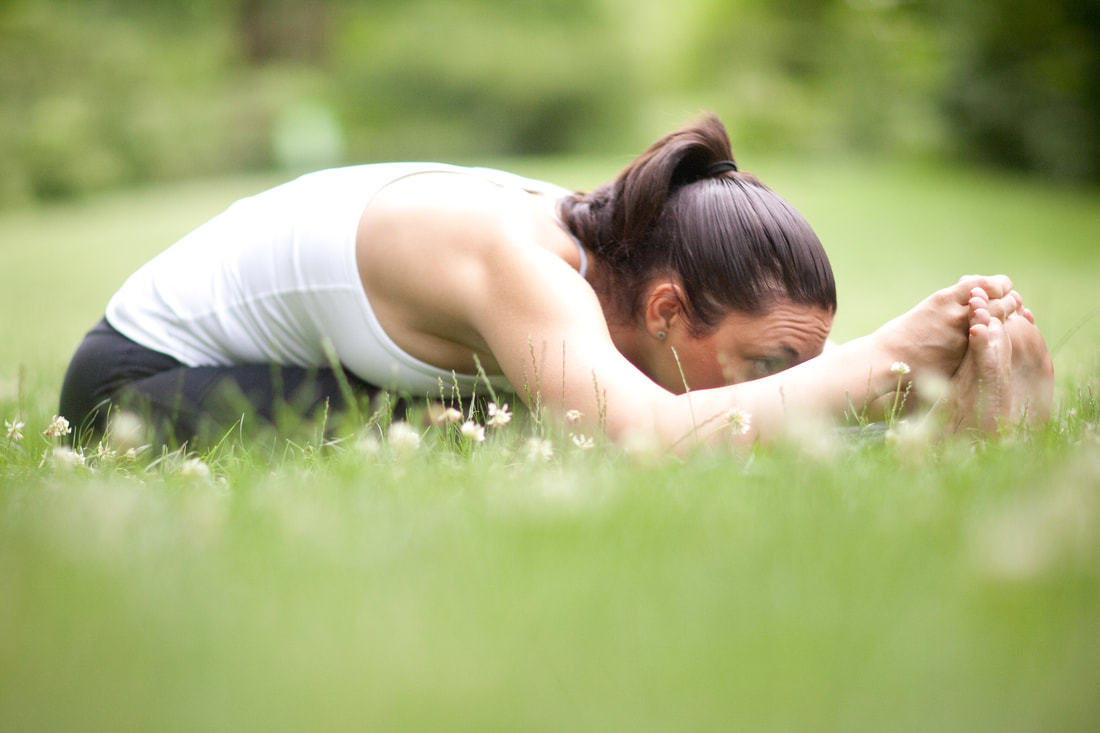 Paschimottanasana - Western Forward Bend Posture Contraindications Back Injuries or Conditions: If you have a recent or chronic back injury, herniated disc, or any other spinal condition, practicing these postures might exacerbate your condition. Always consult with a medical professional before attempting this pose, and consider modifying or skipping it if it causes discomfort. Hamstring Injuries: Dandasana and Paschimottanasana involves stretching the hamstrings. If you have a hamstring injury, be cautious when extending your legs straight. Modify the pose by bending your knees slightly. Knee Issues: If you have knee problems, such as injuries, discomfort, or limited flexibility, practicing Dandasana or Pacchimottanasana with legs extended might strain the knees. Keep your knees slightly bent to prevent strain on the knees. Sciatica: Sciatica refers to pain that radiates along the path of the sciatic nerve, typically affecting the lower back, buttocks, and legs. Dandasana's forward fold can compress the sciatic nerve, potentially worsening the condition. Consult a healthcare professional before attempting this pose if you have sciatica. Pregnancy: As your body changes during pregnancy, Dandasana might become uncomfortable due to the pressure on your abdomen and pelvis. Consider practicing a modified version with support under your hips or avoid the pose if it causes discomfort. Hip or Groin Injuries: If you have a history of hip or groin injuries, be cautious when practicing Dandasana. The external rotation of the hips required for the pose might strain these areas. Use props and modify the pose to suit your comfort level. High Blood Pressure: If you have high blood pressure, the seated position in Dandasana might not be advisable for extended periods. Instead, consider practicing the pose with your back against a wall. Paschimottanasana involves a forward fold that can temporarily increase blood pressure. Individuals with high blood pressure should approach the pose mindfully and avoid excessive compression of the abdomen. Avoid holding the pose for an extended period and come out of it immediately if you feel any discomfort. Recent Abdominal Surgery: If you've had abdominal surgery, Dandasana might place undue pressure on your healing abdominal area. Avoid straining or compressing the area until you've fully healed. And it's best to avoid Paschimottanasana until you have fully healed and received clearance from your healthcare provider. Osteoporosis: Individuals with osteoporosis should approach Dandasana and Paschimottanasana cautiously, especially if there's a risk of vertebral compression fractures. Avoid rounding the spine excessively. General Discomfort: If you experience discomfort or pain while attempting Dandasana, listen to your body. It's important not to force yourself into the pose. Modify the pose or skip it altogether if it doesn't feel right for you. Remember that yoga should be practiced mindfully and with respect for your body's limitations. If you have any underlying health conditions or concerns, it's always a good idea to consult a healthcare professional before starting a new yoga practice or attempting specific poses like Dandasana or Paschimottanasana. An experienced yoga teacher can also guide you through modifications or alternatives that suit your individual needs. Sanskrit Vinyasa Count: Adding a Traditional Dimension In Ashtanga Yoga, the practice is guided by a specific counting method in Sanskrit, which directs both the breath and the movement. This precise system enhances the meditative aspect of the practice, creating a seamless flow of energy and consciousness. Benefits of Practicing Dandasana and Paschimottanasana with Sanskrit Vinyasa Count Practicing Dandasana with the Sanskrit Vinyasa Count enhances your connection to the ancient roots of Ashtanga Yoga. The rhythmic counting and synchronized breath allow you to cultivate mindfulness, fostering a deeper mind-body connection. Additionally, the specific cues offered by the Sanskrit count help you refine your alignment and experience the pose more profoundly. 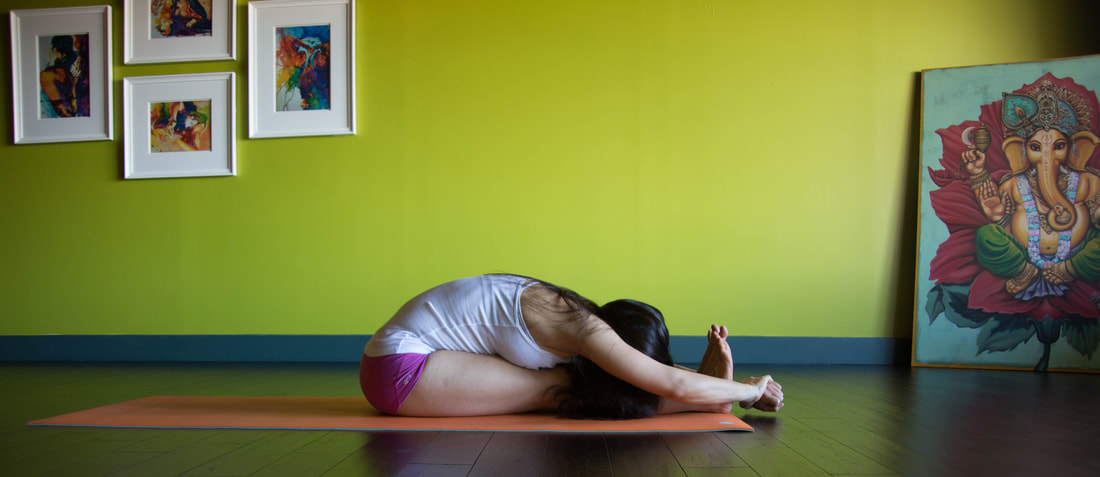 Step by Step Instructions for practicing Dandasana and Paschimottanasana using the Sanskrit Vinyasa Count: Sapta (Vinyasa #7): From Adho Mukha Svanasana (down dog), look forward and walk or jump your feet through and have a seat on the floor with your legs extended in front of you. Flex your feet, engaging the quadriceps and pressing your heels forward as you press your tailbone backward. Place your palms on the floor beside your hips, fingers pointing forward. Bring your chin to your chest and look toward your nose (nasagrai drishti). Take five deep breaths here. As you breathe in, elongate your spine, lifting your chest slightly. This action should come from your core, not your lower back. Asthau (Vinyasa #8) Inhale and lengthen your spine. Head up. Grab your grab your big toes with your thumb, index finger and middle fingers. Nava (Vinyasa #9) Exhale and fold forward. Flex your feet, engage your quadriceps, and hinge at your hips to fold forward from the hips. Look towards your toes (Padhayoragrai drishti Take five deep breaths. Dasa (Vinyasa #10) Inhale - lift your head and torso up. Nava (Vinyasa #9) Exhale - grab the outside of your feet with your hands (or bind your hands) and fold forward. Take five deep breaths Dasa (Vinyasa #10) Inhale - lift your head and torso up. Exhale there. Ekadasa (Vinyasa #11) - On your inhale, bring your hands to the floor, cross your legs and lift your body up off the ground. Dvadasa (Vinyasa #12) - Exhale and jump back into Chaturanga Dandasana. Trayodasa (Vinyasa #13)- Inhale into Urdhva Mukha Svanasana(Upward facing dog) Caturdasa (Vinyasa #14) - Exhale into Adho Mukha Svanasana (Downward facing dog) Click here to watch a Yoga tutorial breaking down Dandasana and Paschimottanasana Practicing Paschimottanasana with the traditional Sanskrit vinyasa count provides a deeper connection between your breath and movement, enhancing the benefits of this pose. Remember that yoga is a journey, and it's important to honor your body's limitations while gradually working towards greater flexibility and awareness. As you integrate the Sanskrit vinyasa count into your practice, you'll find a meditative flow that not only nurtures your physical body but also calms your mind and uplifts your spirit. So unroll your mat, follow the steps, and embrace the transformative journey of Ashtanga Yoga and Paschimottanasana.  Modifications If you have tightness in certain areas or are working through an injury or illness, modifying Dandasana (Staff Pose) can make the pose more accessible and comfortable. Here are some modifications you can try: Bend Your Knees: If you have tight hamstrings, consider bending your knees slightly. This modification reduces the intensity of the hamstring stretch and can make the pose more comfortable. Gradually work on straightening your legs over time as your flexibility improves. For now focus on gently pressing your heel forward and your tailbone backwards through space to create extension through your spine. Do NOT try to straighten your leg by pressing your knee downward. Instead, ground through your sitzbones and press your heel forwards. Work with your breathe and bandhas. Wall Support: If you have tightness in your back or difficulty sitting upright, practice Dandasana & Paschimottanasana against a wall. Sit with your back against the wall and your legs extended in front of you. The wall provides gentle support, helping you maintain an aligned spine. Chair Modification: For individuals with significant tightness in the hamstrings or back, you can practice a seated version of Dandasana and Paschimottanasana on a chair. Sit at the edge of the chair, extend your legs in front of you, and place your hands on the seat or armrests. This reduces the intensity of the stretch while still allowing you to benefit from the pose. Similarly, for Paschimottanasana, sit on the edge of a chair, feet flat on the floor. Hinge at the hips and fold forward, resting your forearms or hands on your thighs. This seated modification minimizes strain on the hamstrings. Practice Mindful Breathing: Regardless of the modifications you choose, focus on your breath and the alignment of your spine. Mindful breathing can help you relax into the pose and release tension in your back and hamstrings over time. Shoulder Mobility Variation: If you have tight shoulders or limited mobility in your upper body, you can practice Dandasana with your hands placed slightly behind your hips and fingers pointing forward. This variation allows you to maintain an upright spine while providing a more comfortable arm position. Modifications in yoga are not a sign of weakness; they are tools that empower you to practice safely and with respect for your body's needs. Paschimottanasana can be adapted in various ways to accommodate your individual circumstances. Listen to your body, make use of props, and always prioritize comfort and alignment. With consistent practice and patience, you'll gradually discover the benefits of this pose, regardless of your current level of flexibility. Click here to watch a Yoga tutorial breaking down Dandasana and Paschimottanasana  Practice with The Yoga Shala If you want to join us for LIVE classes, The Yoga Shala offers virtual and in person classes every weekday morning. Owner, Krista Shirley, also offers virtual or in person private sessions (Yoga, Meditation, Breath-work, Nutrition, Life Coaching and Mentorship). Visit theyogashala.org for details. Be sure to signup for our newsletter to stay on top of local events and classes, Nysa products sales, new offerings, new products and more! We hope you find this video series helpful to you in creating or maintaining your yoga practice! 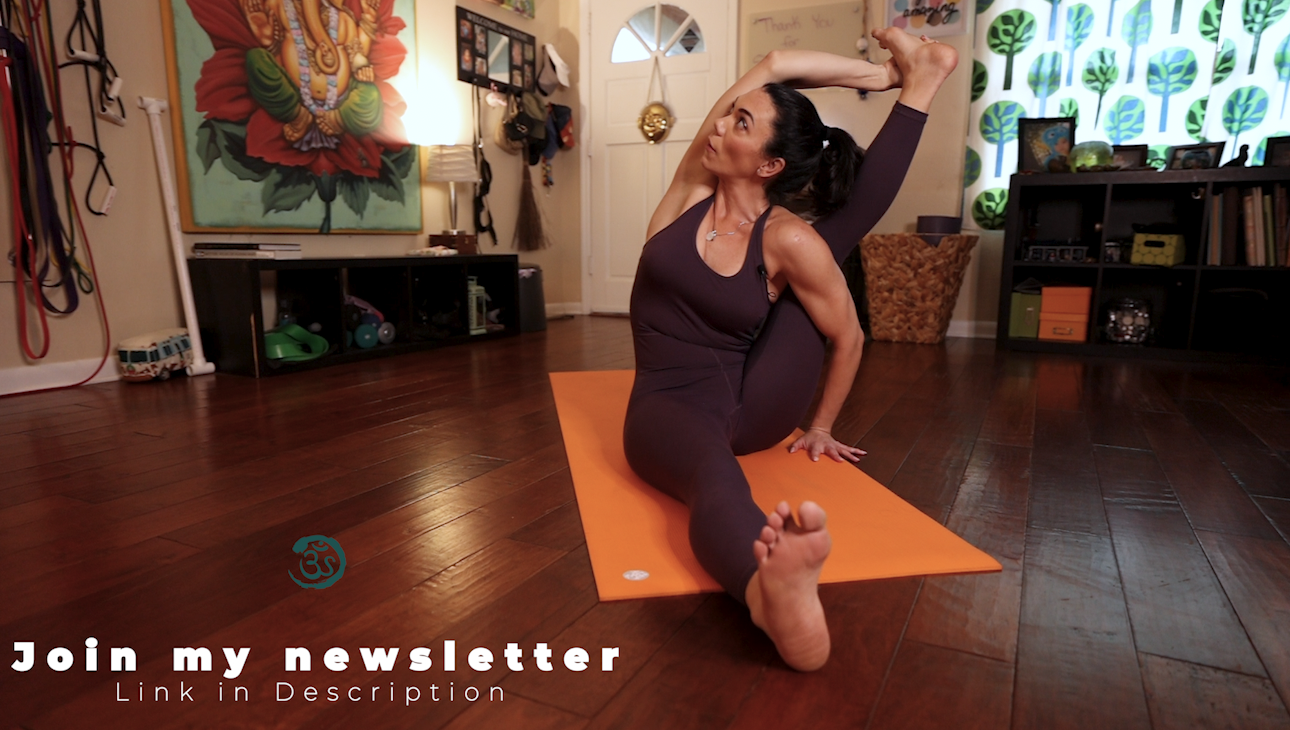 About Krista Krista Shirley is a level II authorized Ashtanga Yoga teacher. She is deeply passionate about sharing these teachings with all who wish to learn. If you want to join Krista in person she teaches daily classes at The Yoga Shala in Winter Park, Florida. She also offers virtual sessions in Yoga, Meditation, Breath-work, Nutrition, Life Coaching and Mentorship. Check out www.theyogashala.org for more details. If you do not live in Central Florida and want to find an authorized teacher in your area, check out our teacher, Sharath Jois’ website, for a list of all teachers authorized and certified by his yoga centre in India. Check out other Yoga tutorials on the Ashtanga Practice
❤️SHOP MERCHANDISE: Nysa Products
❤️LET'S BE SOCIAL: Instagram: Krista Shirley Yoga Instagram: The Yoga Shala Facebook: The Yoga Shala Facebook: KristaShirleyYoga For other inquires please contact: krista@theyogashala.org One of the foundational poses in Ashtanga Yoga, and the very last standing sequence pose, is Virabhadrasana, or Warrior Pose. This standing pose not only builds strength and flexibility but also instills a sense of inner power and focus. In this blog post, we'll guide you through the steps of performing Virabhadrasana with proper alignment and vinyasa count, helping you integrate it seamlessly into your Ashtanga yoga routine. Vīrabhadrāsana will take you further into the realm of balancing strength and focus, control and engagement. You’ll certainly be working and feeling your legs and glutes and back, but you’ll also feel your arm muscles (triceps), your inner thigh muscles and well all the muscles in between! If you do this posture properly, it will ask that you engage everything in your body, with its own weight, as you hold and then move that weight through space. Not only does it eliminate the need to actually lift weights as you begin to use your body properly as a weight to train with, but it also teaches your body how to work with gravity, not fight against it; which will serve you well as you age. 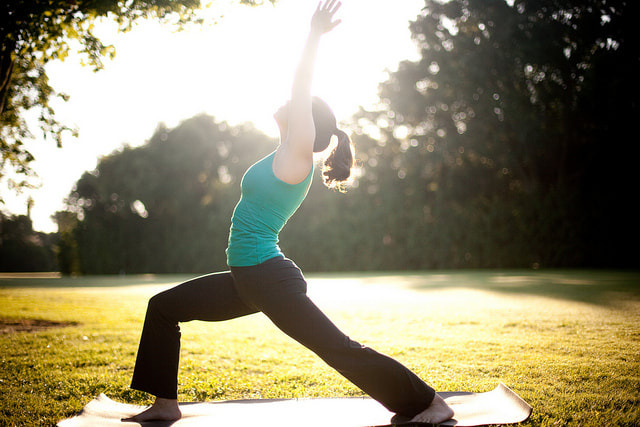 Benefits of Virabhadrasana (Warrior Pose): Strength and Stamina: Virabhadrasana strengthens the legs, core, and upper body, enhancing overall physical strength and stamina. Flexibility: This pose stretches the hips, groin, and thighs, improving flexibility and range of motion in these areas. Improved Posture: Regular practice of Virabhadrasana helps correct postural imbalances and promotes a tall and strong spine. Balance: The pose challenges balance and stability, improving coordination and focus. Mental Focus: The concentrated gaze (drishti) required in this pose fosters mental concentration and presence. Inner Confidence: As the name suggests, Virabhadrasana invokes a sense of inner strength, confidence, and determination. Hip Opener: The pose opens the hips, which can relieve tension and discomfort in the hip area. Chest Expansion: The lifted arms and open chest promote expansion in the chest and shoulders, counteracting the effects of hunching. 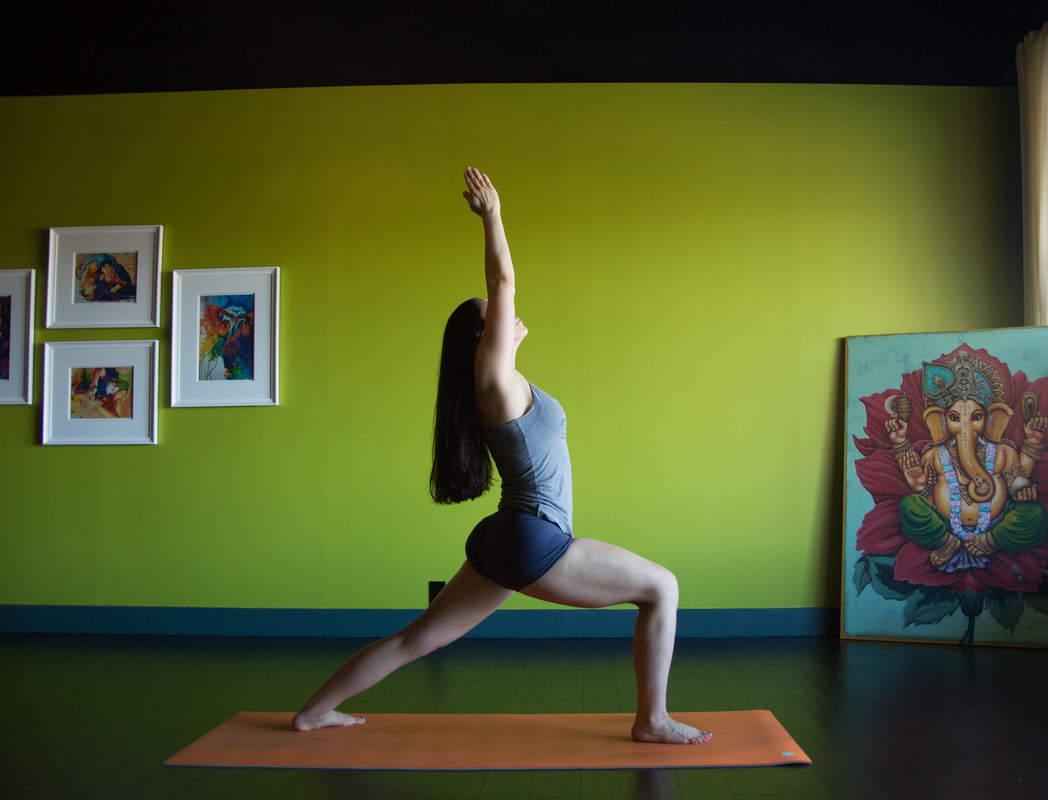 Contraindications and Cautions: While Virabhadrasana offers numerous benefits, there are some contraindications and cautions to consider: High Blood Pressure: Those with high blood pressure should be cautious while practicing Warrior Pose, especially Virabhadrasana II, as the extended arms can potentially raise blood pressure. Heart Conditions: Individuals with heart conditions should approach this pose with care, avoiding excessive strain on the heart and maintaining moderation. Knee Issues: If you have knee injuries or issues, avoid deep bending in the knee of the front leg, and keep the knee in line with the ankle to prevent additional strain. Neck and Shoulder Issues: Individuals with neck or shoulder injuries should avoid excessive strain on these areas while lifting the arms. Pregnancy: Pregnant practitioners should modify the pose by widening the stance and avoiding deep lunges to accommodate their changing center of gravity. Hip Issues: If you have hip issues, modify the pose to avoid excessive external rotation of the hip joint and make sure to consult with a qualified yoga teacher or healthcare professional. Lower Back Issues: Those with lower back problems should be cautious while practicing Virabhadrasana, maintaining proper alignment and avoiding overarching the lower back. Recent Surgery: If you've recently had surgery, particularly on the hips, knees, or shoulders, consult your doctor or physical therapist before attempting this pose. Remember, individual bodies vary, so it's essential to listen to your body and work within your own limitations. If you're new to yoga or have any underlying health concerns, it's recommended to practice under the guidance of a qualified yoga instructor or healthcare professional. Always prioritize safety and comfort in your practice. Click here to watch a Yoga tutorial breaking down Virabhadrasana 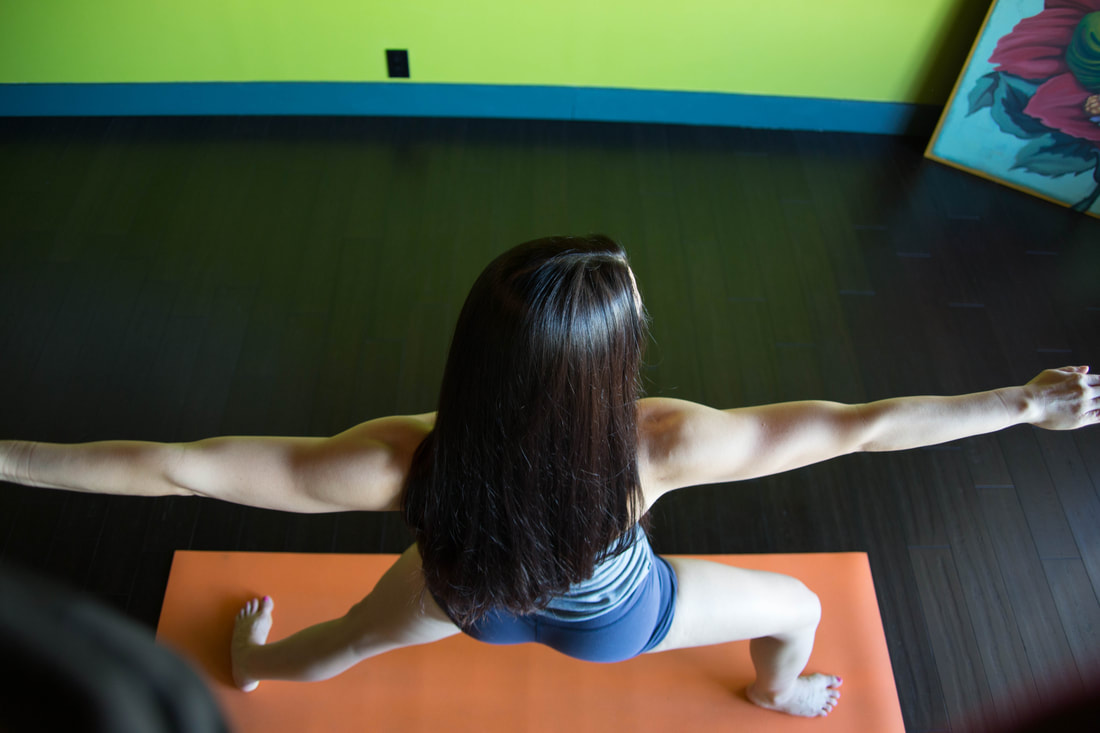 Step-by-Step Instructions for Virabhadrasana I & II (Warriors) with vinyasa count: Virabhadrasana comes right after Utkatasana in the Ashtanga Yoga standing sequence. We will begin the vinyasa count for today’s posture from Downward facing dog or position #6 (sat): Virabhadrasana A (or I) Sapta (Vinyasa #7) - from down dog, pivot your left foot flat (45 degree angle) and step your right foot forward between your hand. Inhale raise your arms up over head and press your palms together. Lookup to your hands (hastagrai Drishti). Take five deep breaths Make sure you continuously press your feet down and out and lift your chest upwards. Ashtau (Vinyasa #8)- Exhale, straighten your right leg and reverse your feet so you are facing the back of your mat. Bend your left knee to 90 degrees. At the same time, try to keep your arms in the air overhead with palms together, and your eyes up to your hands. Look up to your hands (hastagrai Drishti) Take five deep breaths Virabhadrasana B (or II) Nava (Vinyasa #9)- Inhale - take your arms out to the side in line with your feet. Keep your left knee bent. Externally rotate your right hip out to the right and left knee to the left. Engage your back and extend through your arms and fingers. Look to the fingers of your left hand (hastagrai drishti) Take five deep breaths Dasa (Vinyasa #10)- Inhale - straighten your left leg, reverse your feet and bend into your right knee 90 degrees. Keep your arms extended, your back engaged and reach out through your fingers. Press your feet down and out. Look to the fingers of your right hand (hastagrai dristhi) Ekadasa (Vinyasa #11)- Inhale - At the end of your fifth exhale, lower your arms to the floor placing your right hand to the outside of your right foot and left hand outside your left foot. In a more advanced version, press your hands into the floor and lift your lower body off the ground to jump back. Dvadasa (Vinyasa #12)- Exhale - step or jump back into Chaturanga Dandasana. Trayodasa (Vinyasa #13)- Inhale - Upward facing dog Caturdasa (Vinyasa #14) - Exhale - downward facing dog Click here to watch our Yoga tutorial breaking down Virabhadrasana There are several modifications you can explore for Virabhadrasana (Warrior Pose) to adapt the pose to your body's needs and limitations. Here are some modifications for both Virabhadrasana I and II: Modifications for Virabhadrasana I (Warrior I): Arm Variation: If reaching the arms overhead causes discomfort, keep your hands on your hips or place them in prayer position at your chest. Feet Position: If you have difficulty with balance or hip flexibility, shorten your stance by bringing the feet closer together. Back Foot Angle: Instead of pivoting the back foot at a 45-degree angle, keep it parallel to the back of your mat. This reduces strain on the hips and allows for greater stability. Modifications for Virabhadrasana II (Warrior II): Shortened Stance: If balance is challenging, reduce the distance between your feet to create a shorter stance. Gaze Direction: If looking over your front hand strains your neck, maintain a neutral gaze forward or downward. Arm Position: If raising the arms parallel to the floor is uncomfortable, rest your hands on your hips or maintain them in a prayer position. Remember that modifications should be tailored to your individual needs and any existing injuries. It's essential to communicate with your body and prioritize safety over achieving a "perfect" pose. Yoga is about listening to your body and finding what works best for you in each moment. If you're unsure about which modifications to try, consider practicing under the guidance of a knowledgeable yoga teacher who can provide personalized assistance and adjustments. 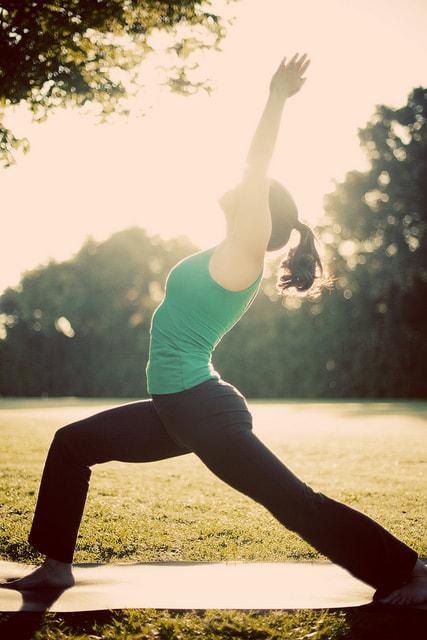 Virabhadrasana, or Warrior Pose, is an essential component of Ashtanga yoga standing sequence. Its dynamic nature not only enhances physical strength and flexibility but also cultivates mental focus and determination. Remember to pay attention to your breath and alignment as you flow through Virabhadrasana I and II, and smoothly integrate the vinyasa count for a harmonious practice. With consistent effort and mindful practice, you'll find yourself embodying the qualities of a warrior on and off the mat. If you would like to practice Virabhadrasana interactively and on demand, click here to check out our YouTube tutorial on the warrior poses. Practice with The Yoga Shala If you want to join us for LIVE classes, The Yoga Shala offers virtual and in person classes every weekday morning. Owner, Krista Shirley, also offers virtual or in person private sessions (Yoga, Meditation, Breath-work, Nutrition, Life Coaching and Mentorship). Visit theyogashala.org for details. Be sure to signup for our newsletter to stay on top of local events and classes, Nysa products sales, new offerings, new products and more! We hope you find this video series helpful to you in creating or maintaining your yoga practice! About Krista Krista Shirley is a level II authorized Ashtanga Yoga teacher. She is deeply passionate about sharing these teachings with all who wish to learn. If you want to join Krista in person she teaches daily classes at The Yoga Shala in Winter Park, Florida. She also offers virtual sessions in Yoga, Meditation, Breath-work, Nutrition, Life Coaching and Mentorship. Check out www.theyogashala.org for more details. If you do not live in Central Florida and want to find an authorized teacher in your area, check out our teacher, Sharath Jois’ website, for a list of all teachers authorized and certified by his yoga centre in India.
❤️SHOP MERCHANDISE: Nysa Products
❤️LET'S BE SOCIAL: Instagram: Krista Shirley Yoga Instagram: The Yoga Shala Facebook: The Yoga Shala Facebook: KristaShirleyYoga For other inquires please contact: krista@theyogashala.org Utkatasana is also known as Chair or Fierce pose. This foundational standing pose is the second to last posture in the Ashtanga Yoga standing sequence. Utkatasana offers myriad benefits for the body and mind, fostering strength, balance, and focus. In this step by step guide, we will break down the process of performing Utkatasana with precision and provide the vinyasa count in Sanskrit, allowing for a seamless integration into your Ashtanga routine. 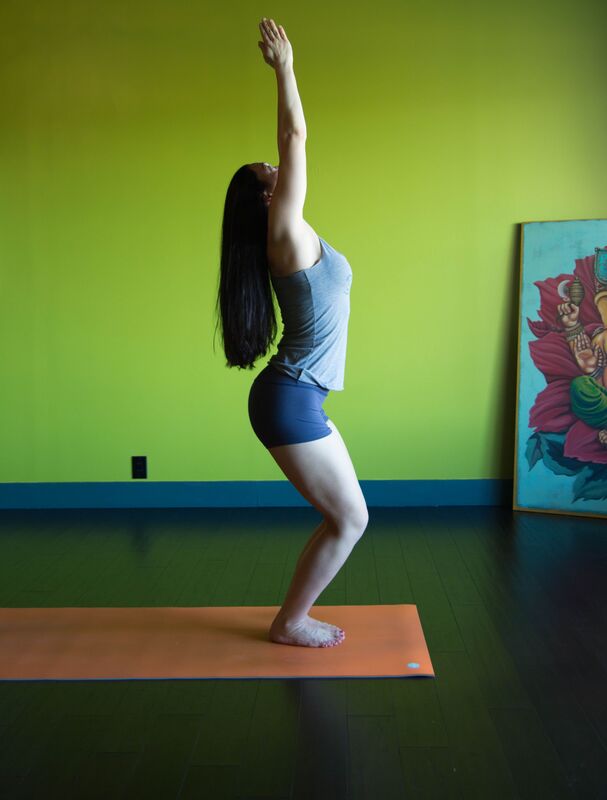 Benefits of Utkatasana (Chair Pose): Strengthens Lower Body Utkatasana primarily targets the muscles of the lower body, including the quadriceps, hamstrings, calves, and glutes. This strengthens these muscles, improving overall stability and support. Enhances Balance The pose challenges your balance as you maintain the seated position, improving proprioception and coordination. Tones Core Muscles Engaging your core muscles in Utkatasana helps to stabilize your spine and supports better posture. Opens Chest and Shoulders The raised arms and expanded chest in this pose encourage better lung capacity and enhance flexibility in the chest and shoulders. Stimulates Digestion The compression of the abdominal region in Utkatasana massages the digestive organs, aiding digestion and metabolism. Energizes the Body Holding the pose requires strength and effort, which increases blood flow and invigorates the body. Builds Mental Focus Utkatasana demands concentration and mental engagement, fostering mindfulness and mental clarity. Prepares for Other Poses This pose serves as a foundational pose that prepares the body for more challenging asanas in the Ashtanga Yoga sequence. Tap here to watch a step-by-step tutorial video of Utkatasana 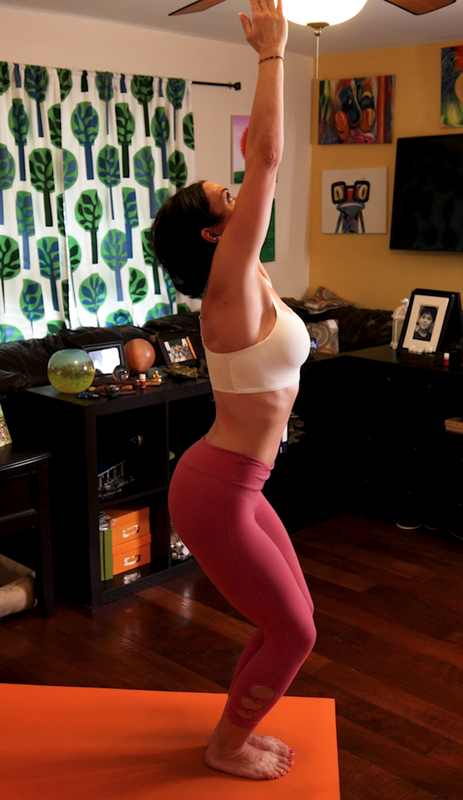 Contraindications and Cautions While Utkatasana offers a range of benefits, it may not be suitable for everyone. Here are some contraindications and precautions to consider: Knee Issues: If you have knee injuries or chronic knee pain, approach Utkatasana with caution. Avoid deep bending and practice with modifications or under the guidance of a qualified instructor. Lower Back Pain: Individuals with lower back issues should be mindful of their alignment in this pose. Engage your core to protect the lower back and avoid over-arching. Ankle or Hip Problems: People with ankle or hip injuries should practice with care, avoiding excessive strain on these areas. High Blood Pressure: If you have high blood pressure, be cautious with the breath retention (holding the breath) that may occur during the pose. Focus on a steady, controlled breath. Pregnancy: Expectant mothers should modify Utkatasana to avoid pressure on the abdomen and the potential risk of falling. To take the posture safely, step your feet hip distance apart before raising your arms overhead. Insomnia or Headaches: For those dealing with insomnia or headaches, avoid excessive strain and pressure on the head and neck. Heart Conditions: If you have heart conditions, approach Utkatasana cautiously. Focus on proper breath control and avoid straining excessively. Always listen to your body and practice within your limits. If you're new to yoga or have any underlying health concerns, it's recommended to consult a healthcare professional or a qualified yoga instructor before attempting Utkatasana or any other yoga pose. With proper alignment and awareness, Utkatasana can become a valuable addition to your yoga practice, promoting both physical strength and mental clarity. Tap here to watch a step-by-step tutorial video of Utkatasana. Step by Step Instructions for taking Utkatasana or Chair Pose: In the Ashtanga yoga standing sequence, we take Utkatasana after we have taken Ardha Baddha Padmottanasana. Once you exit Ardha Baddha Padmottanasana and vinyasa, you will begin the Vinyasa count for Utkatasana from Downward facing dog (Adho Mukha Shvanasana). Sapta - from down dog, look forward and inhale as you jump your feet to your hands, bend your knees and raise your arms. Take five deep breaths Look to your fingers, hastagrai drishti Ashtau - Exhale, bring your hands to the floor next to your feet and still looking forward, jump your feet back into Chaturanga Dandasana. From there you will complete your vinyasa and prepare to take Virabhadra (Warrior). Utkatasana, also known as Chair Pose, holds a significant place in the Ashtanga Yoga practice. It is one of the final standing sequence postures and it will challenge your strength and endurance. Embrace the challenge and honor the synergy of alignment, breath, and focus that Utkatasana brings. With consistent practice, you will not only enhance your physical prowess but also nurture your mental resilience, propelling you towards greater depths of your yogic journey. So, unroll your mat, embody the spirit of Utkatasana, and unlock its transformative potential. Modifications: Modifications for Utkatasana (Chair Pose) can be helpful for individuals with varying levels of flexibility, strength, or specific physical limitations. These modifications ensure that you can still experience the benefits of the pose while adapting it to your body's needs. Here are some modifications for Utkatasana: Hands at Heart Center: Instead of raising your arms overhead, keep your hands at heart center in Anjali Mudra (prayer position). This variation reduces shoulder strain while still engaging your core and lower body. Shallower Bend: Start by bending your knees just slightly. This will decrease the intensity of the pose, making it more accessible, especially if you have knee or lower back concerns. Using a Wall: Stand with your back against a wall and lower yourself into the chair pose while sliding down the wall. This provides support and helps maintain proper alignment. Wide Stance: Start this posture in a wider stance than usual. From hip distance, step out a little further. This can help decrease pressure on the knees and make the pose more accessible. Remember that modifications are meant to support your practice and make poses accessible. It's always recommended to practice under the guidance of a knowledgeable yoga instructor, especially if you're dealing with specific limitations or injuries. By choosing the right modification, you can comfortably incorporate Utkatasana into your practice and gradually progress as your strength and flexibility improve. Practice with The Yoga Shala If you want to join us for LIVE classes, The Yoga Shala offers virtual and in person classes every weekday morning. Owner, Krista Shirley, also offers virtual or in person private sessions (Yoga, Meditation, Breath-work, Nutrition, Life Coaching and Mentorship). Visit theyogashala.org for details. Be sure to signup for our newsletter to stay on top of local events and classes, Nysa products sales, new offerings, new products and more! We hope you find this video series helpful to you in creating or maintaining your yoga practice!  About Krista Krista Shirley is a level II authorized Ashtanga Yoga teacher. She is deeply passionate about sharing these teachings with all who wish to learn. If you want to join Krista in person she teaches daily classes at The Yoga Shala in Winter Park, Florida. She also offers virtual sessions in Yoga, Meditation, Breath-work, Nutrition, Life Coaching and Mentorship. Check out www.theyogashala.org for more details. If you do not live in Central Florida and want to find an authorized teacher in your area, check out our teacher, Sharath Jois’ website, for a list of all teachers authorized and certified by his yoga centre in India.
❤️SHOP MERCHANDISE: Nysa Products
❤️LET'S BE SOCIAL: Instagram: Krista Shirley Yoga Instagram: The Yoga Shala Facebook: The Yoga Shala Facebook: KristaShirleyYoga For other inquires please contact: krista@theyogashala.org Ardha Baddha Padmottanasana (Half Bound Lotus Forward Bend) Ashtanga Yoga is an ancient practice that involves a sequence of postures designed to foster physical strength, flexibility, and mental clarity. Ardha Baddha Padmottanasana, a standing balance pose in the Ashtanga series, offers a plethora of benefits for both body and mind. This blog post will walk you through the step-by-step instructions, using the traditional Sanskrit vinyasa count, to help you master this pose and elevate your yoga journey. 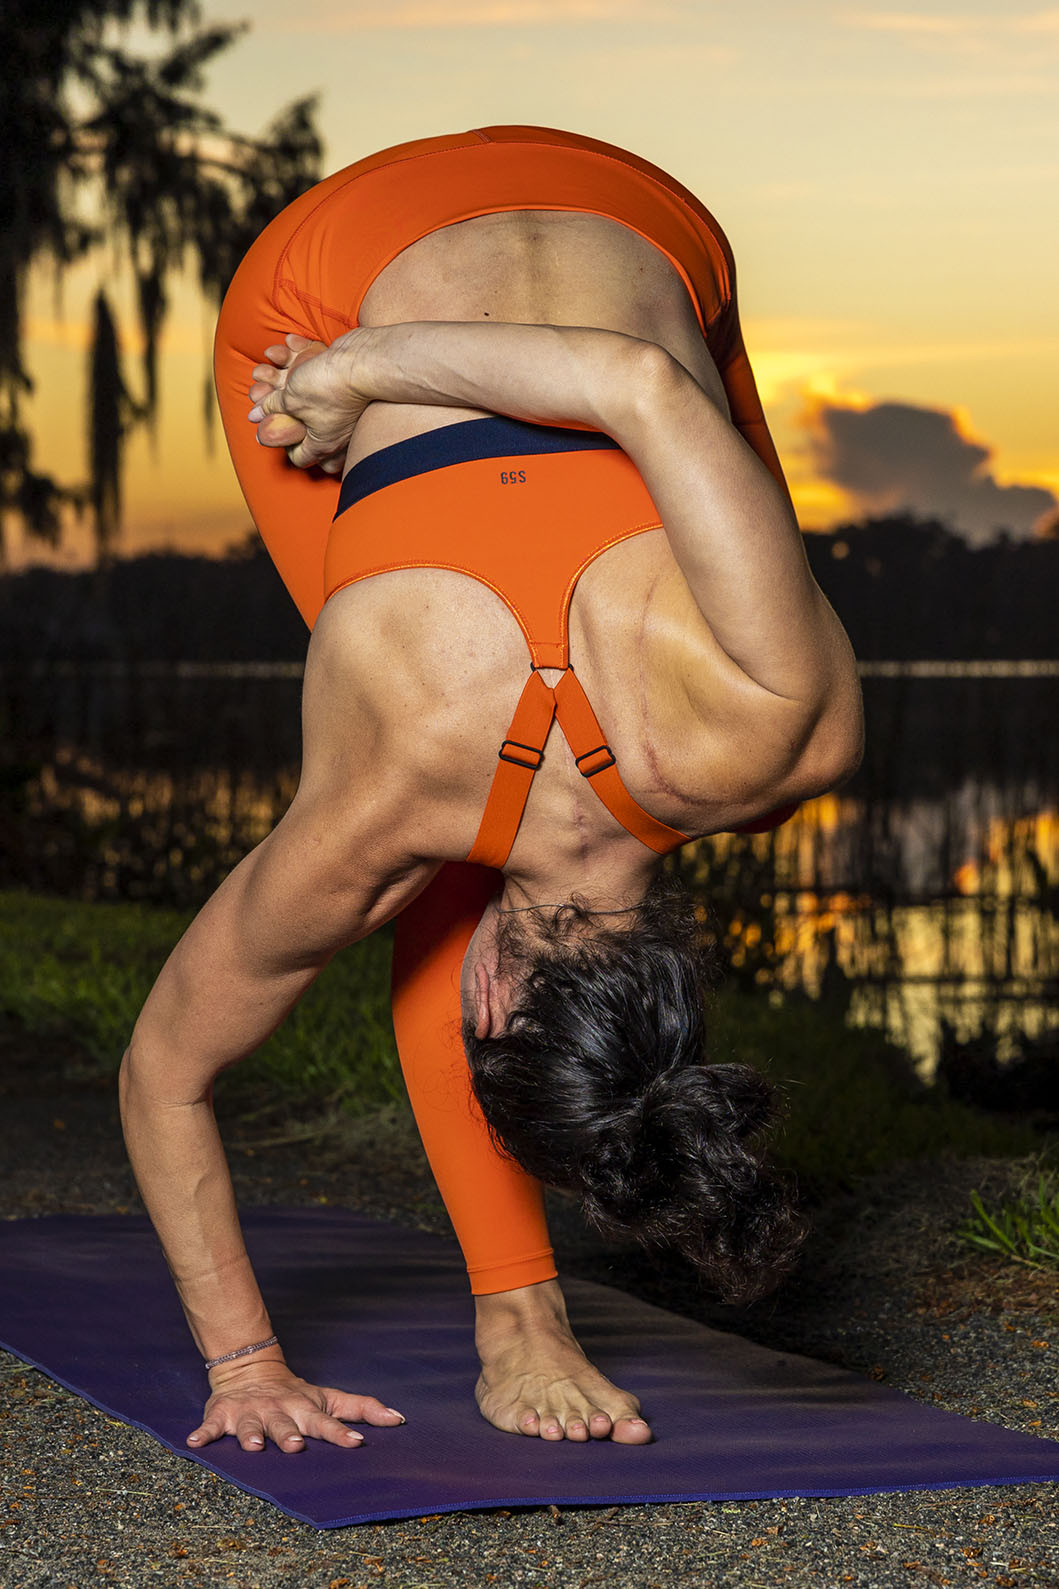 Benefits of Ardha Baddha Padmottanasana: Hip Flexibility: This pose deeply opens the hip joint, improving flexibility and range of motion in the hips. It stretches the hip flexors, groins, and external rotators. Hamstring Stretch: Ardha Baddha Padmottanasana provides an intense stretch to the hamstrings, which can help alleviate tightness and improve flexibility in the back of the legs. Balance and Core Engagement: The pose requires balancing on one leg while holding the foot in half lotus position. This challenges your sense of balance and engages the core muscles for stability. Forward Bending Benefits: The forward bending action lengthens the spine, releases tension in the back muscles, and massages the abdominal organs, aiding digestion. Improved Concentration: Balancing poses like Ardha Baddha Padmottanasana demand focus and concentration, promoting a calm and centered mind. Energy Flow: The activation of the legs and the opening of the hips help to stimulate the flow of prana (life force energy) through the body's energy channels. Click here to watch a Yoga tutorial breaking down Ardha Baddha Padmottanasana 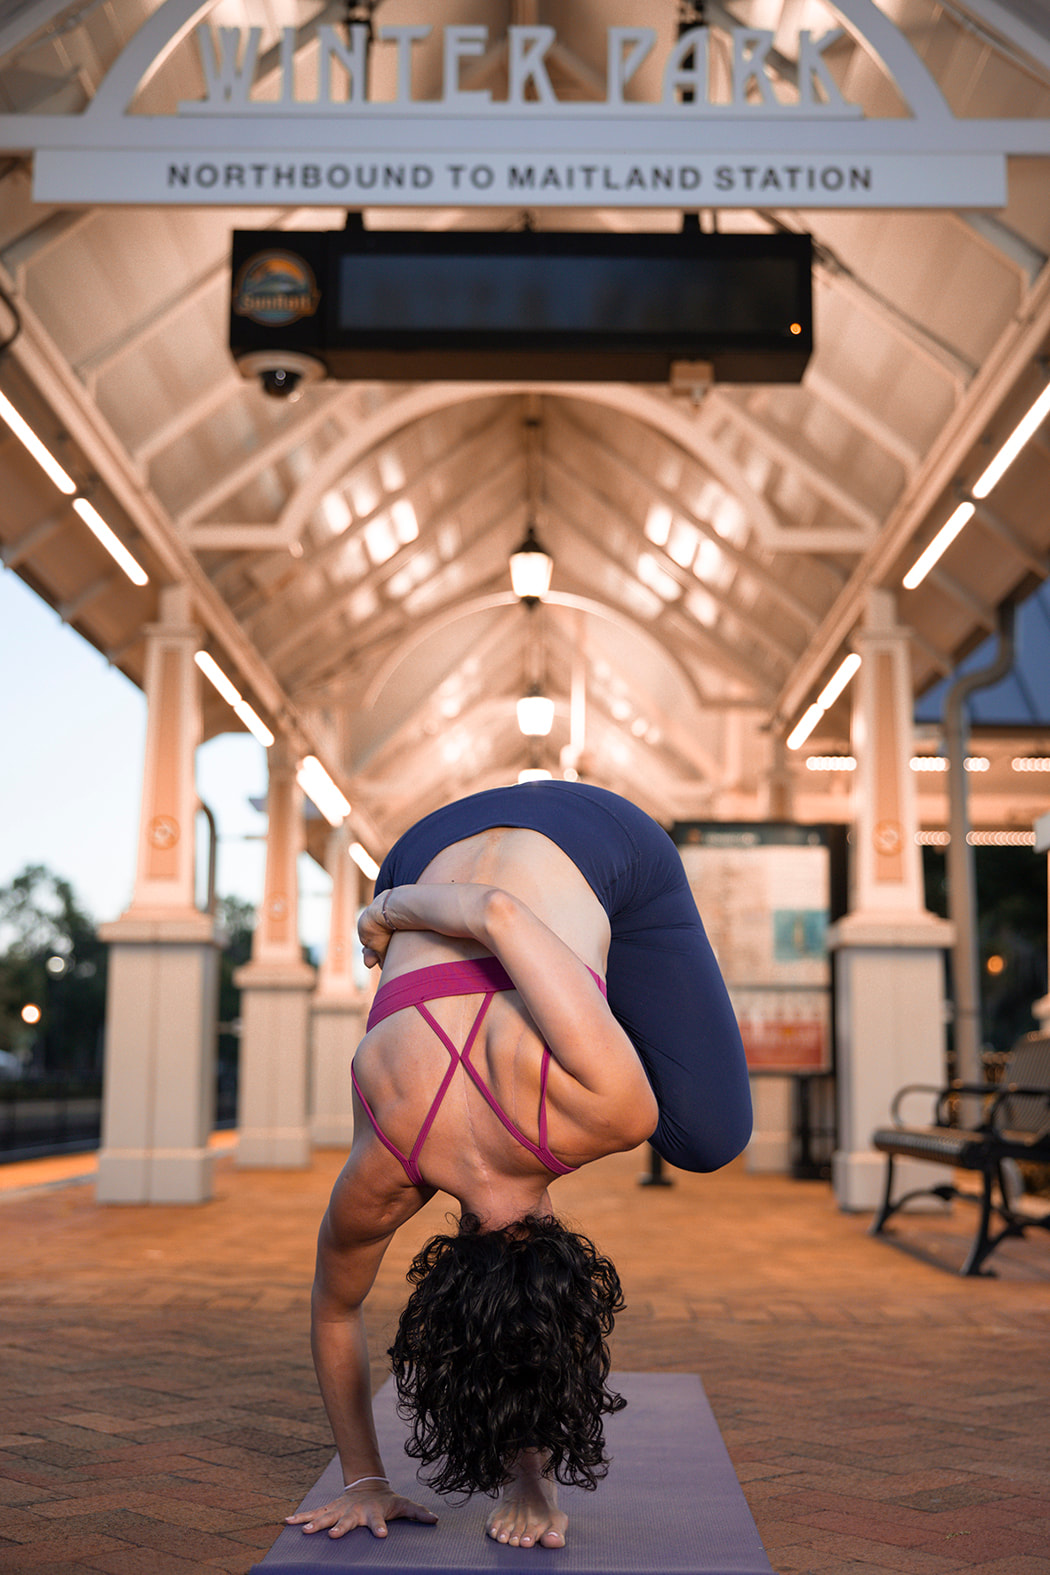 Contraindications and Cautions: Knee or Hip Injury If you have a knee or hip injury, particularly on the side you're attempting the half lotus, it's best to avoid this pose. Modify with poses that offer similar benefits without risking injury. High Blood Pressure If you have high blood pressure, be cautious in the forward bending aspect of this pose, as it can lead to a sudden drop in blood pressure. Practice with the head at a higher level or consider skipping this pose. Ankle Instability Individuals with weak ankles or a history of ankle injuries should approach this pose with care. Proper alignment and support are crucial to prevent strain. Pregnancy Pregnant individuals should avoid deep forward bending and intense hip opening. It's advised to modify or skip Ardha Baddha Padmottanasana during pregnancy. Recent Surgery If you've had recent surgery on your knees, hips, or spine, consult with a healthcare professional or experienced yoga instructor before attempting this pose. Limited Flexibility If you're unable to comfortably reach your foot or bind your fingers, avoid straining, practice the preparatory steps. Balance Issues Individuals with severe balance issues may find it challenging to maintain stability in this pose. Practicing near a wall or with the support of a chair can help. As with any yoga practice, it's crucial to listen to your body and respect its limitations. If you're new to Ardha Baddha Padmottanasana or have any health concerns, consider practicing under the guidance of a qualified yoga instructor who can offer personalized modifications and ensure your safety throughout the practice. 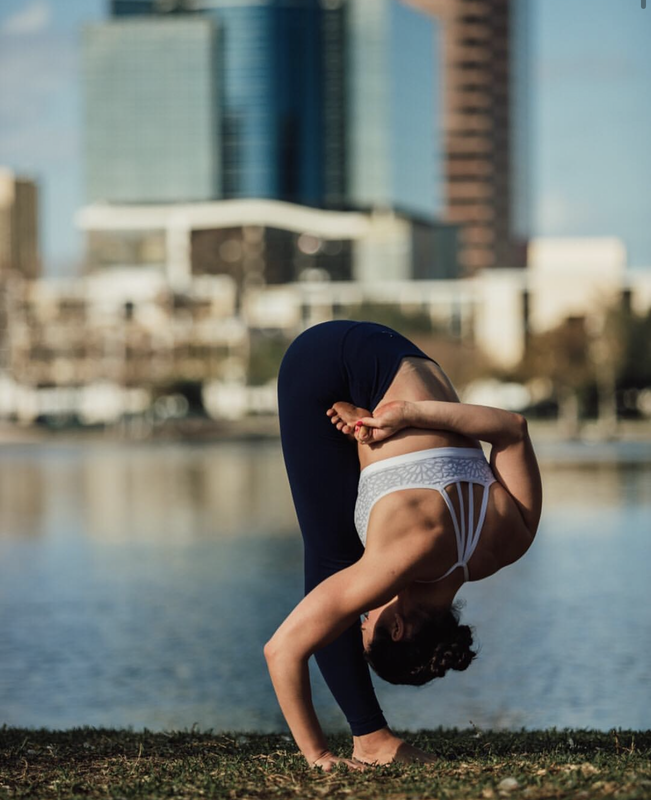 Step-by-Step Instructions (Sanskrit Count): Ardha Baddha Padmottanasana Ekam - Inhale bring your right leg up into half lotus position. Take your right arm behind your back and grab the big to of your right foot with your right thumb, index, and middle finger. Dve - Exhale fold your body forward, bringing your left hand to the floor next to your right leg. Take five deep breaths. Gaze to your nose, nasagrai drishti. Squeeze mula banda with each inhale. Focus on Uddiyana bandha with each exhale. Trini - Inhale, look forward, lift the torso until your left arm is extended with your left hand still on the floor. Exhale here. Catvari - Inhale, slowly stand up. Keep your right hand bound to your left foot. Panca - Exhale release your right hand from your right foot and return to Samasthithi. Sat - Inahale, bring your left leg up into half lotus position. Take your left arm behind your back and grab the big to of your right foot with your left thumb, index, and middle finger. Sapta - Exhale fold your body forward, bringing your right hand to the floor next to your left leg. Take five deep breaths. Gaze to your nose, nasagrai drishti. Squeeze mula banda with each inhale. Focus on Uddiyana bandha with each exhale. Ashtau - Inhale look forward only. Exhale there. Nava - Inhale, slowly stand up. Keep your right hand bound to your left foot. Exhale release your right hand from your right foot and return to Samasthithi. Please note that these instructions are provided in Sanskrit for the vinyasa count. It's helpful to your practice to gain a proper understanding of the Sanskrit terms and their meanings. If you're unfamiliar with the Sanskrit terminology, it's recommended to learn from a qualified Ashtanga Yoga instructor or resource. Click here to watch a Yoga tutorial breaking down Ardha Baddha Padmottanasana Modifications: Bend the Knee If hamstring flexibility is a challenge, consider bending the knee of the standing leg slightly. This modification takes some pressure off the hamstrings and allows you to work on the hip opening aspect of the pose. Practice Against a Wall Stand with your side against a wall. As you fold forward, let the wall support your folded leg. This helps you find balance and stability, especially if you're working on your half lotus position. Chair Variation Place a chair in front of you and rest your folded leg on the chair's seat. This modification offers support and helps you focus on the forward bending and hip opening components. Skip the Bind If the bind is too challenging, skip it altogether. Focus on bringing your hands to your hips, sacrum, or wherever feels comfortable while maintaining a straight spine. Reduce Forward Fold Instead of folding deeply, focus on a gentle forward fold. Keep your spine long and gradually work on increasing the depth of the fold over time. Remember, the goal is not to force your body into a shape but to find a variation that respects your current level of flexibility, balance, and any limitations you might have. Over time and with consistent practice, you might find that your body naturally becomes more open and able to explore deeper variations of Ardha Baddha Padmottanasana. Always listen to your body and prioritize safety and comfort in your practice. 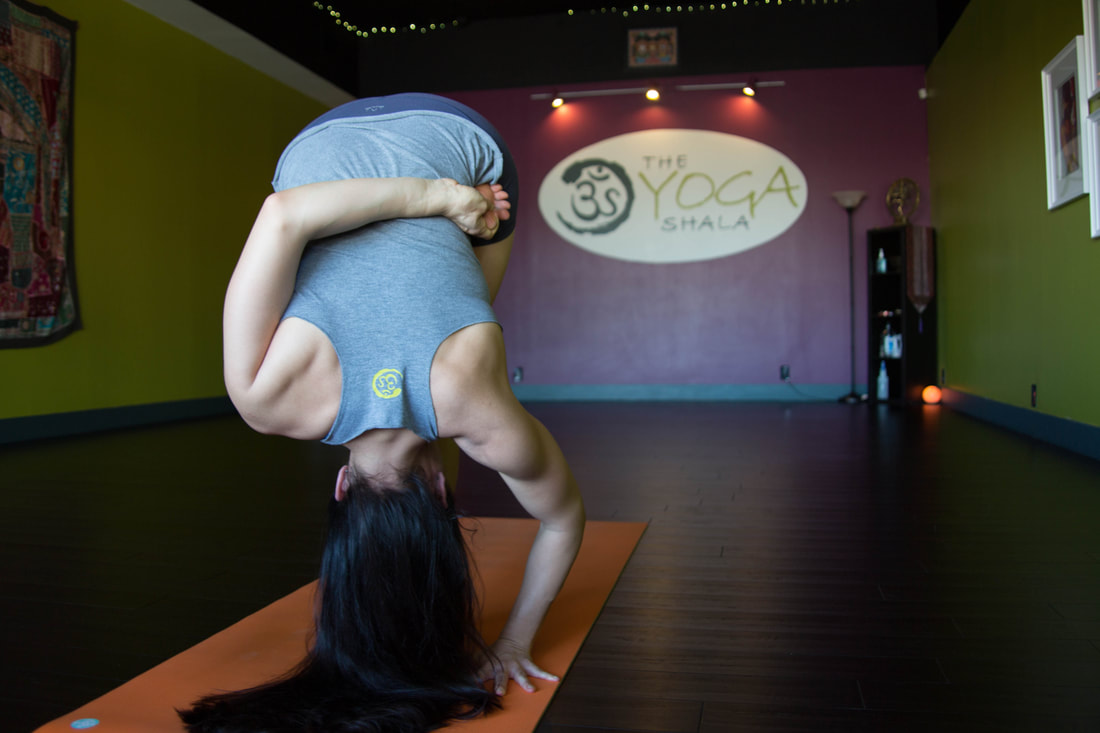 Ardha Baddha Padmottanasana is a harmonious blend of balance, flexibility, and mindfulness. As you immerse yourself in mastering this pose, remember that dedication and patience yield rich rewards. Through consistent practice, you will witness your hip flexibility, balance, and inner serenity flourishing. Embrace the voyage of deepening your Ashtanga Yoga practice as you integrate this revitalizing pose. Practice with The Yoga Shala If you want to join us for LIVE classes, The Yoga Shala offers virtual and in person classes every weekday morning. Owner, Krista Shirley, also offers virtual or in person private sessions (Yoga, Meditation, Breath-work, Nutrition, Life Coaching and Mentorship). Visit theyogashala.org for details. Be sure to signup for our newsletter to stay on top of local events and classes, Nysa products sales, new offerings, new products and more! We hope you find this video series helpful to you in creating or maintaining your yoga practice! About Krista: Krista Shirley is a level II authorized Ashtanga Yoga teacher. She is deeply passionate about sharing these teachings with all who wish to learn. If you want to join Krista in person she teaches daily classes at The Yoga Shala in Winter Park, Florida. She also offers virtual sessions in Yoga, Meditation, Breath-work, Nutrition, Life Coaching and Mentorship. Check out www.theyogashala.org for more details. If you do not live in Central Florida and want to find an authorized teacher in your area, check out our teacher, Sharath Jois’ website, for a list of all teachers authorized and certified by his yoga centre in India.
❤️SHOP MERCHANDISE: Nysa Products ❤️LET'S BE SOCIAL: Instagram: Krista Shirley Yoga Instagram: The Yoga Shala Facebook: The Yoga Shala Facebook: KristaShirleyYoga For other inquires please contact: krista@theyogashala.org Ashtanga yoga is a dynamic and physically demanding practice that combines breath with movement. One of the challenging poses in the Ashtanga yoga sequence is Utthita Hasta Padangusthasana. Known in English as Extended Hand-to-Big-Toe Pose. This pose requires strength, flexibility, and balance. With consistent practice, it can be mastered. In this blog post, we will provide you with benefits, contraindications, modifications and step-by-step instructions to help you confidently practice Utthita Hasta Padangusthasana. 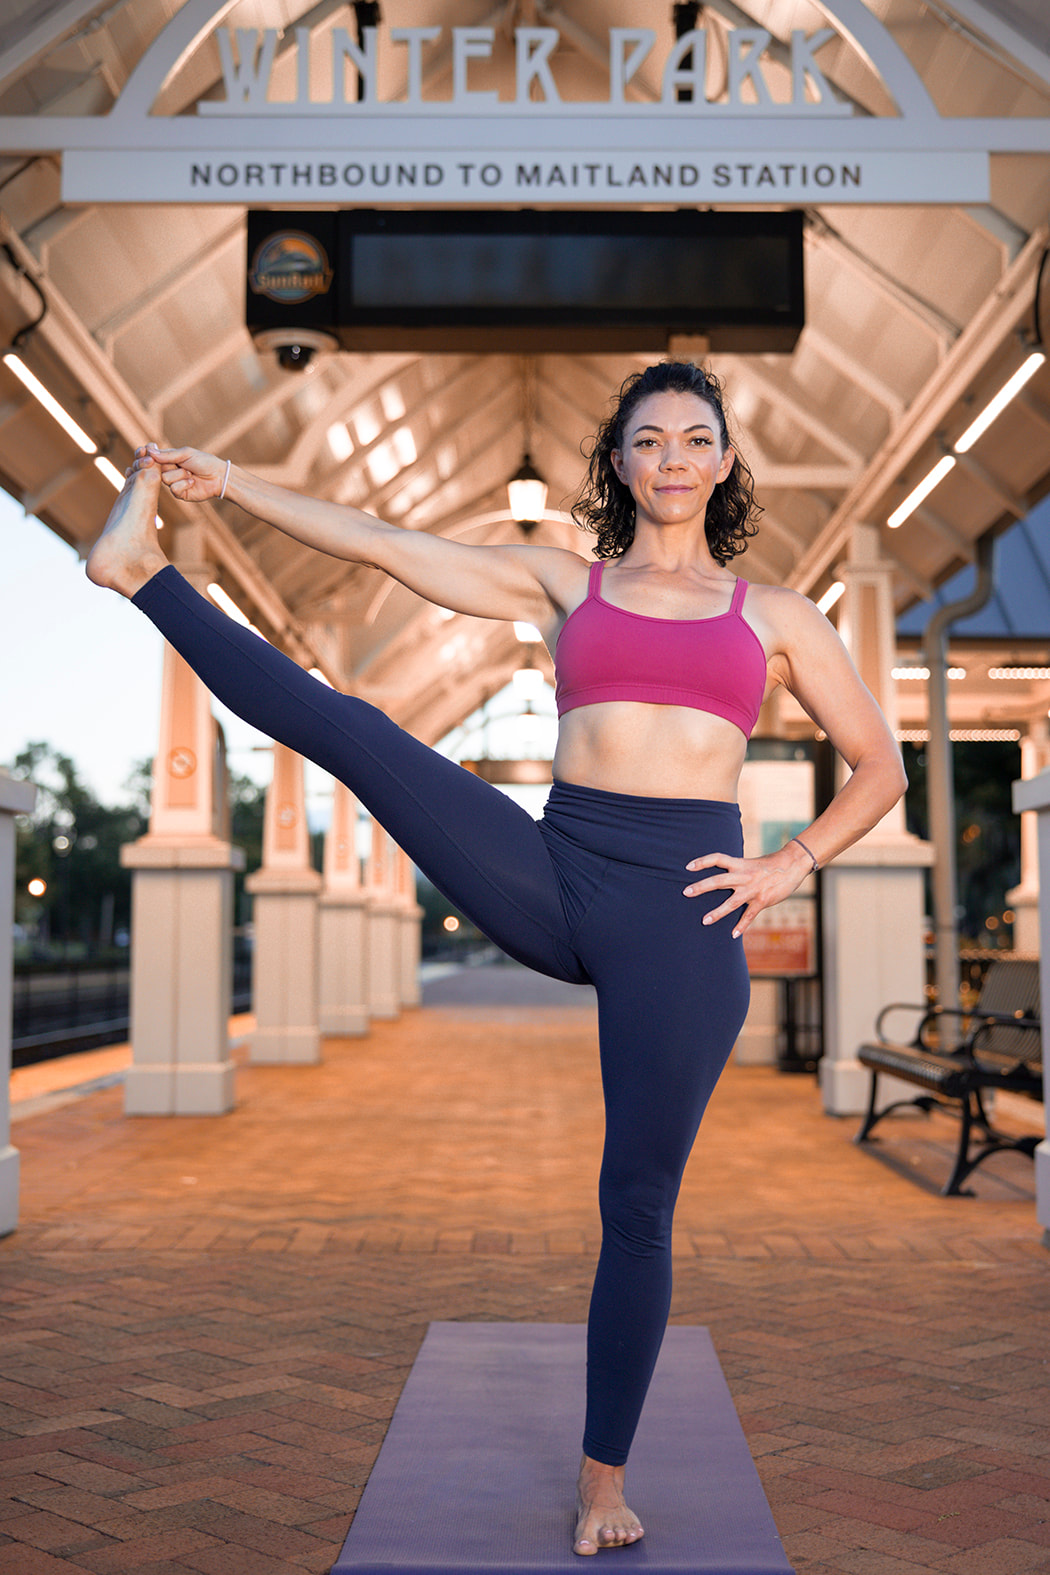 BENEFITS: Utthita Hasta Padangusthasana offers a multitude of benefits for both the body and mind. Some of the key benefits of practicing this pose include:
Incorporating Utthita Hasta Padangusthasana into your regular yoga practice can provide you with a wide range of physical and mental benefits. Remember to practice with patience, listen to your body, and modify as needed to avoid any strain or injury. Contraindications:
As with any yoga practice, it's important to consult with a qualified yoga instructor or healthcare professional if you have any concerns or medical conditions before attempting Utthita Hasta Padangusthasana or any other yoga pose. They can provide you with personalized guidance and modifications to suit your individual needs and ensure safe and effective practice. Always practice mindfully, listen to your body, and respect your limits to avoid any strain or injury during your yoga practice. Tap here to watch a step-by-step tutorial video of Utthita Hasta Padangusthasana 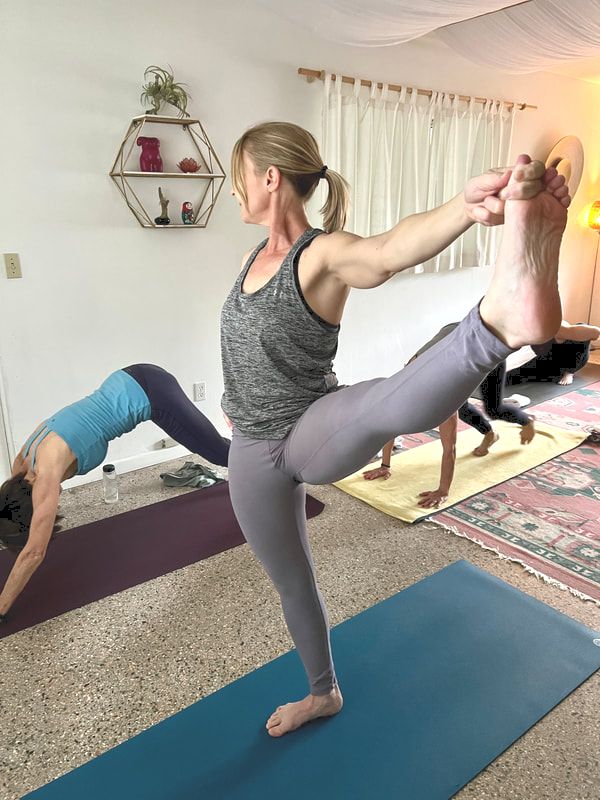 Step-by-Step Instructions for the Full Expression of Utthita Hasta Padangusthasana Ekam – Inhale: Standing in Samasthithi, inhale your right arm out directly in front of you. Simultaneously, lift the right leg straight up. On the same inhale, catch the big toe with your thumb, index and middle finger Dve – Exhale: Exhale your torso over your extended right leg as you bend your right elbow to ring your torso towards your leg. Work with tensegrity or oppositions of force to maintain your balance. To do that, work to press your pelvis backwards as you extend your upper body forwards. Gaze to the big toe of your right foot (Padayoragra Drishti). Breathe here for 5 deep breaths. Trini – Inhale: Inhale as you straighten your right arm and bring your torso upright back to standing position. Catvari – Exhale, 5 Breaths: Still holding your fingers to your big toe, exhale as you take your right leg out to the right. Gaze over the left shoulder (Parsva Drishti). Stay here for five deep breaths. Panca – Inhale: Bring your right leg forward again. Your right arms stays extended, the left hand on your hip Sat – Exhale: Exhale fold your torso over your extended right leg. Santa – Inhale, Exhale, 5 breaths: Inhale bring your torso back up to standing position and then exhale your hands to your his. Hold your leg upright in this position with a neutral spine. Use your deep core muscles. Stay here for five deep breaths. Ashtau - Caturdasa 8 to 14: At the end of the fifth exhale, lower the right leg down. Then repeat the entire flow of movement (Vinyāsa 1 to 7) on the left side. Like any yoga pose, Utthita Hasta Padangusthasana requires consistent practice to master. Incorporate it into your regular yoga practice, and be patient with yourself as you work towards improving your strength, flexibility, and balance. Modifications
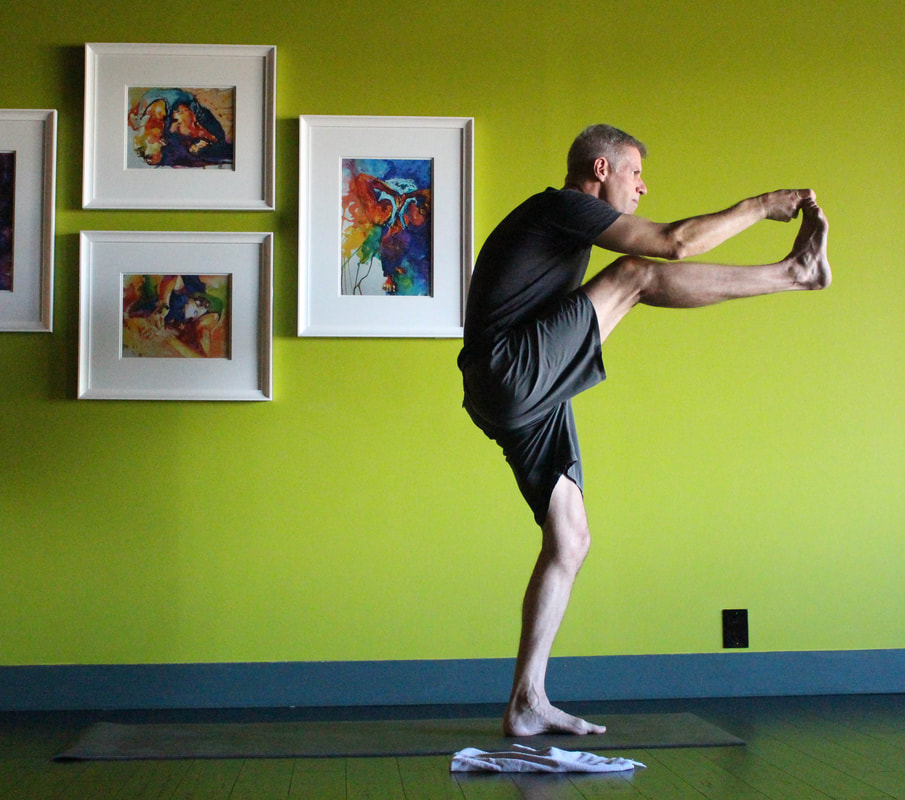 Remember, it's important to listen to your body and only go as far as your comfortable range of motion allows. Yoga is not about pushing yourself beyond your limits, but rather finding a balance between effort and ease. Always practice mindfully and with awareness, and consult with a qualified yoga instructor for guidance and modifications that suit your individual needs. Utthita Hasta Padangusthasana is a challenging yet rewarding pose in the Ashtanga yoga sequence. With consistent practice, you can master this pose and reap its numerous benefits. Follow the step-by-step instructions provided in this blog post, practice regularly, and enjoy the journey of exploring and deepening your yoga practice with Utthita Hasta Padangusthasana. Practice with The Yoga Shala If you want to join us for LIVE classes, The Yoga Shala offers virtual and in person classes every weekday morning. Owner, Krista Shirley, also offers virtual or in person private sessions (Yoga, Meditation, Breath-work, Nutrition, Life Coaching and Mentorship). Visit theyogashala.org for details. Be sure to signup for our newsletter to stay on top of local events and classes, Nysa products sales, new offerings, new products and more! We hope you find this video series helpful to you in creating or maintaining your yoga practice! 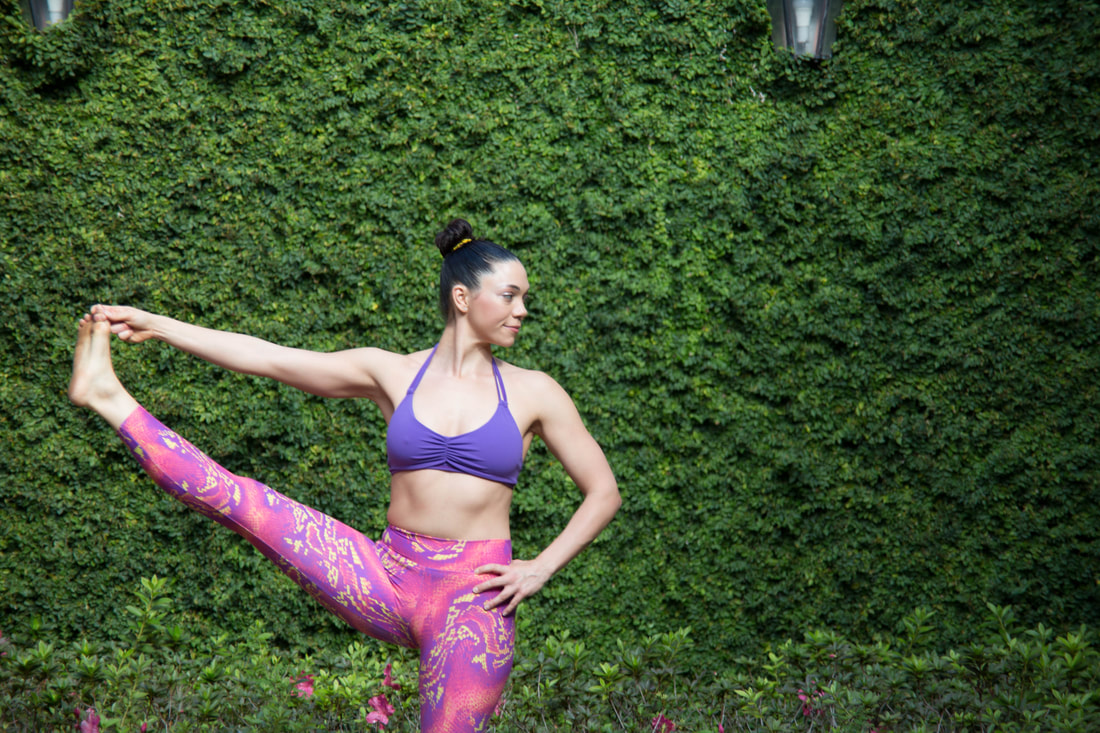 About Krista: Krista Shirley is a level II authorized Ashtanga Yoga teacher. She is deeply passionate about sharing these teachings with all who wish to learn. If you want to join Krista in person she teaches daily classes at The Yoga Shala in Winter Park, Florida. She also offers virtual sessions in Yoga, Meditation, Breath-work, Nutrition, Life Coaching and Mentorship. Check out www.theyogashala.org for more details. If you do not live in Central Florida and want to find an authorized teacher in your area, check out our teacher, Sharath Jois’ website, for a list of all teachers authorized and certified by his yoga centre in India.
❤️SHOP MERCHANDISE: Nysa Products
❤️LET'S BE SOCIAL: Instagram: Krista Shirley Yoga Instagram: The Yoga Shala Facebook: The Yoga Shala Facebook: KristaShirleyYoga For other inquires please contact: krista@theyogashala.org Ashtanga Yoga is a traditional style of yoga that incorporates a set sequence of postures along with breath control and focus. The Ashtanga Yoga system also teaches students two sacred mantras. Mantras are sacred syllables, words, or phrases often practiced as a form of meditation or chanting to enhance the practice.  The “Ashtanga Opening Mantra" is chanted at the beginning of an Ashtanga Yoga practice. The Opening Mantra is also called the "Vande Gurunam" mantra, which is a Sanskrit verse that pays homage to the lineage of teachers who have passed down the wisdom and teachings of yoga. The mantra is chanted in a call-and-response style, with the instructor leading and the students repeating after them. The Opening Mantra: "Vande Gurunam Charanaravinde Sandarshita Svatma Sukhava Bodhe Nihshreyase Jangalikayamane Samsara Halahala Mohashantyai" Translation: "I bow to the lotus feet of the gurus, The awakening happiness of one's own self revealed, Beyond better, acting like the jungle physician, Pacifying delusion, the poison of Samsara (the cycle of birth and death)." This mantra serves as an invocation, setting the tone for the practice and acknowledging the lineage of yoga teachers who have contributed to the teachings of Ashtanga Yoga. Chanting the Opening Mantra can help to cultivate reverence, gratitude, and focus, creating a sense of connection to the wisdom and tradition of yoga.  In addition to the Opening Mantra, Ashtanga Yoga may also incorporate other mantras or chants during the practice, such as the closing mantra, or individual postures may have their own specific mantras associated with them. Mantras can be used as a tool to calm the mind, deepen concentration, and heighten spiritual awareness during the practice of Ashtanga Yoga. It's important to note that while mantras are a significant aspect of Ashtanga Yoga for many practitioners, they are not required, and different instructors and students may have different preferences and approaches to incorporating mantras into their practice. It's always best to follow the guidance of a qualified yoga teacher and approach mantras with an open mind and respectful attitude towards their cultural and spiritual significance. Ashtanga Yoga practitioners often recite the Opening and Closing Mantras as a way to honor the tradition and lineage of yoga, and to create a sacred and focused atmosphere for their practice. The Opening Mantra, also known as the "Vande Gurunam" mantra, is chanted at the beginning of an Ashtanga Yoga practice to pay homage to the lineage of teachers who have passed down the wisdom and teachings of yoga. By acknowledging the gurus and expressing gratitude for their guidance, practitioners cultivate a sense of reverence and connection to the ancient tradition of yoga. The mantra serves as an invocation, setting the intention for the practice and inviting a state of openness and receptivity to the teachings of yoga. The Closing Mantra, also known as the "Samasthitihi" mantra, is chanted at the end of an Ashtanga Yoga practice to bring the practice to a complete and harmonious close. The mantra translates to "May all beings be happy, may all beings be healthy, may all beings be safe, may all beings live with ease." By reciting this mantra, practitioners express their heartfelt wishes for the well-being of all beings, including themselves, their loved ones, and all living beings in the world. The Closing Mantra serves as a reminder of the interconnectedness of all beings and the importance of cultivating compassion and goodwill towards others.  Reciting the Opening and Closing Mantras in Ashtanga Yoga is not only a ritualistic practice, but also a way to create a meditative and focused state of mind. The repetition of the sacred syllables and words in the mantras can help to calm the mind, deepen concentration, and enhance spiritual awareness. Chanting the mantras also helps to synchronize the breath and movements in the practice, creating a sense of rhythm and flow. It's worth mentioning that while mantras are an integral part of Ashtanga Yoga for many practitioners, they are not mandatory, and different instructors and students may have different preferences and approaches to their use. It's important to approach mantras with respect, understanding their cultural and spiritual significance, and to follow the guidance of a qualified yoga teacher in incorporating them into your practice. Ultimately, the recitation of the Opening and Closing Mantras in Ashtanga Yoga can serve as a personal expression of reverence, gratitude, and mindfulness, enhancing the overall experience of the practice. The Opening and Closing Mantras used in Ashtanga Yoga have a rich history that can be traced back to the ancient yogic traditions of India. These mantras have been passed down through generations of yoga practitioners and teachers, and are considered to be an integral part of the Ashtanga Yoga practice. The exact origins and authorship of the Opening and Closing Mantras are not well-documented, as they have been handed down orally over the centuries. However, it is believed that these mantras were composed in Sanskrit, which is considered to be the classical language of ancient India, and have been recited in various forms of yoga for centuries. The Opening Mantra, "Vande Gurunam Charanaravinde," is often attributed to Sage Veda Vyasa, who is considered to be a revered figure in the Hindu tradition and is believed to have compiled the ancient scriptures known as the Vedas. This mantra is also sometimes associated with the teacher-student lineage of T. Krishnamacharya, who is considered to be one of the modern fathers of Hatha Yoga and is known to have influenced the development of Ashtanga Yoga. The Closing Mantra, "Samasthitihi," which translates to "May all beings be happy, may all beings be healthy, may all beings be safe, may all beings live with ease," is a verse that reflects the yogic principle of ahimsa, or non-harming, and is rooted in the philosophy of compassion towards all beings. The authorship of the Closing Mantra is not well-documented, but it is widely used in various forms of yoga as a way to express goodwill and positive intentions towards oneself and others. It's important to note that while the specific history and origins of the Opening and Closing Mantras may not be fully known, these mantras have been revered and passed down through generations of yogis as a way to honor the lineage of yoga teachers, invoke blessings, and cultivate mindfulness and compassion. They are considered to be sacred and are used in Ashtanga Yoga as a way to create a focused, reverential, and meditative atmosphere for the practice.  Reciting mantras, whether in the context of yoga, meditation, or other spiritual practices, is believed to offer a wide range of benefits for the mind, body, and spirit. Here are some potential benefits of reciting mantras:
It's important to note that the benefits of reciting mantras may vary depending on individual beliefs, intentions, and practices. Mantras are a personal and subjective experience, and it's essential to approach them with sincerity, reverence, and respect for their cultural and spiritual significance. It's recommended to learn mantras from qualified teachers and practitioners, and to integrate them into one's practice with mindfulness and discernment. Click here to view our YouTube video on Mantras and the Ashtanga Yoga Opening and Closing Mantras Practice with The Yoga Shala If you want to join us for LIVE classes, The Yoga Shala offers virtual and in person classes every weekday morning. Owner, Krista Shirley, also offers virtual or in person private sessions (Yoga, Meditation, Breath-work, Nutrition, Life Coaching and Mentorship). Visit theyogashala.org for details. Be sure to signup for our newsletter to stay on top of local events and classes, Nysa products sales, new offerings, new products and more! We hope you find this video series helpful to you in creating or maintaining your yoga practice! About Krista: Krista Shirley is a level II authorized Ashtanga Yoga teacher. She is deeply passionate about sharing these teachings with all who wish to learn. If you want to join Krista in person she teaches daily classes at The Yoga Shala in Winter Park, Florida. She also offers virtual sessions in Yoga, Meditation, Breath-work, Nutrition, Life Coaching and Mentorship. Check out www.theyogashala.org for more details. If you do not live in Central Florida and want to find an authorized teacher in your area, check out our teacher, Sharath Jois’ website, for a list of all teachers authorized and certified by his yoga centre in India.
❤️SHOP MERCHANDISE: Nysa Products
❤️LET'S BE SOCIAL: Instagram: Krista Shirley Yoga Instagram: The Yoga Shala Facebook: The Yoga Shala Facebook: KristaShirleyYoga For other inquires please contact: krista@theyogashala.org Parsvottanasana is also known as Intense Side Stretch Pose or Pyramid Pose. It is the twelveth posture in the Ashtanga Yoga Standing sequence, and comes after Prasarita Padottanasana D. Parsvottanasana is a powerful standing forward bend that offers an array of physical and mental benefits. 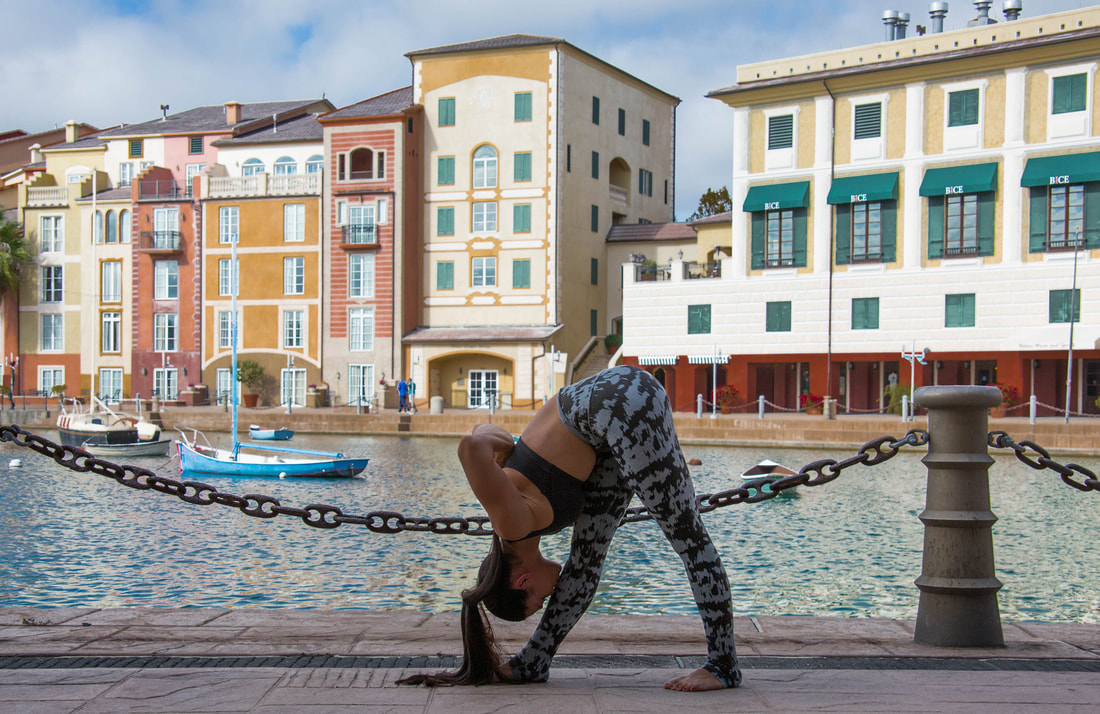 Benefits of Parsvottanasana:
While Parsvottanasana can be beneficial for many practitioners, there are some contraindications to be aware of. It's important to consult with a qualified yoga teacher or a healthcare professional before attempting this pose if you have any of the following conditions:
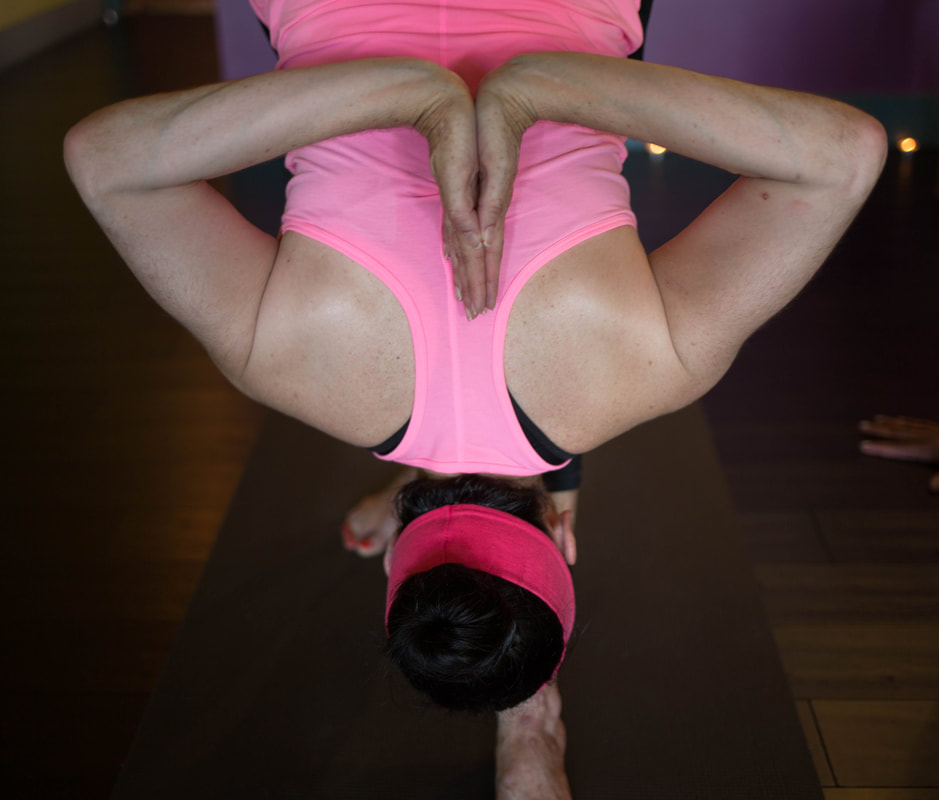 Step-by-step instructions on how to master Parsvottanasana in your Ashtanga yoga practice using the Sanskrit vinyasa count. From Samasthiti (Equal Standing Pose) Inhale, Ekam - Turn to face the back of your mat brining your right foot three feet in front of your left. Bring your palms together behind your back, fingers facing upwards. Make sure your hips are square. Keep your legs straight, and press down and back with your left foot as you press down and forward with your right to engage your glutes and thighs. Exhale, Dve - Keeping your back straight, your legs engaged, your feet pushing and your head up, begin to hinge from your hips to fold forward over your straight right leg. Take five deep breaths here. Gaze to your nose, nasagrai drishti. Inhale, Trini - Pressing your pelvis forward, lift your torso back up to standing. Be sure to keep your hands where they are and continue to engage your middle back (rhomboids and middle trapezius). Exhale, Chatvari - Reverse your feet, square your hips and press your feet in opposite directions (tensegrity). Begin to hinge from your hips, extending your body out over your right leg. Keep your spine long and your chest lifted as you lower your torso towards your right thigh. Take five deep breaths. Gaze to your nose, nasagrai dristhi. Inhale, Pancha - lift your torso back up to standing. Be sure you are pressing your left foot down and forward and your right foot down and backwards as you inhale and rise up. If you create enough tensegrity through your feet and hips your upper body will simply float up to stack your body weight on top of itself. Exhale - Return your fee to parallel position, extend your arms out to the side and return to Samasthithi. Modifications:
Remember to always listen to your body and modify the pose according to your own comfort level and abilities. It's essential to practice with mindfulness and respect for your body's limitations to avoid any injuries. Tap HERE to watch a step-by-step tutorial video on Parsvottanasana Parsvottanasana is a powerful standing forward bend that offers numerous benefits for the body and mind. With consistent practice and proper alignment, you can master this pose and add it to your Ashtanga yoga routine. Remember to always modify the pose as needed to suit your individual needs. Embrace the journey of your practice and enjoy the benefits of Parsvottanasana in your yoga journey! Practice with The Yoga Shala If you want to join us for LIVE classes, The Yoga Shala offers virtual and in person classes every weekday morning. Owner, Krista Shirley, also offers virtual or in person private sessions (Yoga, Meditation, Breath-work, Nutrition, Life Coaching and Mentorship). Visit theyogashala.org for details. Be sure to signup for our newsletter to stay on top of local events and classes, Nysa products sales, new offerings, new products and more! We hope you find this video series helpful to you in creating or maintaining your yoga practice! 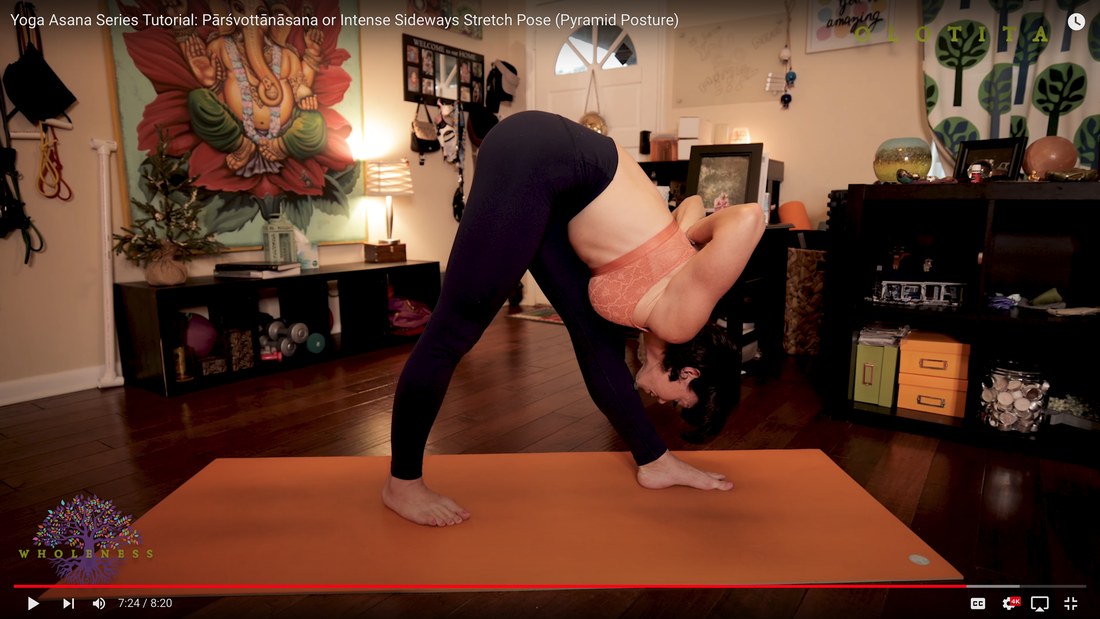 About Krista: Krista Shirley is a level II authorized Ashtanga Yoga teacher. She is deeply passionate about sharing these teachings with all who wish to learn. If you want to join Krista in person she teaches daily classes at The Yoga Shala in Winter Park, Florida. She also offers virtual sessions in Yoga, Meditation, Breath-work, Nutrition, Life Coaching and Mentorship. Check out www.theyogashala.org for more details. If you do not live in Central Florida and want to find an authorized teacher in your area, check out our teacher, Sharath Jois’ website, for a list of all teachers authorized and certified by his yoga centre in India.
❤️SHOP MERCHANDISE: Nysa Products ❤️LET'S BE SOCIAL: Instagram: Krista Shirley Yoga Instagram: The Yoga Shala Facebook: The Yoga Shala Facebook: KristaShirleyYoga For other inquires please contact: krista@theyogashala.org Have you ever wondered how you can achieve a state of balance and stability in your yoga practice? One concept that can help you unlock the secrets to mastering yoga poses and finding a sense of ease in your practice is tensegrity. 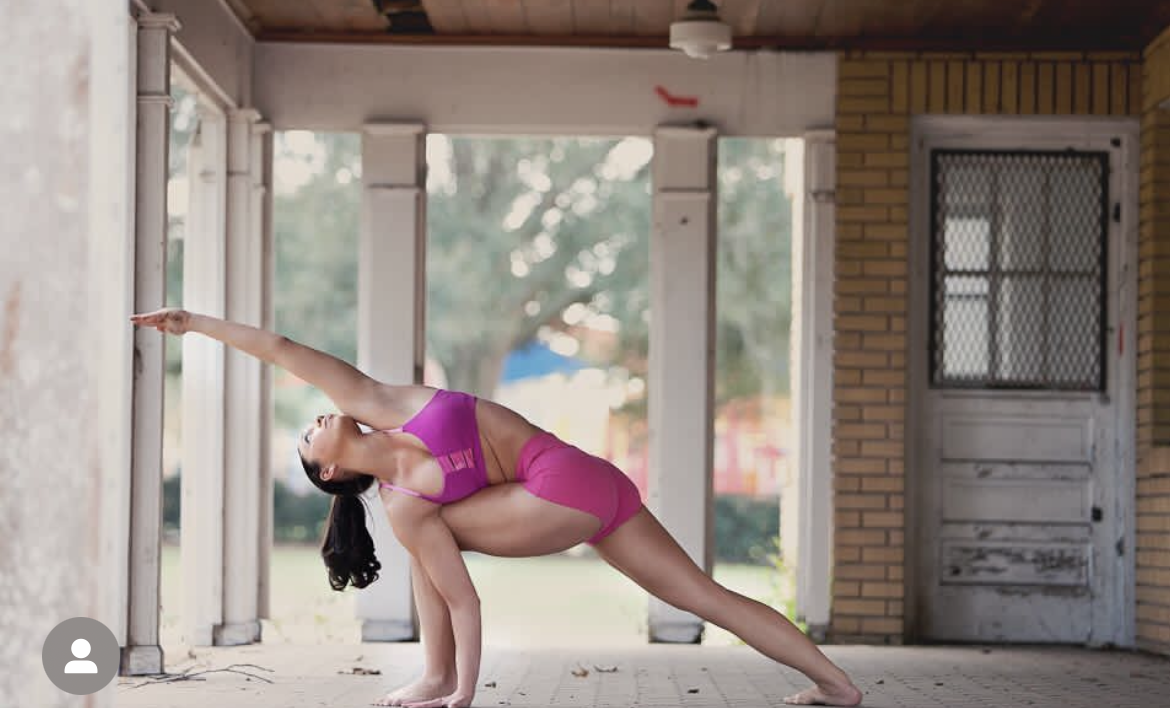 Tensegrity is a fascinating concept that combines tension and integrity, and it has been widely used in architecture and engineering. But did you know that tensegrity can also be applied to your yoga practice? Tensegrity, coined by the architect and visionary inventor Buckminster Fuller, refers to a structural system that uses a combination of tension and compression to create stability and strength. In tensegrity structures, tension elements, such as ropes or cables, are balanced with compression elements, such as struts or beams, to create a self-supporting and dynamically stable structure. This allows for flexibility, adaptability, and resilience in the face of external forces. So how does tensegrity apply to yoga? In yoga, we often seek balance and stability in our poses, as well as in our minds and bodies. Tensegrity can help us understand how to create a stable and balanced structure in our bodies while maintaining a sense of ease and freedom in our movements. Let's explore how we can apply the concept of tensegrity in our yoga practice. Finding Balance: Tensegrity in Asanas Asanas, or yoga poses, require balance and stability to be performed correctly. Tensegrity can help us understand how to create a balanced structure in our bodies to support our poses. Just like a tensegrity structure, our bodies need both tension and compression to find balance. 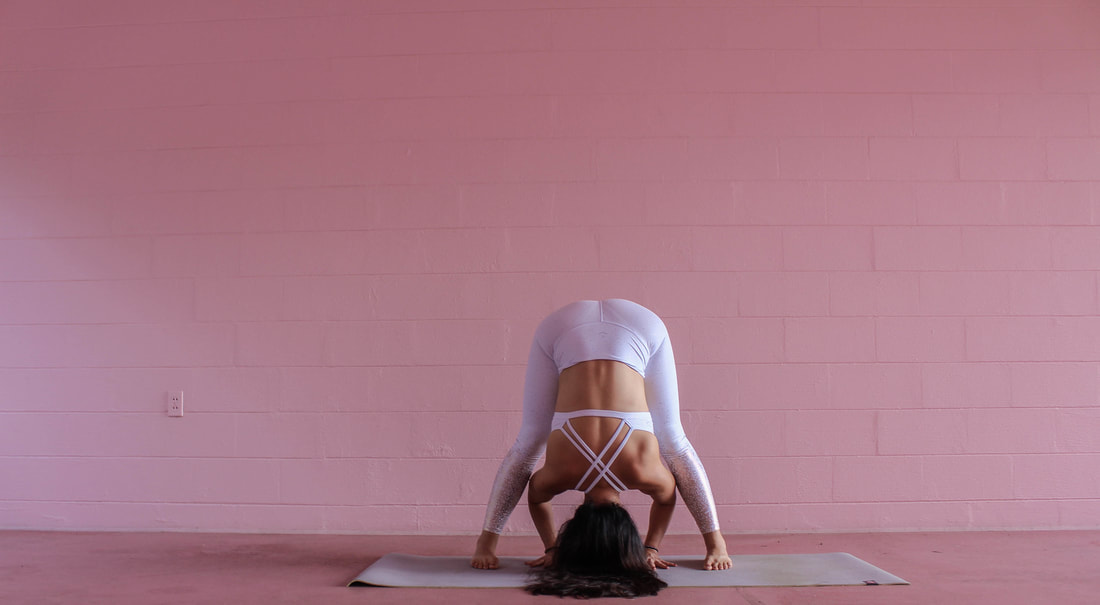 For example, in a standing pose Prasarita Padottanasana A, we need to press down and out through both feet to engage the muscles in our legs to create tension and stability. We also need to press the hands down and forward to engage the muscles in our arms and upper back to create tension and stability. At the same time, we are working to maintain a sense of ease and lightness in the rest of our upper body. The tension in our hands and feet creates compression, while engaging mula bandha as we inhale helps the rest of our body remain relaxed, allowing for flexibility and freedom of movement. This combination of tension and compression creates a balanced structure, just like in a tensegrity system. Building Stability: Tensegrity in Core Strength A strong and stable core is essential in many yoga poses, as it provides the foundation for our movements. Tensegrity can help us understand how to create stability in our core by balancing tension and compression. 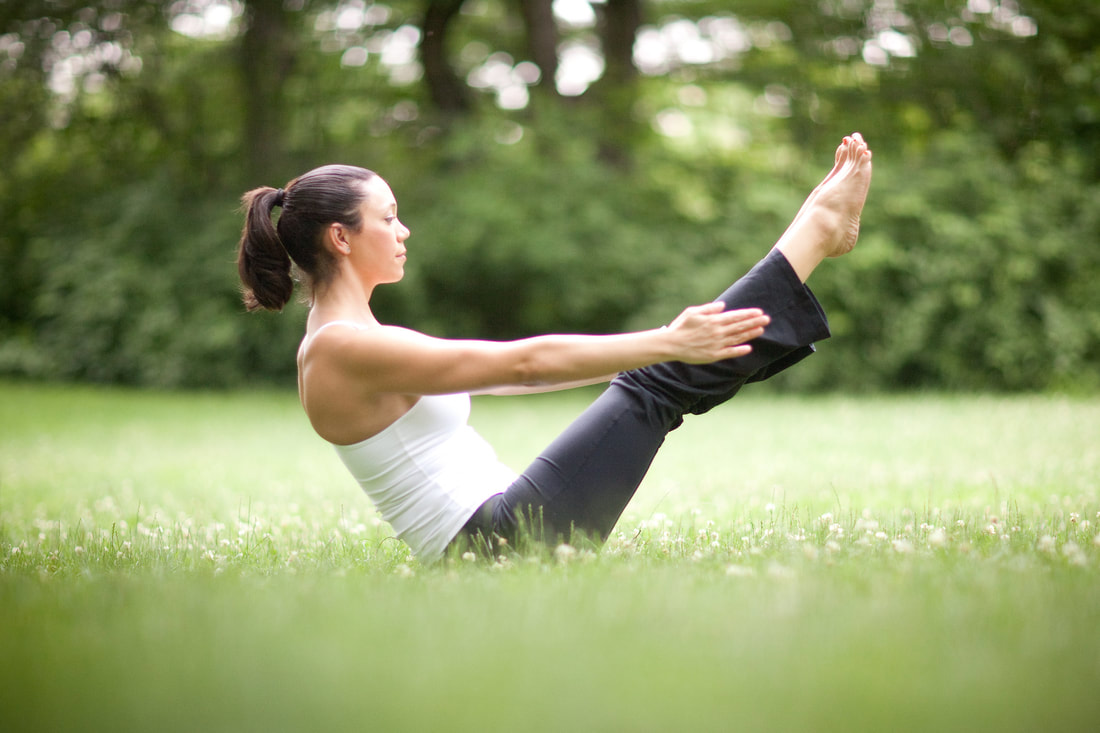 In a pose like Boat Pose (Navasana), for example, we engage the muscles of our abdominal area to create tension and stability, while also maintaining a sense of relaxation in our shoulders, neck, and face. The tension in our core muscles creates compression, while the rest of our body remains soft and relaxed, allowing for stability and ease of movement. This balance of tension and compression creates a stable and strong core, just like in a tensegrity structure. Cultivating Mind-Body Connection: Tensegrity in PranayamaPranayama, or yogic breathing techniques, are an integral part of yoga practice and play a vital role in cultivating the mind-body connection. Tensegrity can help us understand how to use tension and relaxation in our breath to create balance and stability in our minds and bodies.  For example, in a breathing technique like Ujjayi Breath, we create tension in the back of our throat to control the flow of our breath, while also maintaining a sense of relaxation in our facial muscles and body. The tension in our throat creates compression, while the rest of our body remains soft and relaxed, allowing for a smooth and controlled breath. This balance of tension and relaxation in our breath helps us cultivate a calm and focused mind, just like in a tensegrity system Enhancing Flexibility: Tensegrity in Stretching Flexibility is a key component of many yoga poses, and tensegrity can help us understand how to optimize our flexibility by balancing tension and compression.  In poses that involve stretching, such as Forward Fold (Uttanasana), we create tension in the muscles that are being stretched, while maintaining a sense of relaxation in the rest of our body. This tension creates compression, allowing our muscles to lengthen and stretch without straining. By finding the right balance between tension and relaxation, we can enhance our flexibility and achieve deeper stretches with ease, just like in a tensegrity structure. Preventing Injury: Tensegrity in Body Alignment Proper body alignment is crucial in yoga to prevent injuries and promote safe and effective practice. Tensegrity can help us understand how to align our bodies in a way that distributes tension and compression evenly, reducing the risk of strain or injury. 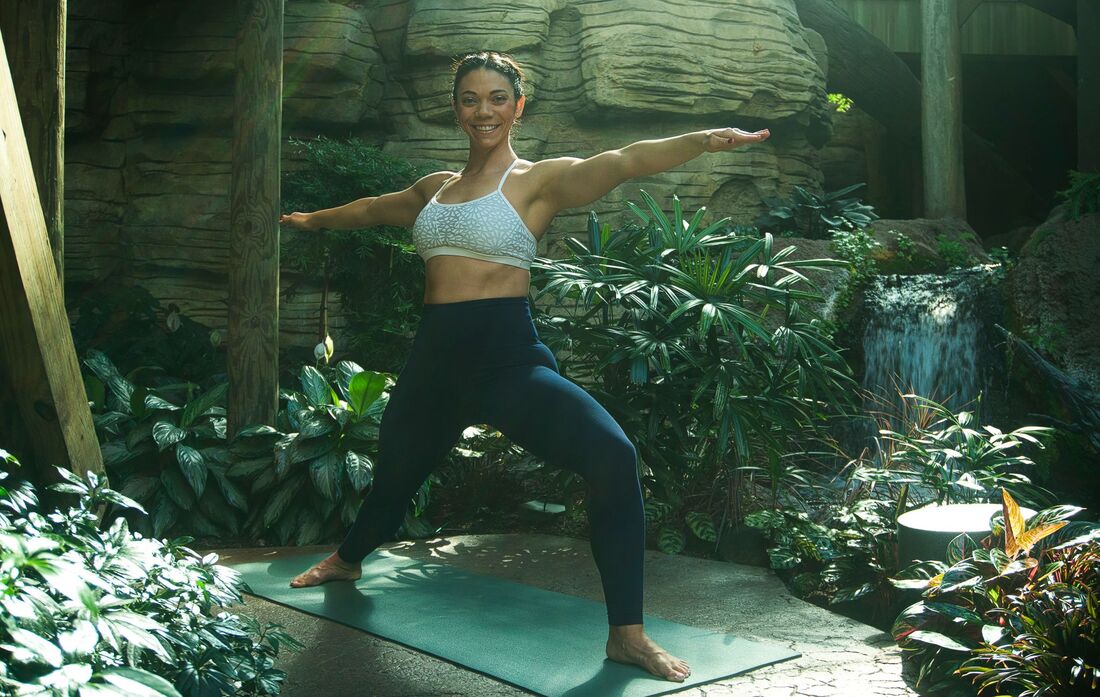 For instance, in poses like Warrior II (Virabhadrasana II), we engage the muscles of our legs and arms to create tension, while maintaining a relaxed and aligned spine. The tension in our limbs creates compression, while the rest of our body remains balanced and aligned. This balanced distribution of tension and compression promotes optimal body alignment, reducing the strain on our joints and muscles and preventing injuries. Mindful Awareness: Tensegrity in MindfulnessMindfulness is an essential aspect of yoga practice, and tensegrity can help us cultivate mindful awareness by bringing attention to the balance between tension and relaxation in our bodies. 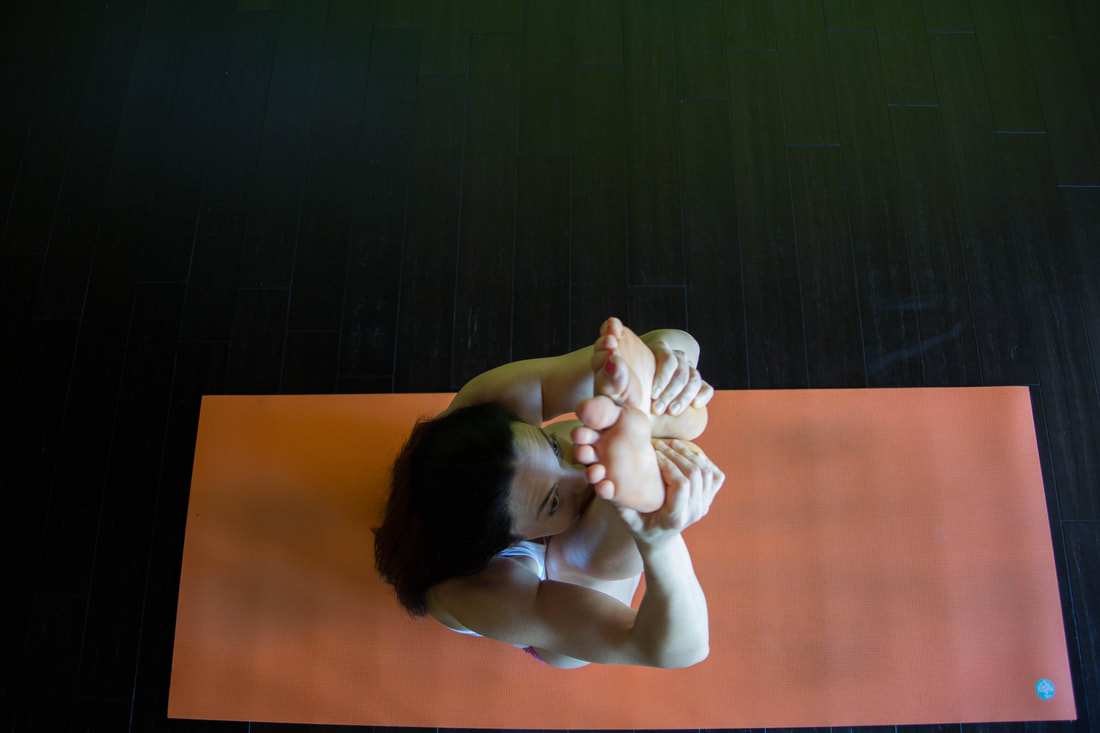 By practicing yoga poses with a heightened awareness of the sensations in our bodies, we can become more mindful of the tension and relaxation in different muscle groups. We can learn to find the right balance between tension and relaxation in each pose, adjusting our movements mindfully to maintain stability and ease. This mindful awareness of the interplay between tension and relaxation in our bodies can also be extended to our minds, helping us cultivate a sense of balance, stability, and calmness in our overall well-being. Tensegrity is a powerful concept that can enhance our yoga practice by helping us find balance, stability, flexibility, prevent injuries, and cultivate mindful awareness. By understanding the interplay between tension and relaxation in our bodies and minds, we can optimize our yoga practice and experience a deeper connection between our mind, body, and breath. Embrace the art of tensegrity in your yoga practice! And if you’d like to practice tensegrity in action, be sure to check out our other video on Tensegrity where we apply this concept to several yoga postures to help you begin to tangibly apply the concept of tensegrity and unlock new levels of balance and stability on and off the mat! Tap HERE to watch our tutorial on Tensegrity Practice with The Yoga Shala If you want to join us for LIVE classes, The Yoga Shala offers virtual and in person classes every weekday morning. Owner, Krista Shirley, also offers virtual or in person private sessions (Yoga, Meditation, Breath-work, Nutrition, Life Coaching and Mentorship). Visit theyogashala.org for details. Be sure to signup for our newsletter to stay on top of local events and classes, Nysa products sales, new offerings, new products and more! We hope you find this video series helpful to you in creating or maintaining your yoga practice!  About Krista: Krista Shirley is a level II authorized Ashtanga Yoga teacher. She is deeply passionate about sharing these teachings with all who wish to learn. If you want to join Krista in person she teaches daily classes at The Yoga Shala in Winter Park, Florida. She also offers virtual sessions in Yoga, Meditation, Breath-work, Nutrition, Life Coaching and Mentorship. Check out www.theyogashala.org for more details. If you do not live in Central Florida and want to find an authorized teacher in your area, check out our teacher, Sharath Jois’ website, for a list of all teachers authorized and certified by his yoga centre in India.
❤️SHOP MERCHANDISE: Nysa Products
❤️LET'S BE SOCIAL: Instagram: Krista Shirley Yoga Instagram: The Yoga Shala Facebook: The Yoga Shala Facebook: KristaShirleyYoga For other inquires please contact: krista@theyogashala.org WE CHALLENGE YOU TO MAKE YOUR SELF CARE A PRIORITY THIS JULY! Join us, July 16th-24th, for 9 days of yoga asana and a guiding theme each day. Open to all levels. If you desire to be more present and connected then this challenge is for you. We will help you create a routine by commitment to yourself. Each day we invite you to share your insights and anything that comes up for you. No better time to focus more on your own self care as national Be Love Day starts us off and we conclude on International Self-Care Day! Let’s celebrate, nurture, and tune-in to these vital aspects of our lives, our self-care.  What is self-care and how can we create a routine that reflects that? Maybe you find it hard to love yourself or maybe you’ll find this a breeze. Wherever you fall on the spectrum of that connection to yourself we invite you along for 8 days of committing to your yoga practice sprinkled in with journal prompts and more! Never forget self care is not selfish! You must take care of yourself and be healthy mentally, emotionally, intellectually, physically, and spiritually in order to help others the way we should and could. Join us in this fun challenge to promote self care and have fun and a chance to win some awesome prizes! 3 lucky winners will win a bundle of yoga and self care goodies and yoga classes!  1st Place Bundle: 5 Pack of Yoga classes at The Yoga Shala (virtual or in person), Primary & Second Series poster, Nysa Essential oil roller, Nysa Skin care kit, Nysa ex-large yoga bag, a value totaling over $300!  2nd Place Bundle: 2 Pack of Yoga Classes at The Yoga Shala (Virtual or in Person), Primary & Second Series Yoga Poster, Nysa Tote, Nysa travel size EO roller, Kino MacGregor DVD, Ayurveda Book, Wah CD (Over $165 value) 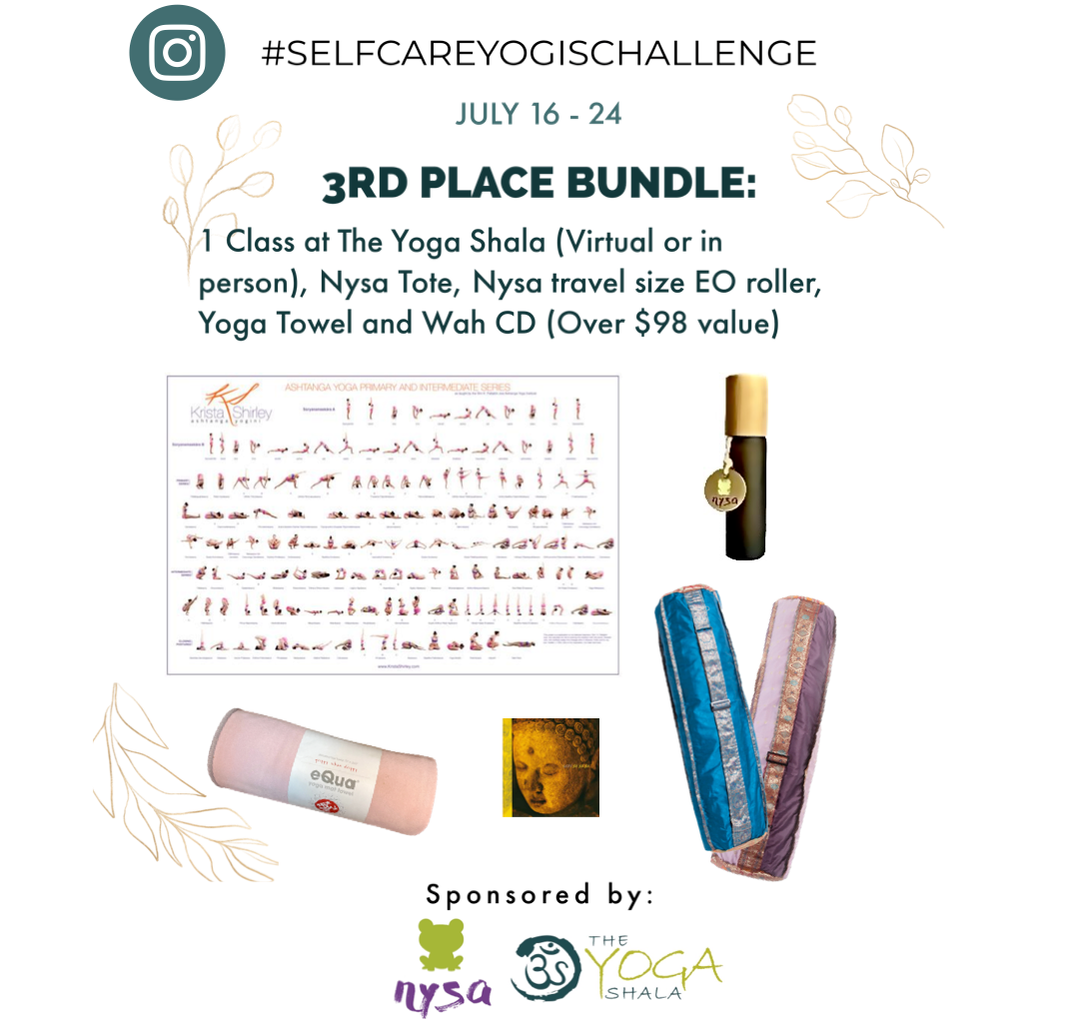 3rd Place Bundle: 1 Class at The Yoga Shala (Virtual or in person), Nysa Tote, Nysa travel size EO roller, Yoga Towel and Wah CD (Over $98 value) 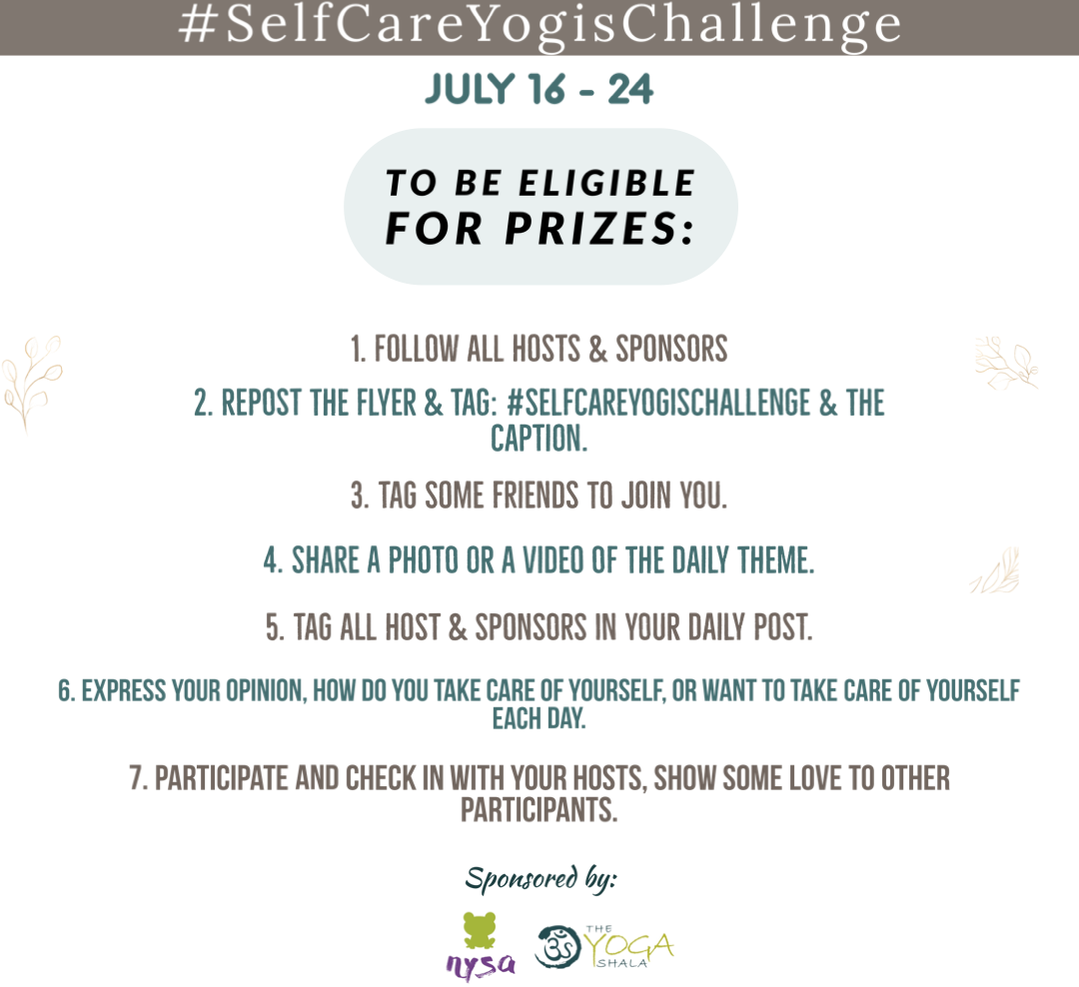 Hosts: @el.feather @kristashirleyyoga @theyogashala_ @saint_louis_ashtanga_yoga Exclusive Sponsors: @nysa_by_olotita @theyogashala_ Asana Lineup: 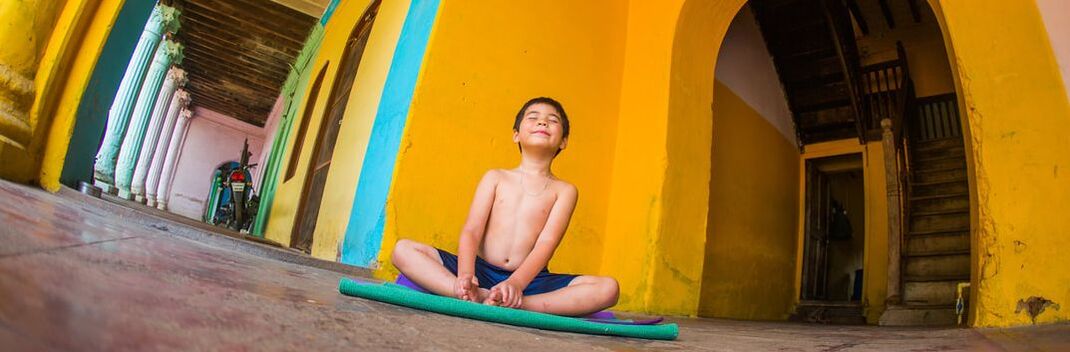 July 16th - Baddha Konasana 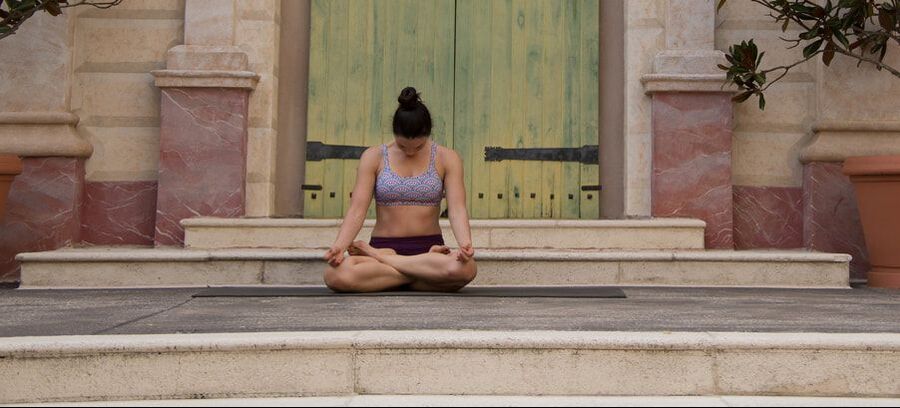 July 17th - Padmasana 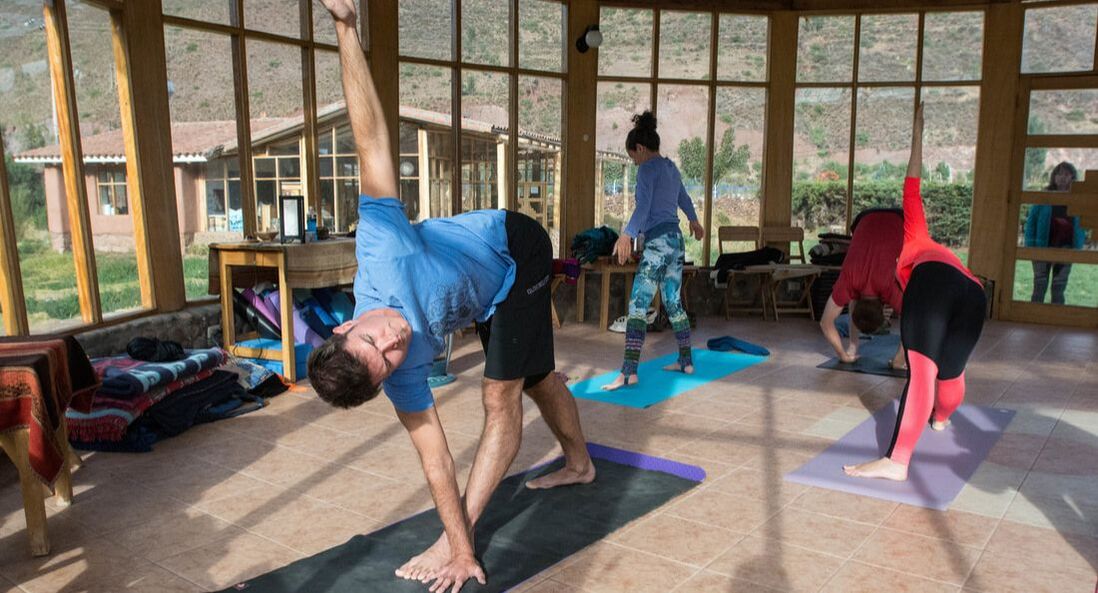 July 18th - Utthita Trikonasana 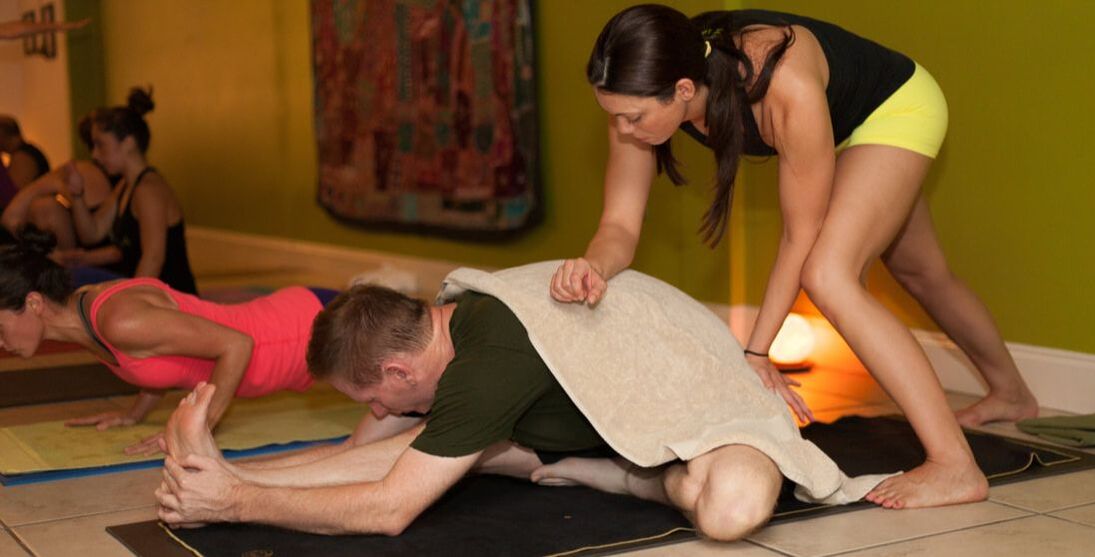 July 19th - Janu Sirsasana A 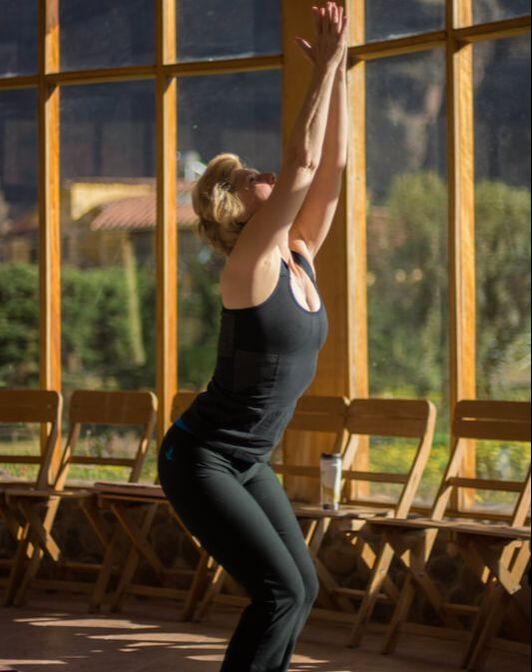 July 20th - Utkatasana  July 21st - Ustrasana 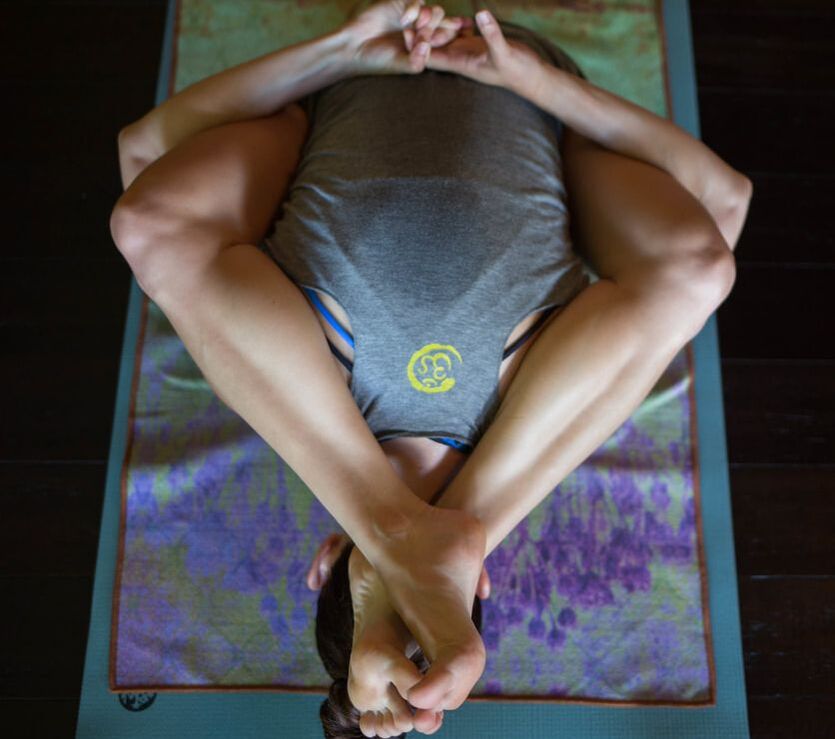 July 22nd - Supta Kurmasana 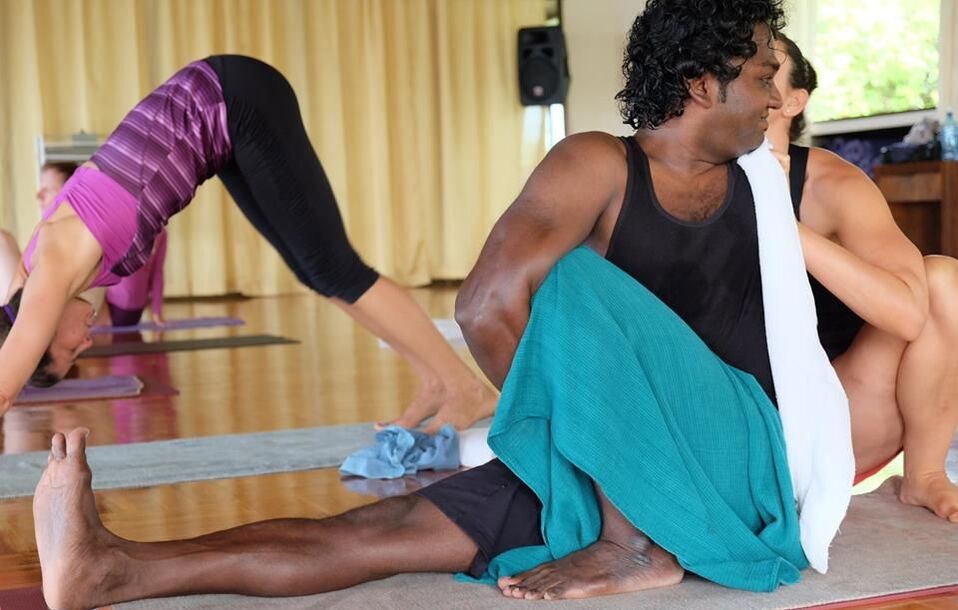 July 23rd - Marichyasana C 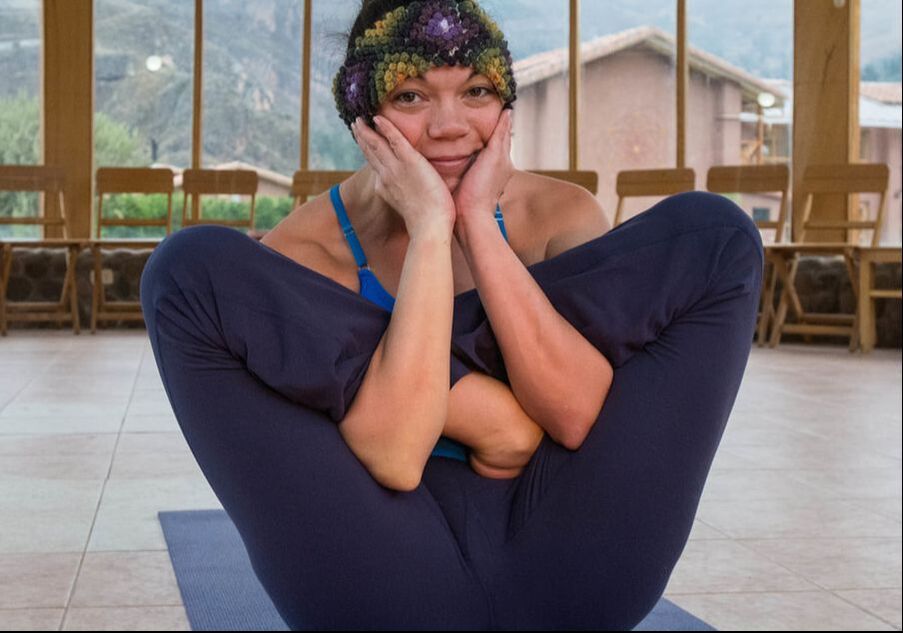 July 24th - Garbha Pindasana Krista, Danielle, Ashley, Nysa and The Yoga Shala look forward to sharing in this wonderful self-care focused challenge with you!
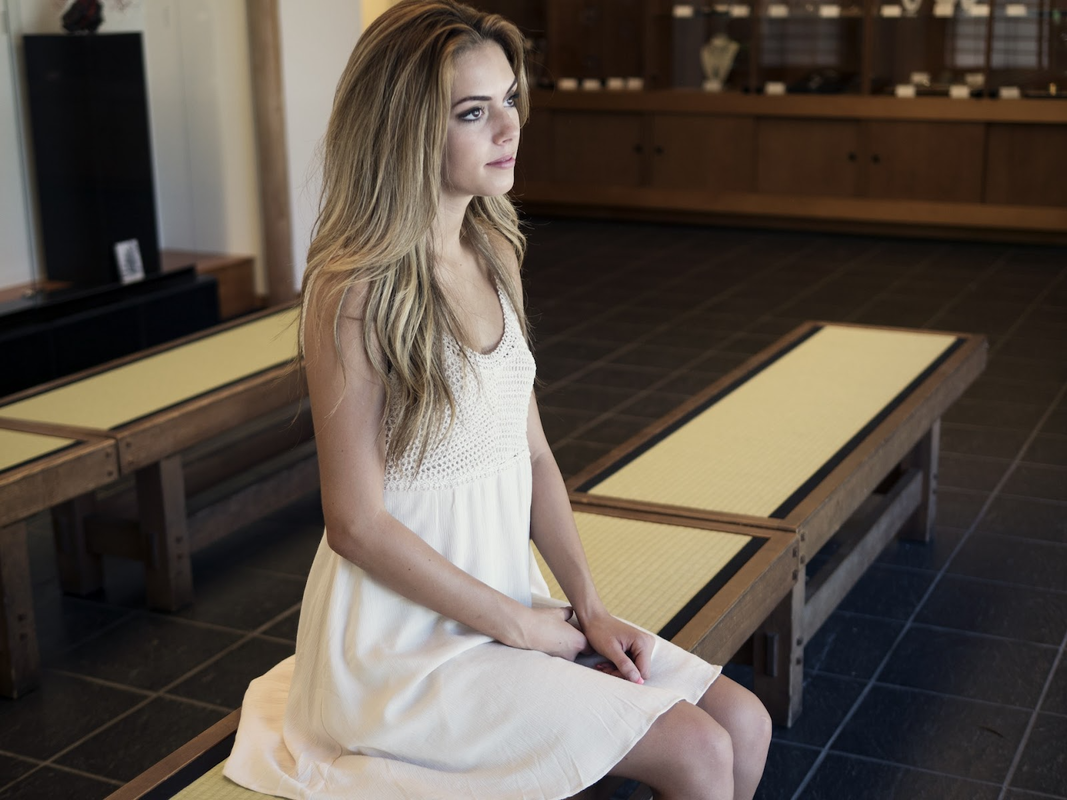 Good posture is essential for overall health and well-being. It not only helps us look taller and more confident, but it can also lead to a variety of health benefits. Poor posture can put unnecessary strain on muscles and joints, leading to discomfort and back pain. By maintaining good posture, we can reduce the risk of developing these issues and improve our overall quality of life. Beyond physical benefits, good posture can also improve digestion by allowing the internal organs to function properly and increase lung capacity by promoting proper breathing.
Unfortunately, modern lifestyles often involve long hours spent sitting in front of a computer or hunching over a mobile device, which can take a toll on our posture. The good news is that it's never too late to start improving your posture. With a few simple changes to your daily habits, you can begin to reap the benefits of good posture and enjoy better physical and mental health. In this article from The Yoga Shala, we'll discuss several ways to improve your posture and enjoy the benefits that come with it. Slouching and Poor Posture Posture is fundamental to how we present ourselves to the world. When we stand up straight, our bodies project confidence and poise, making us appear taller and more self-assured. According to https://howtallheight.com/: "Standing up straight can increase your height by up to two inches." Conversely, when we slouch or have poor posture, we inadvertently make ourselves look shorter and less confident. This can negatively impact our personal and professional lives. But standing up straight isn't just about appearances. Good posture is essential for overall health and well-being, as mentioned earlier. So if you want to improve your posture and project confidence, start by standing up straight and maintaining good posture throughout the day. It may take some time to break old habits and adjust to a new way of standing and sitting, but with practice and persistence, you can achieve better posture and all of its associated benefits. Strengthen Your Core Muscles The core muscles in our body are essential for maintaining good posture and reducing the strain on our neck and back muscles. These muscles comprise the abs, glutes, and back muscles, and they work together to provide stability and support to our spine. Strengthening these core muscles through exercises like planks, bridges, and bird dogs can help maintain the natural curve of your spine and improve your posture overall. Not only can this lead to reduced back pain and other health benefits, but it can also enhance our physical appearance and exude confidence. So if you want to maintain good posture and achieve overall wellness, it's essential to incorporate core strengthening exercises into your fitness routine. Good Posture Furniture As working from home becomes increasingly popular, it's essential to invest in furniture that supports good posture. An ergonomic chair is a must-have since it can be adjusted to your height and provides ample support for your back. When sitting, keep your feet flat on the ground and your knees at a 90-degree angle to reduce strain on your lower back. Avoid using soft couches or chairs that don't offer proper support, as this can lead to slouching and poor posture. If you find that your lower back needs extra support, use a lumbar pillow to help maintain the natural curve of your spine. By taking these steps, you can reduce the risk of back pain, improve your posture, and increase productivity while working from home. Eye Level Computer Monitor Spending long hours in front of a computer can take its toll on our neck and shoulder muscles, leading to strains and aches. To prevent this, it's essential to position your monitor at eye level to reduce the strain on your neck when looking down. You may need to use a monitor arm or stack books under your monitor to achieve the proper height. Additionally, ensure that you are not straining to reach the keyboard or mouse, as this can cause tension and pain in your shoulders and arms. Consider investing in an adjustable desk or keyboard tray to maintain proper alignment and reduce the risk of repetitive strain injuries. By taking these steps, you can work comfortably and efficiently, without sacrificing your physical well-being. Sit Up Straight Maintaining good posture when sitting is crucial for preventing neck and back pain. To achieve this, sit upright with your head and neck in line with the rest of your spine. Avoid slouching or leaning forward, as this puts unnecessary strain on your neck and back muscles. It's also important to use a chair with good lumbar support to help maintain the natural curve of your spine. Keep your shoulders relaxed and avoid hunching them up towards your ears, as this can lead to tension and discomfort in your upper body. By sitting with good posture, you can reduce the risk of developing chronic pain and other health problems associated with poor posture. Additionally, maintaining good posture can enhance your overall appearance and boost your confidence, making it a win-win situation. Strength and Flexibility Aside from core strengthening exercises, increasing your overall strength and flexibility can significantly improve your posture. Engaging in activities like yoga from The Yoga Shala, pilates, and weight training can help improve your overall strength and flexibility, making it easier to maintain proper alignment throughout the day. These exercises can also help reduce muscle tension and alleviate pain associated with poor posture. Additionally, incorporating stretching exercises like shoulder rolls and neck stretches can further reduce muscle tension and improve your posture by loosening tight muscles and increasing flexibility. By combining these exercises with good posture habits, you can achieve excellent posture and experience all of the health benefits that come with it. Improve Physical Balance Good physical balance is essential for maintaining good posture. When we have good balance, we're less likely to slouch or lean to one side, which can lead to poor posture and chronic pain. Activities like tai chi, and dance can help improve your balance by challenging your body to maintain stable positions and shift weight smoothly. Even simple activities like standing on one foot or walking heel to toe can help improve your balance over time. By incorporating balance exercises into your routine, you can not only improve your posture but also reduce your risk of falls and other injuries. Advantages of Good Posture Good posture can offer a wide range of health benefits that extend beyond just looking good. It can reduce back pain, headaches, and digestive issues by taking pressure off your muscles and internal organs. By keeping your bones and joints aligned, it reduces wear and tear on your body over time, which can help prevent degenerative conditions like arthritis. Additionally, good posture can improve lung capacity and circulation, leading to better overall health. Finally, studies have shown that good posture can even boost your mood and increase energy levels. By making good posture a priority in your life, you can experience these benefits and enjoy greater physical and emotional wellness. Poor posture can be detrimental to your health and lead to a variety of problems. It can cause chronic neck and back pain, headaches, and digestive issues, among other things. Fortunately, improving your posture is a simple and effective way to boost your overall health and well-being. By incorporating habits like core strengthening exercises, choosing ergonomic furniture, positioning your computer monitor at eye level, and sitting upright, you can start to improve your posture and enjoy all the benefits that come with it. Making a few small changes to your daily routine can make a big difference in how you look and feel. So straighten up, stand tall, and take control of your posture to experience a happier, healthier life. Prasarita Padottanasana, also known as the Wide-Legged Forward Bend, is a powerful set of standing yoga poses that provides an intense stretch to the hamstrings, inner thighs, and spine. This pose is often practiced in different variations, labeled as A, B, C, and D, each with its unique benefits and Sanskrit vinyasa count. In this step-by-step guide, we will explore Prasarita Padottanasana A-D with the correct Sanskrit vinyasa count to help you master this invigorating pose. These postures are the seventh-eleventh poses of the Ashtanga Yoga Primary series. They come after Utthita Parsva Konasana and Parivrtta Parsva Konasana. Tap here to watch a step-by-step tutorial video on Prasarita Padottanasana A-D. Benefits The Benefits of Prasarita Padottanasana A-D: Prasarita Padottanasana A-D are popular standing yoga poses that offers numerous benefits for the body, mind, and spirit. These postures involve standing with the legs wide apart and folding forward from the hips, bringing the torso towards the ground.
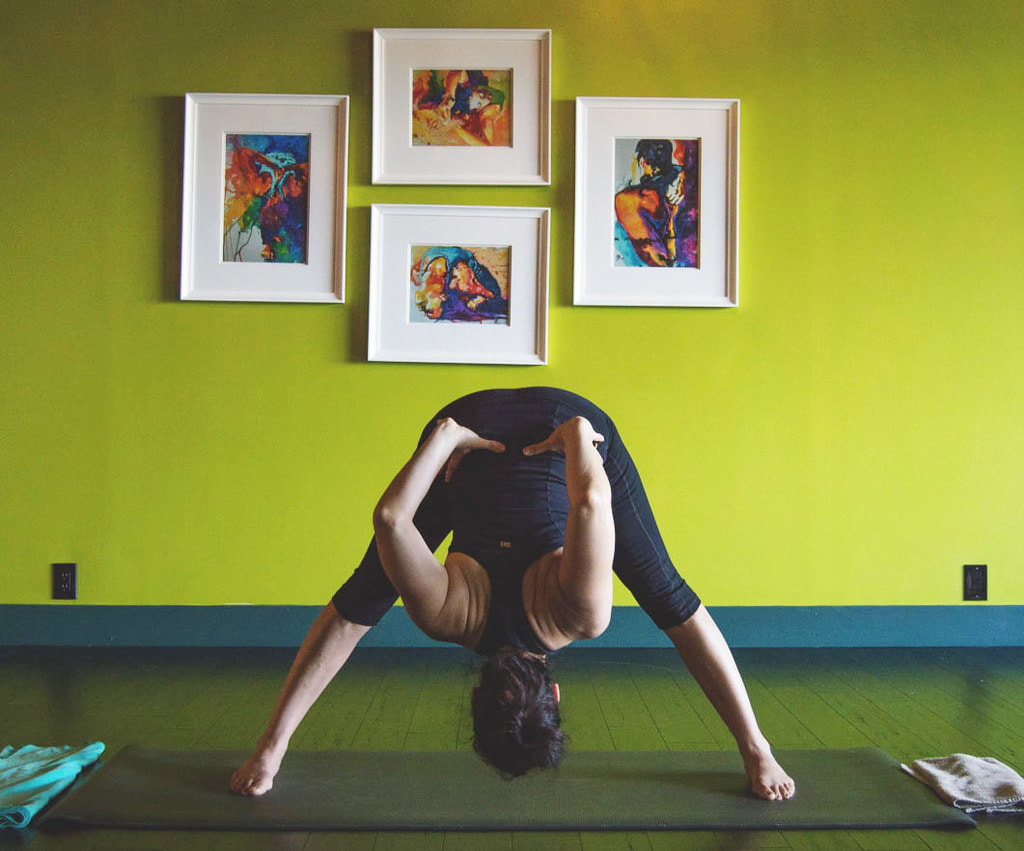 Contraindications: While Prasarita Padottanasana offers numerous benefits, it may not be suitable for everyone. It's important to practice this pose mindfully and with awareness of your body's limitations. Here are some contraindications to keep in mind:
Step By Step Instructions for Prasarita Padottanasana A-D Prasarita Padottanasana A 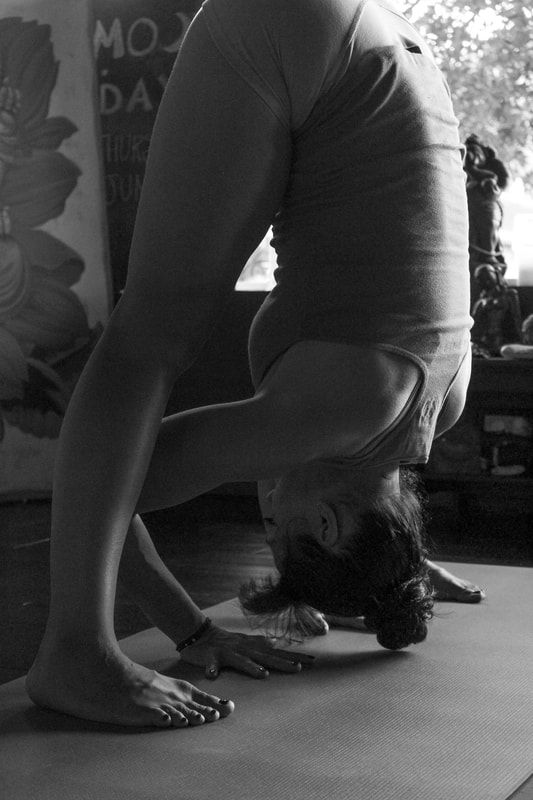 Standing at the top of your mat in Samasthiti (equal standing posture) Ekam (Inhale) Step or Jump Your Feet 4-5 feet apart, hands to hips, head up. Dve (Exhale) Fold forward with a flat back, placing both hands on the ground in line with your feet. Look up. Again inhale lengthening your spine, looking upward. Keep your feet parallel to each other and ensure that your toes are pointing straight ahead. Trini (Exhale) Pressing your hand down and forward into the floor, fold forward. Root down through the four corners of your feet, pressing down and out through the feet to engage your glutes to help support your body. Stay here five deep breaths. Engage mula bandha with each inhale. Gazing towards your nose (Nasagrai Drishti). Chaturi (Inhale) Straighten your arms and look forward. Exhale here. Pancha (Inhale) Place your hands to your hips and inhale back to standing. Be sure you press your hips forward and allowing your weight to stack naturally through space to return to standing. Exhale there. Prasarita Padottanasana B 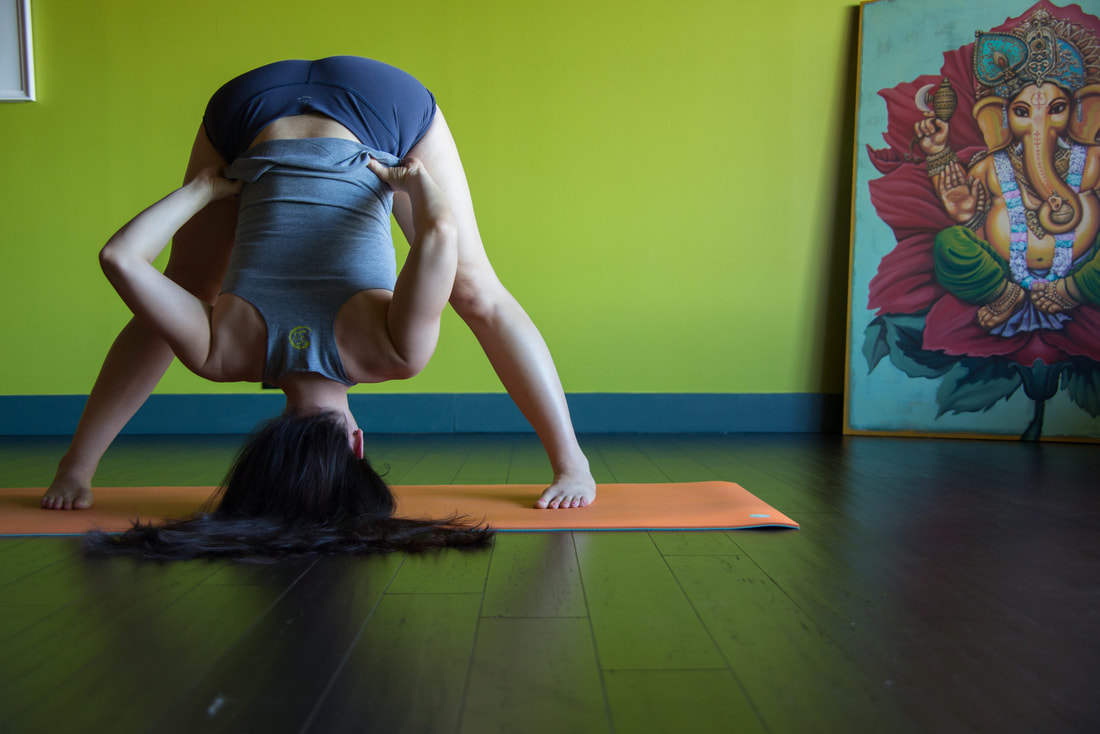 Ekam (Inhale) With your feet still 4-5 feet apart and parallel, inhale and take your arms up and out to the sides. Dve (Exhale) Place your hands to your hips and engage your mid back to keep your chest lifted. Head up. Again inhale and lengthen your spine, being sure to keep your ribs down as you press your chest up. Trini (Exhale) With both hands on your hips, hinge from your hips to fold forward. Stay here five deep breaths. Actively engage your mid back to keep your chest open in this forward bend, while keeping your hands to your hips. Root down through the four corners of your feet, pressing down and out through the feet to engage your glutes to help support your body. Engage mula bandha with each inhale. Gazing towards your nose (Nasagrai Drishti). Chaturi (Inhale) Keeping your hands to your hips, inhale back to standing. Be sure you press your hips forward and allowing your weight to stack naturally through space to return to standing. Pancha (Exhale) Prasarita Padottanasana C 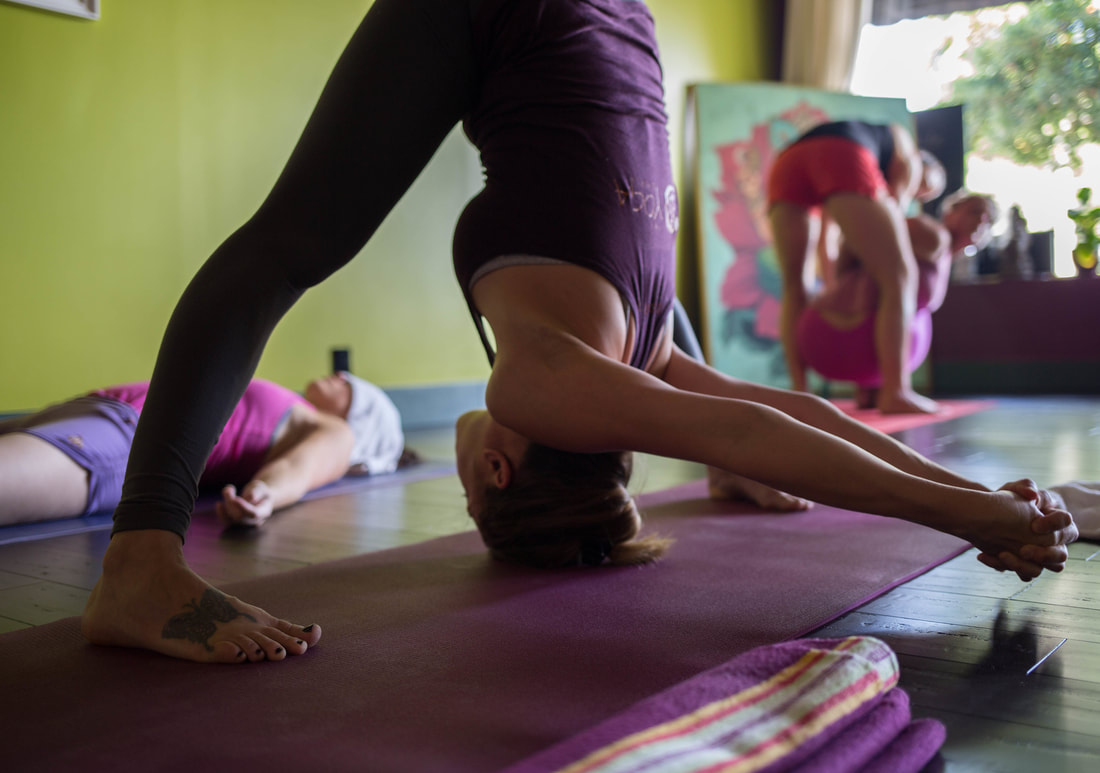 Ekam (Inhale) With your feet still 4-5 feet apart and parallel, inhale and take your arms up and out to the sides Dve (Exhale) Keeping your body tall, exhale and interlace your hands and fingers together behind your back. Again inhale, lengthening your spine and lifting your chest, looking upward. Keep your feet parallel to each other and ensure that your toes are pointing straight ahead. Trini (Exhale) With both hands interlaced behind your back and your chest lifted, fold forward. Traction your head forward. Root down through the four corners of your feet, pressing down and out through the feet to engage your glutes to help support your body. Stay here five deep breaths. Engage mula bandha with each inhale. Gazing towards your nose (Nasagrai Drishti). Chaturi (Inhale) Keeping your hands interlaced together behind your back, inhale back to standing. Be sure you press your hips forward and allowing your weight to stack naturally through space to return to standing. Pancha (Inhale) Exhale there. Prasarita Padottanasana D 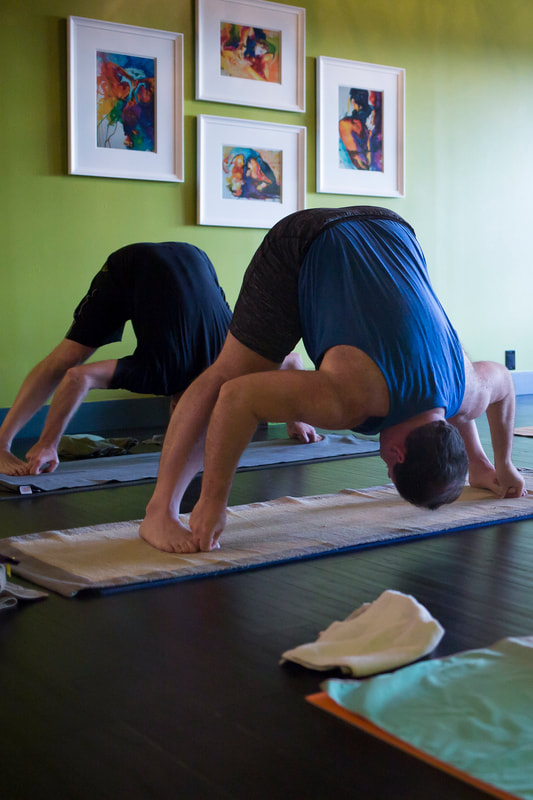 Ekam (Inhale) With your feet still 4-5 feet apart and parallel, and both hands to your hips, inhale and lengthen your spine. Be sure you keep your ribs pressing downwards as you work to lift your chest. Dve (Exhale) Fold forward with a flat back, placing your thumb, index and middle finger around the big toe of each foot. Look up. Again inhale lengthening your spine, looking upward. Keep your feet parallel to each other and ensure that your toes are pointing straight ahead. Trini (Exhale) Pressing your feet down and out, with arms straight, fold forward. Once folded, bend your elbows out to 90 degrees, keep your wrists straight and pull your toes forward with your gripped fingers as your press your feet down and out. Root down through the four corners of your feet, pressing down and out through the feet to engage your glutes to help support your body. Stay here five deep breaths. Engage mula bandha with each inhale. Gazing towards your nose (Nasagrai Drishti). Chaturi (Inhale) Straighten your arms and look forward. Exhale here. Pancha (Inhale) Place your hands to your hips and inhale back to standing. Be sure you press your hips forward and allowing your weight to stack naturally through space to return to standing. Exhale there. Modifications 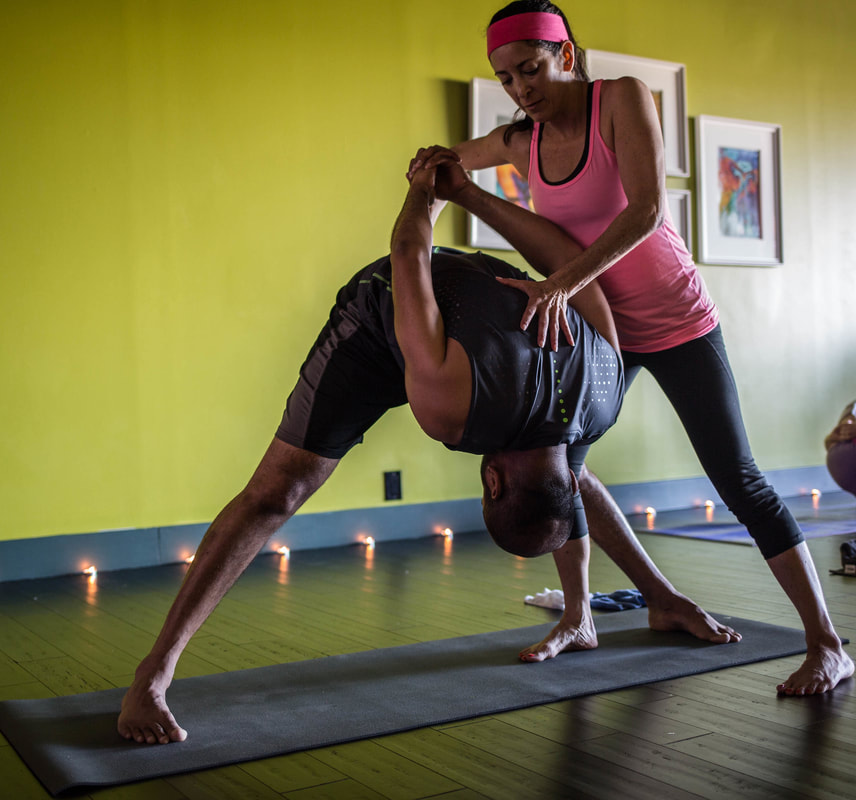
Remember to always listen to your body and practice within your own range of motion. It's essential to work with a qualified yoga teacher if you have any specific concerns, injuries, or limitations to ensure that you're practicing safely and effectively. Tap here to watch a step-by-step tutorial video on Prasarita Padottanasana A-D Prasarita Padottanasana A-D offer numerous benefits for the body and mind, including stretching and strengthening the lower body, promoting a healthy spine, calming the mind, improving digestion, enhancing balance and proprioception, and energizing the body. However, it's important to practice with caution and make modifications as needed based on your individual needs and limitations. With proper alignment and mindful practice, Prasarita Padottanasana can be a beneficial addition to your yoga practice. Practice with The Yoga Shala If you want to join us for LIVE classes, The Yoga Shala offers virtual and in person classes every weekday morning. Owner, Krista Shirley, also offers virtual or in person private sessions (Yoga, Meditation, Breath-work, Nutrition, Life Coaching and Mentorship). Visit theyogashala.org for details. Be sure to signup for our newsletter to stay on top of local events and classes, Nysa products sales, new offerings, new products and more! We hope you find this video series helpful to you in creating or maintaining your yoga practice! 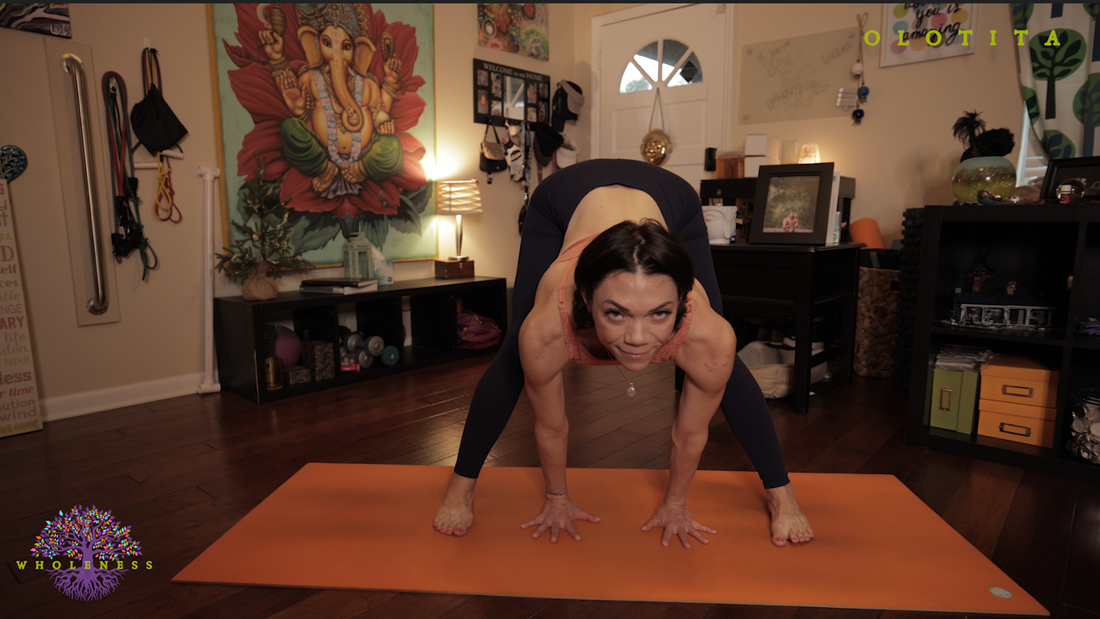 About Krista: Krista Shirley is a level II authorized Ashtanga Yoga teacher. She is deeply passionate about sharing these teachings with all who wish to learn. If you want to join Krista in person she teaches daily classes at The Yoga Shala in Winter Park, Florida. She also offers virtual sessions in Yoga, Meditation, Breath-work, Nutrition, Life Coaching and Mentorship. Check out www.theyogashala.org for more details. If you do not live in Central Florida and want to find an authorized teacher in your area, check out our teacher, Sharath Jois’ website, for a list of all teachers authorized and certified by his yoga centre in India.
❤️SHOP MERCHANDISE: Nysa Products
❤️LET'S BE SOCIAL: Instagram: Krista Shirley Yoga Instagram: The Yoga Shala Facebook: The Yoga Shala Facebook: KristaShirleyYoga For other inquires please contact: krista@theyogashala.org 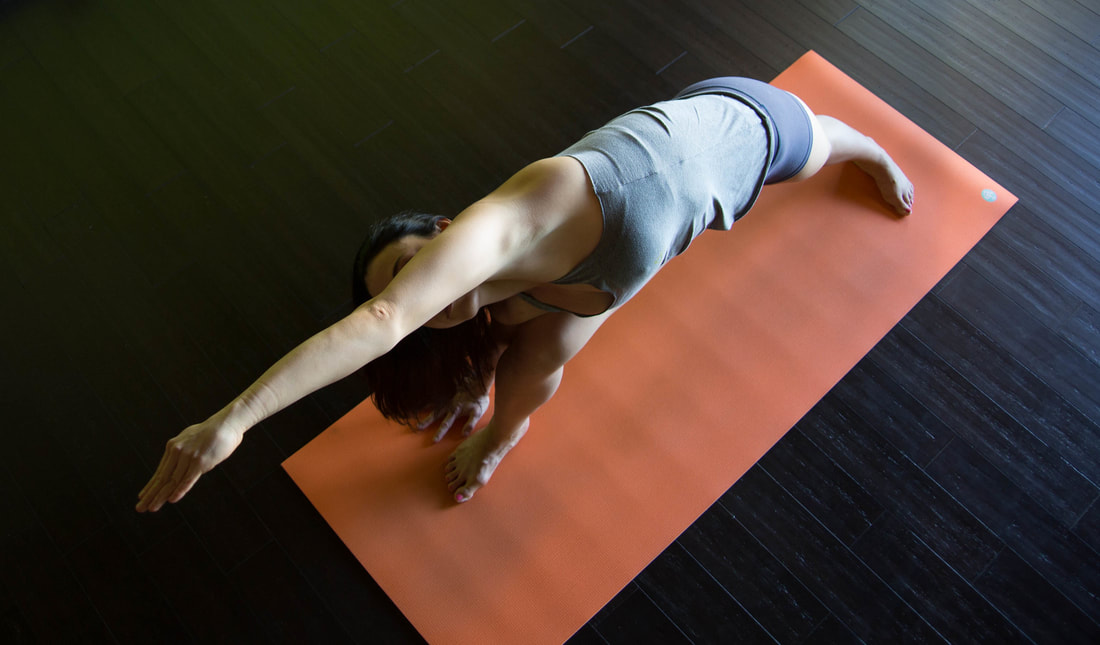 Ashtanga yoga, a dynamic and powerful form of yoga, comprises a series of postures that are synchronized with breath and movement. Among the many postures in the Ashtanga Primary Series, Utthita Parsva Konasana and Parivrtta Parsva Konasana are two challenging and invigorating poses that offer numerous benefits for the body, mind, and spirit. Utthita Trikonasana translates to Extended Side Angle Pose and Parivrtta Trikonasana, Revolved Extended Side Angle Pose. These postures are the fifth and sixth poses of the Ashtanga Yoga Primary series. They come after Utthita Trikonasana and Parivrtta Trikonasana. Tap here to watch a step-by-step tutorial video on 2 modifications and the full expression of Utthita Parsva Konasana and Parivrtta Parsva Konasana. BENEFITS Utthita Parsva Konasana and Parivrtta Parsva Konasana are two yoga poses that offer numerous benefits to the body, mind, and spirit. Both poses are variations of the wide-legged standing forward fold pose, and they involve stretching and twisting movements that provide unique advantages. Let's explore the benefits of each pose in more detail: Utthita Parsva Konasana (Extended Side Angle Pose):
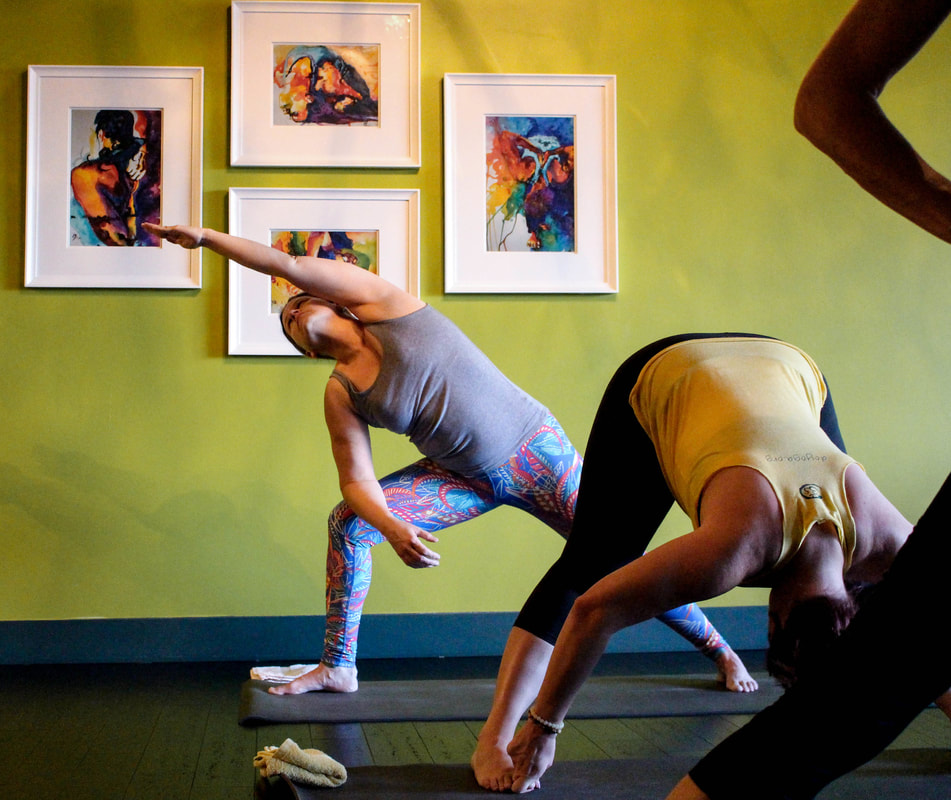 Parivrtta Parsva Konasana (Revolved Side Angle Pose):
In addition to these specific benefits, both Utthita Parsva Konasana and Parivrtta Parsva Konasana are invigorating poses that can help to energize the body, improve flexibility, and promote a sense of grounding and balance. As with any yoga practice, it is important to practice these poses safely and under the guidance of a qualified yoga instructor, especially if you are a beginner or have any health concerns. Always listen to your body, modify the poses as needed. 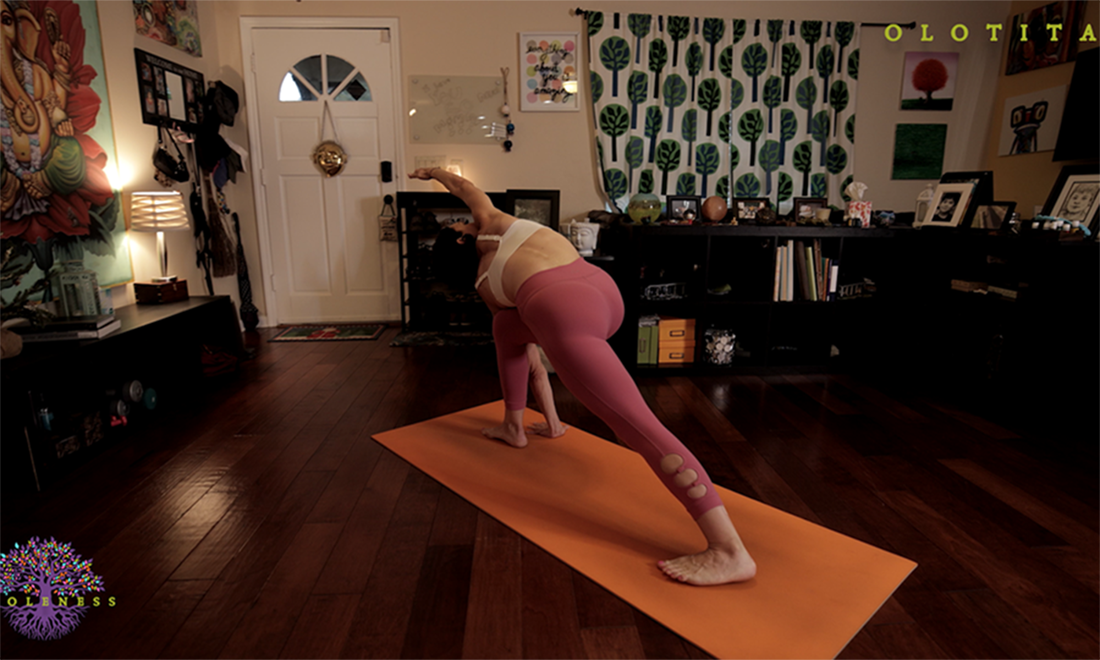 Contraindications As with any physical activity, there are certain contraindications or precautions to consider when practicing Utthita Parsva Konasana and Parivrtta Parsva Konasana. It is important to consult with a qualified yoga instructor or healthcare professional if you have any health concerns or conditions that may affect your ability to safely practice these poses. Some potential contraindications for these poses may include:
It is crucial to practice yoga mindfully and with awareness of your body's limitations. Always work within your comfort level, modify poses as needed, and seek guidance from a qualified yoga instructor or healthcare professional if you have any concerns or health conditions. Remember, yoga is meant to be a practice of self-care and self-awareness, and your safety and well-being should always come first. Step-by-Step Instructions for the Full Expression of Utthita Parsva Konasana and Parivrtta Parsva Konasana with Sanskrit Vinyasa Count 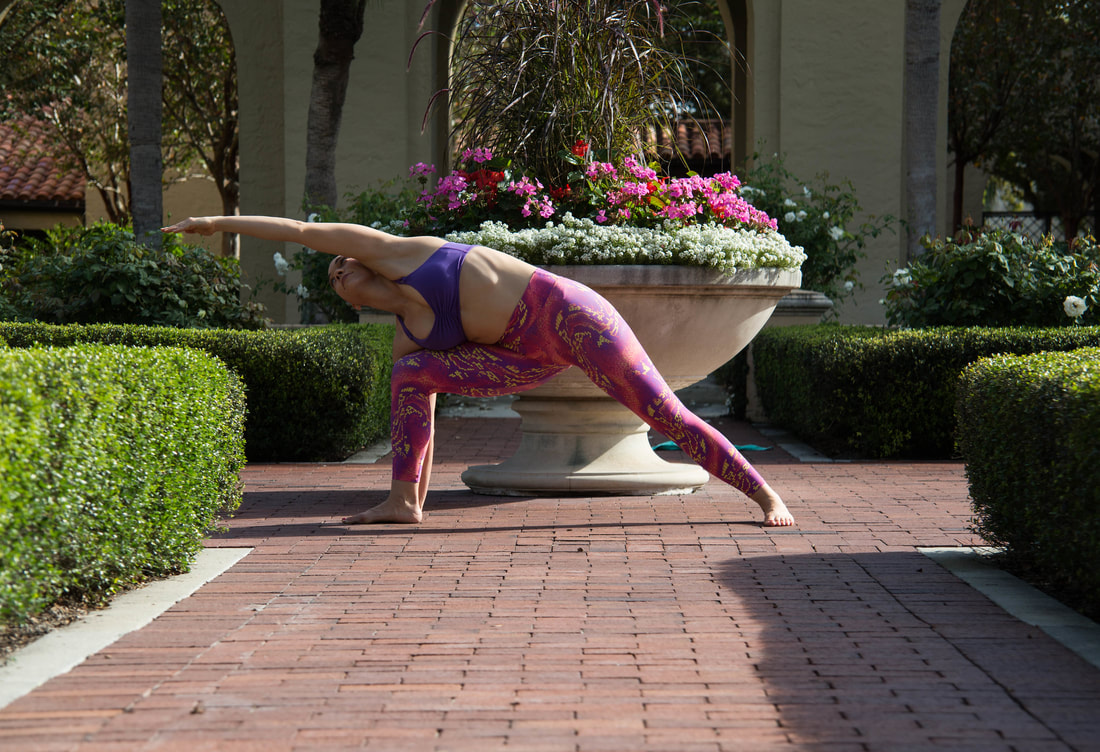 Utthita Parsva Konasana, also known as Extended Side Angle Pose, is a standing pose that involves a deep lateral stretch, activating the hips, hamstrings, quadriceps, and core muscles. Ekam (Inhale) - Step your feet wide apart Dve (Exhale) - Turn your right foot out and bend the right knee 90 degrees. Place your right hand to the outside of your right foot. Extend your left arm overhead at an angle and gaze to your fingers (hastagrai dristhi). Take five deep breaths. Remember to engage mula bandha. Trini (Inhale) - Return to standing position and turn your feet parallel with arms extended. Chatvari (Exhale) - Reverse your feet, left foot turning to the left and right foot turning slightly inward toward the left; bend your left knee and place your left hand on the floor on the outside of your left foot. Raise your right arm overhead at an angle and gaze to your fingers (hastagrai dristhi). Take five deep breaths. Remember to engage mula bandha. Panca (Inhale) - come up from Utthita Parsva Konasana left side 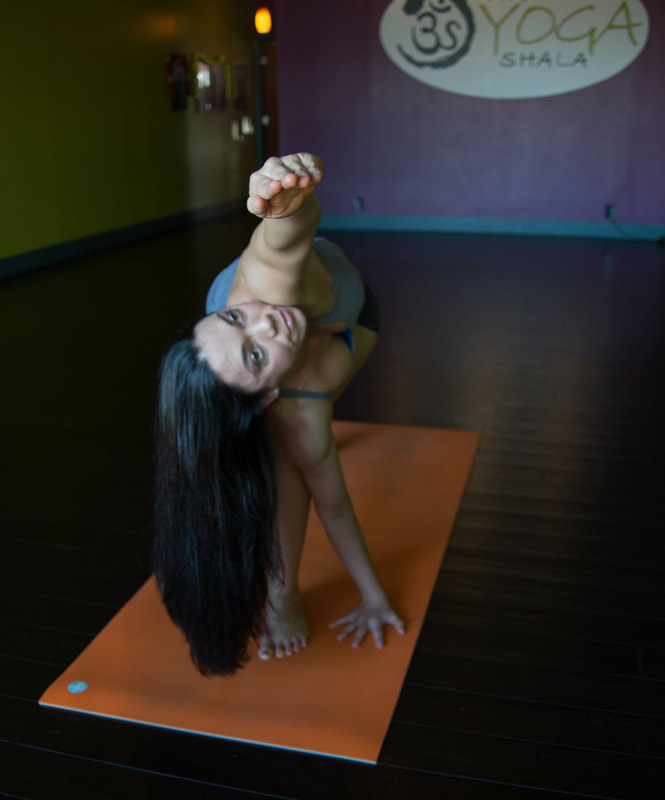 Parivrtta Parsva Konasana, also known as Revolved Extended Side Angle Pose, is a challenging variation of Utthita Parsva Konasana that adds a twist to the pose, providing an additional detoxifying effect and improving digestion. Dve (Exhale) - Reverse your feet, square your hips, bend your right knee and take your left arm over your bent right knee. In the full expression, bring your left hand to the outside of your right foot, ensuring that your left armpit is all the way over your right knee. Take your right arm up in the air at an angle. Look to your fingers (hastagrai dristhi) and take five deep breaths here. Trini (Inhale) - Lift up out of the posture returning your feet to parallel position, arms extended. Chatvari (Exhale) - Reverse your feet, square your hips, bend your left knee and take your right arm over your bent left knee. In the full expression, bring your right hand to the outside of your left foot, ensuring that your right armpit is all the way over your left knee. Take your left arm up in the air at an angle. Look to your fingers (hastagrai dristhi) and take five deep breaths here. Panca (Inhale) - Lift up out of the posture returning your feet to parallel position, arms extended. Exhale back to Samasthiti. Modifications 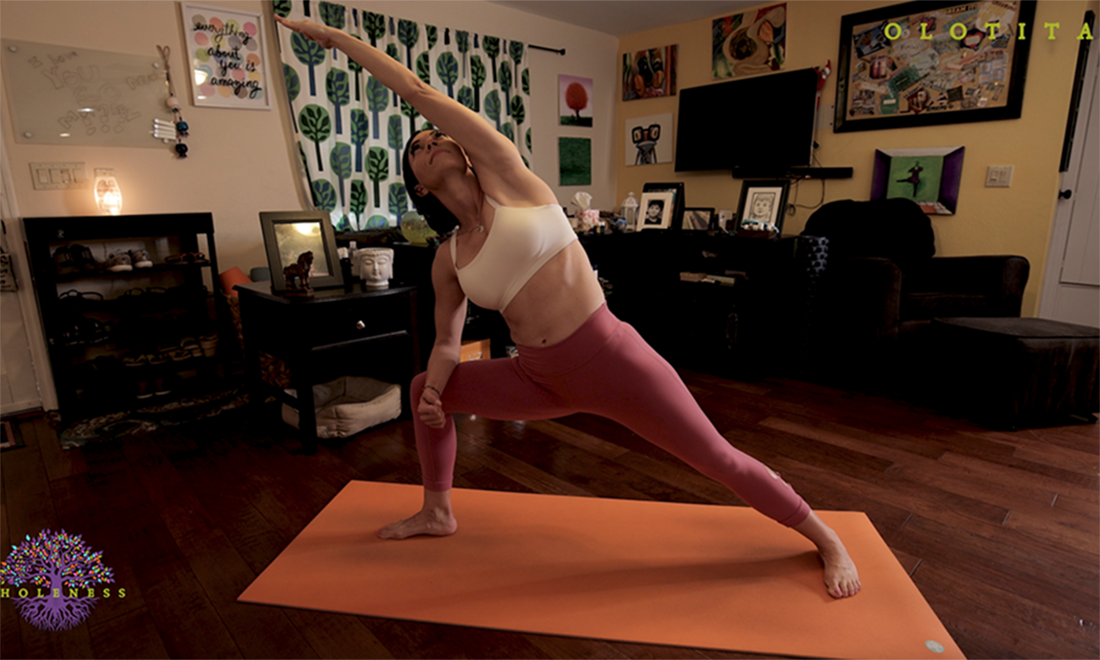 Utthita Parsva Konasana (Extended Side Angle Pose) modifications: If you have difficulty reaching the ground with your hand, place your right forearm on top of your right quadricep, instead of taking your right hand all the way to the floor. Be sure you press your forearm down into your thigh and work to extend your torso upwards to activate your lats and serratus anterior. 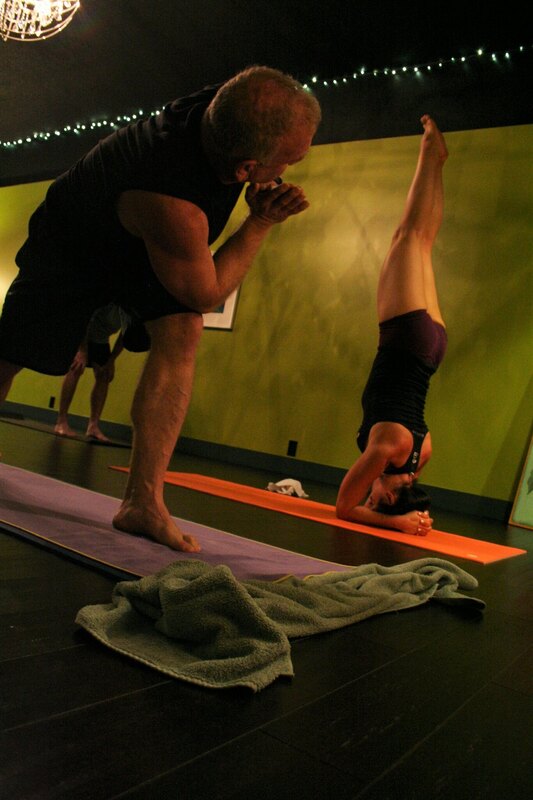 Parivrtta Parsva Konasana (Revolved Side Angle Pose) modifications: If you have difficulty taking the full expression of this deep spinal rotation, try these modifications instead.
Remember to always listen to your body and modify the poses as needed to suit your individual needs and limitations. It's important to practice safely and mindfully, and consult with a qualified yoga instructor or healthcare professional if you have any concerns or questions about modifications. Tap here to watch a step-by-step tutorial video on 2 modifications and the full expression of Utthita Parsva Konasana and Parivrtta Parsva Konasana. Practice with The Yoga Shala If you want to join us for LIVE classes, The Yoga Shala offers virtual and in person classes every weekday morning. Owner, Krista Shirley, also offers virtual or in person private sessions (Yoga, Meditation, Breath-work, Nutrition, Life Coaching and Mentorship). Visit theyogashala.org for details. Be sure to signup for our newsletter to stay on top of local events and classes, Nysa products sales, new offerings, new products and more! We hope you find this video series helpful to you in creating or maintaining your yoga practice! 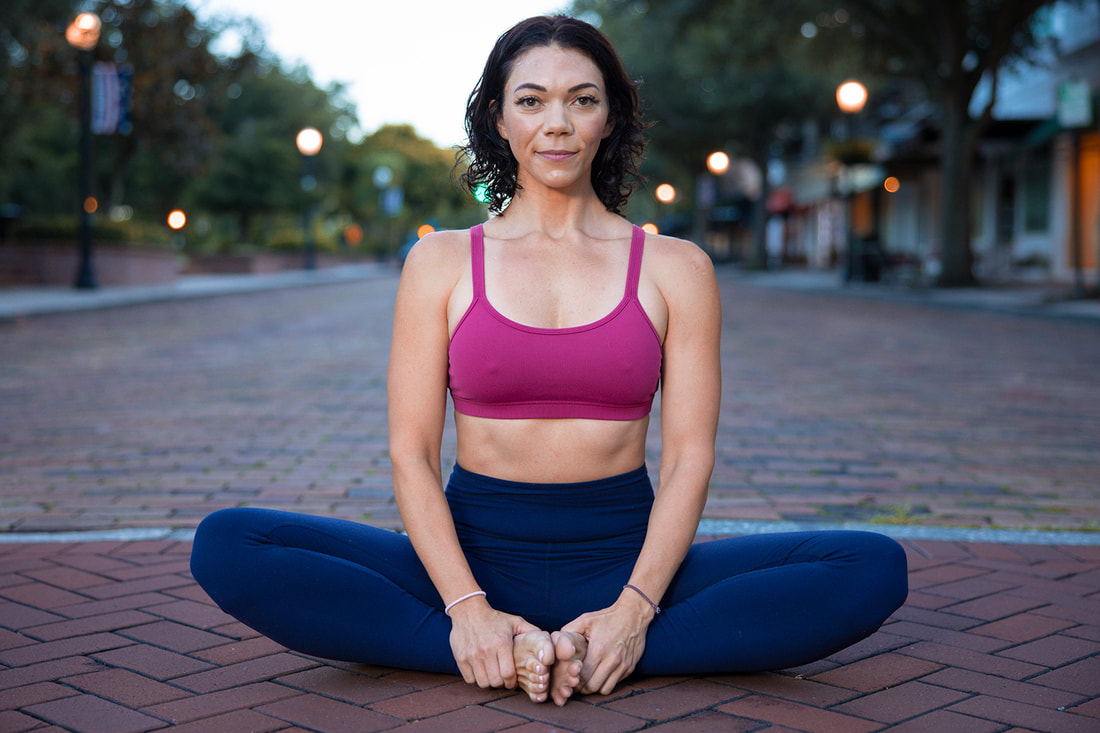 About Krista: Krista Shirley is a level II authorized Ashtanga Yoga teacher. She is deeply passionate about sharing these teachings with all who wish to learn. If you want to join Krista in person she teaches daily classes at The Yoga Shala in Winter Park, Florida. She also offers virtual sessions in Yoga, Meditation, Breath-work, Nutrition, Life Coaching and Mentorship. Check out www.theyogashala.org for more details. If you do not live in Central Florida and want to find an authorized teacher in your area, check out our teacher, Sharath Jois’ website, for a list of all teachers authorized and certified by his yoga centre in India.
❤️SHOP MERCHANDISE: Nysa Products
❤️LET'S BE SOCIAL: Instagram: Krista Shirley Yoga Instagram: The Yoga Shala Facebook: The Yoga Shala Facebook: KristaShirleyYoga For other inquires please contact: krista@theyogashala.org 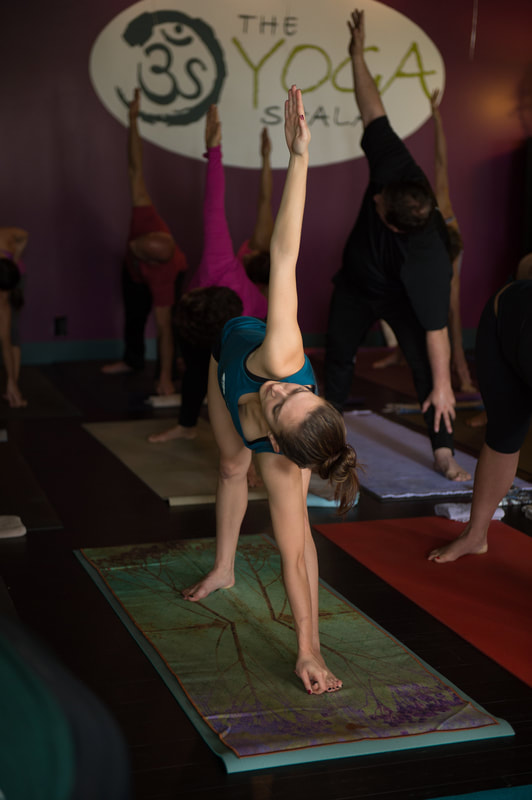 The Triangles are excellent postures for both new and experienced yoga practitioners. The asana helps students build a combination of strength, flexibility, balance and mental focus, when practiced regularly. Utthita Trikonasana translates to Extended Triangle Pose and Parivrtta Trikonasana, Revolved Triangle Pose. These postures are the third and fourth poses of the Ashtanga Yoga Primary series. They come after Padangusthasana and Pada Hastasana. Benefits of Utthita Trikonasana:
Benefits of Parivrtta Trikonasana:
The triangle poses are dynamic postures that helps to improve our posture by strengthening the muscles that support postural alignment, including the back, core, psoas, and quadriceps. When done properly, these yoga asanas will lengthen the front and back of the body, creating a more natural upright posture. Revolved triangle posture also massages the internal organs of the body, which can aid in improving digestion. And my favorite benefit to practicing this posture is the mental focus necessary to do the triangles while maintaining balance and tensegrity. It’s hard to maintain incredible focus on the breathe and bandhas and body position, but with consistent practice, doing this asana builds strong mental focus! Over time, the triangles help students gain more overall body awareness, balance, focus and mental strength. Below you’ll find instructions for practicing this posture, both the full expression and modifications that will safely help you build up the full expression of these asanas over time. Start with the modifications so they assist you in keeping your back flat, your head up, the front of your body long and over time you’ll build the strength necessary to practice the full expression with ease. Contraindications: The full expression of Parivrtta Trikonasana, revolved triangle, is NOT recommended if you are pregnant. Some women will find they can easily still do this asana while pregnant, but the spinal rotation puts too much pressure on your abdominal wall and therefore is better done in a modification form during pregnancy. These are wonderful standing postures but can be quite a challenge if you have tightness in your back or hips, or weakness in your core or back. There is a lot to think about in the posture, oppositions of force, lengthening, engaging, reaching while breathing and engaging your bandhas. Let’s take a step by step look at how to do the Triangle Postures. Tap here to watch a step-by-step tutorial video on 2 modifications/variations and the full expression of Utthita Trikonasana and Parivrtta Trikonasana. Step-by-Step Instructions for the Full Expression of Utthita Trikonasana and Parivrtta Trikonasana The Primary Series Sequence is a brilliant flow from posture to posture whereby each practiced asana prepares you for the ones to follow. You will begin adding these yoga poses into your primary series practice right after you finish Padangusthasana and Pada Hastasana. Utthita Trikonasana (Extended Triangle Pose): 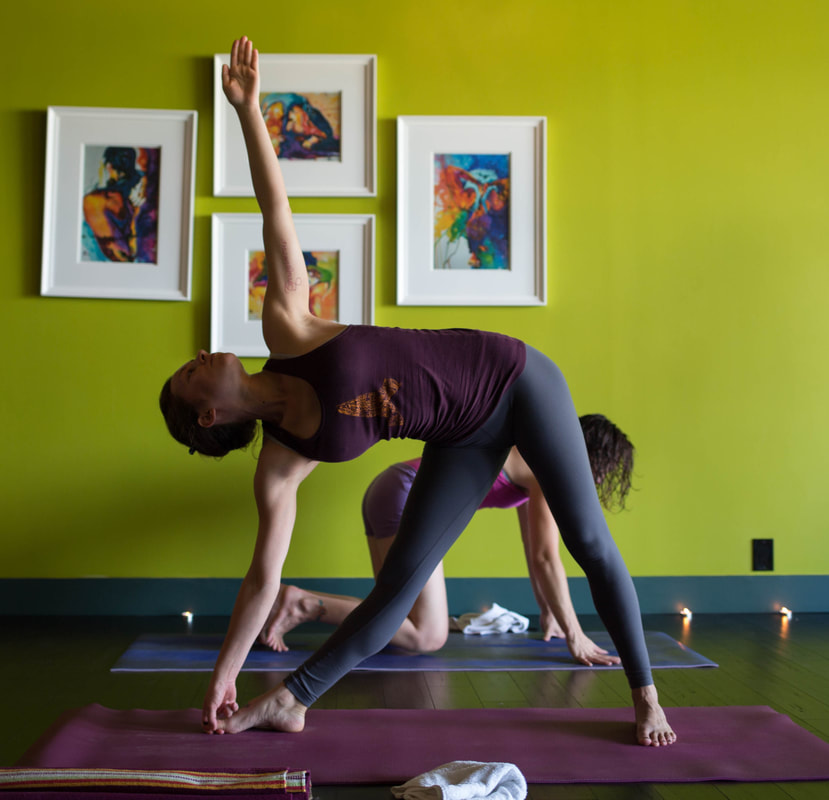 Step 1: Ekam, Inhale - Step your feet wide apart, arms extended out to the sides at shoulder height. Turn your right foot out to 90 degrees, and pivot your left foot slightly inwards. Step 2: Dve, Exhale - Reach your right hand down and grab your big toe with your index, middle finger and thumb. Keep your left hand pointing upwards towards the sky. Hold for 5 breaths. Step 3: Trini, Inhale - Come up, arms extended, torso facing the right side. Step 4: Chaturi, Exhale - Turn your left foot out to the left, right foot slightly inwards and reach your left hand down towards and grab your big toe with your index, middle finger and thumb. Keep your right hand pointing upwards towards the sky. Hold for 5 breaths. Focus on your bandhas and gaze to your fingers (hastagri drishti). Step 5: Pancha, Inhale - Come up, with both arms extended. Parivrtta Trikonasana (Revolved Triangle Pose): 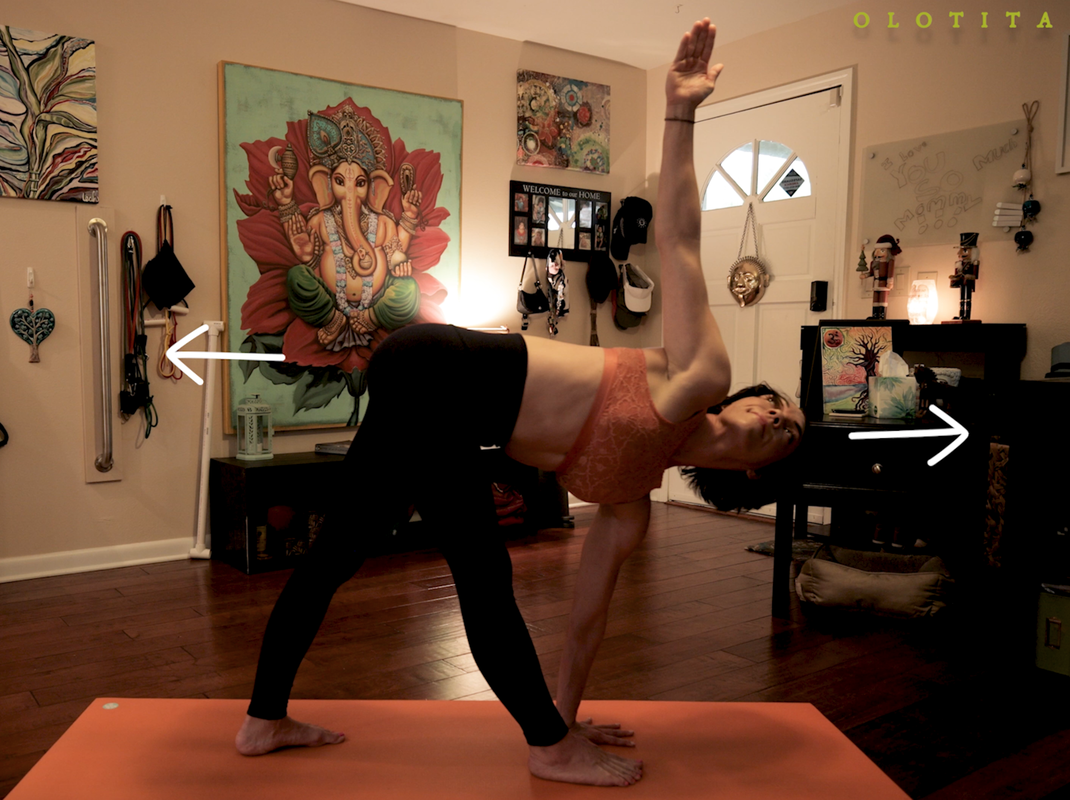 Step 6: Dve, Exhale - Rotate your body back to the right, square your hips and reach your left hand down towards the floor on the outside of your right foot (if you can’t get your palm flat with a straight leg, bend your right knee slightly and place your left hand to the inside of your foot). Simultaneously, rotate your torso towards the right, opening up your chest towards the sky. You are looking up to your fingers, hastagrai drishti. Hold for 5 breaths. Step 7: Trini, Inhale - Come up, arms extended, torso facing the right side. Step 8: Chaturi, Exhale - Reverse your feet so your left leg is facing forward with your right foot turned slightly inwards. Square your hips and reach your right hand down towards the floor on the outside of your left foot (if you can’t get your palm flat with a straight leg, bend your left knee slightly and place your right hand to the inside of your foot). Simultaneously, rotate your torso towards the left, opening up your chest towards the sky. You are looking up to your fingers, hastagrai drishti. Hold for 5 breaths. Step 9: Pancha - Inhale, Come up with both arms exteneded. Step 10: Exhale back to Samasthiti. Tap here to watch a step-by-step tutorial video on 2 modifications and the full expression of Utthita Trikonasana and Parivrtta Trikonasana. Modifications for the Triangle Poses: While the step by step instructions are for getting into the full expression of Utthita Trikonasana, there are several wonderful variations or modifications you can take to start where you are and safely work towards the full expression of the posture. Never feel ashamed of starting with modifications for yoga postures. It is far safer to work with modifications to build the strength and flexibility necessary to execute postures correctly. If you find you have weakness and/or limited flexibility in your back, hip flexors or hamstrings you will find it difficult to keep your back straight in the full expression of Boat Pose. Utthita Trikonasana Modifications: 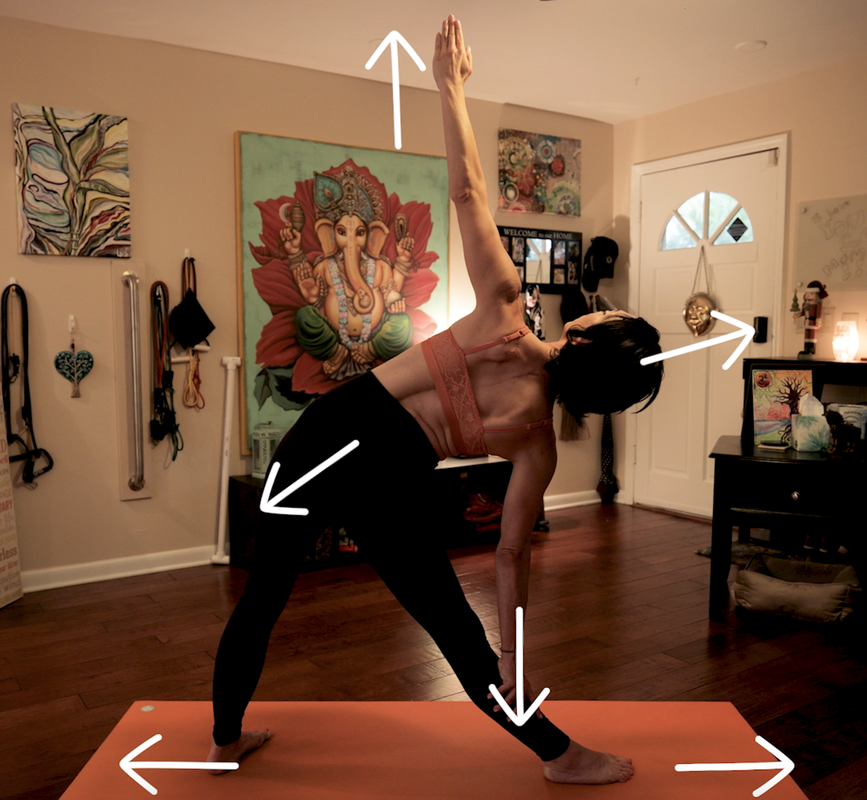 If you are unable to grab your big toe with your index, middle finger and thumb, instead place your hand on your shin and actively grip your hand around your shin to activate the muscles of your arm, initiating tensegrity in your upper limb. If you are unable to keep your front leg straight when you grab your big toe with your fingers, consider grabbing your shin with your hand instead, for now. Many people will unintentionally hyper extend their front knee in order to achieve a straight leg. You don’t want to do that. It puts undue pressure on the knee, and cuts off your body’s tensegrity, which is so vital for building strength in your limbs. Parivrtta Trikonasana Modifications: If you are unable to bring your hand to the floor with a straight leg, try keeping your front knee bent and bringing your hand to the inside of your foot, instead of the outside. This will give you far far more stability and control in your body as you work to open and balance. Spread the fingers of the hand on the ground and press down into it as you reach your lifted arm higher into the air. Push your front foot down and forward and your back foot down and backward to feel your glutes and hips activate to stabilize your pelvis. Over time, the hip flexors will lengthen allowing you to straighten both legs in this posture. Once you can do that, its as simple as gently placing your hand to the outside of your foot while maintaining opposition of force. Common Mistakes Don’t allow the aesthetic of the posture to compromise your body position. It is FAR more important to keep your spine extended and your bottom hand pressing into the floor than to have both legs straight legs or your hand to the outside of your foot. When you find yourself feeling unbalanced, be sure to take a modification of the posture to ensure you can balance and keep working to traction your spine in space. It’s perfectly ok if your front knee needs to bend to allow your spine to straighten. Remember to approach your practice with mindfulness and respect for your body's limitations. It's always wise to seek guidance from a qualified yoga teacher or healthcare professional if you have any health concerns or injuries. With dedicated practice and attention to proper alignment, Utthita Trikonasana and Parivrtta Trikonasana can help you cultivate strength, flexibility, and balance in both body and mind. Embrace the journey of Ashtanga Yoga, and may your practice flourish with grace and devotion! Tap here to watch a step-by-step tutorial video on 2 modifications and the full expression of Utthita Trikonasana and Parivrtta Trikonasana. Practice with The Yoga Shala If you want to join us for LIVE classes, The Yoga Shala offers virtual and in person classes every weekday morning. Owner, Krista Shirley, also offers virtual or in person private sessions (Yoga, Meditation, Breath-work, Nutrition, Life Coaching and Mentorship). Visit theyogashala.org for details. Be sure to signup for our newsletter to stay on top of local events and classes, Nysa products sales, new offerings, new products and more! We hope you find this video series helpful to you in creating or maintaining your yoga practice! 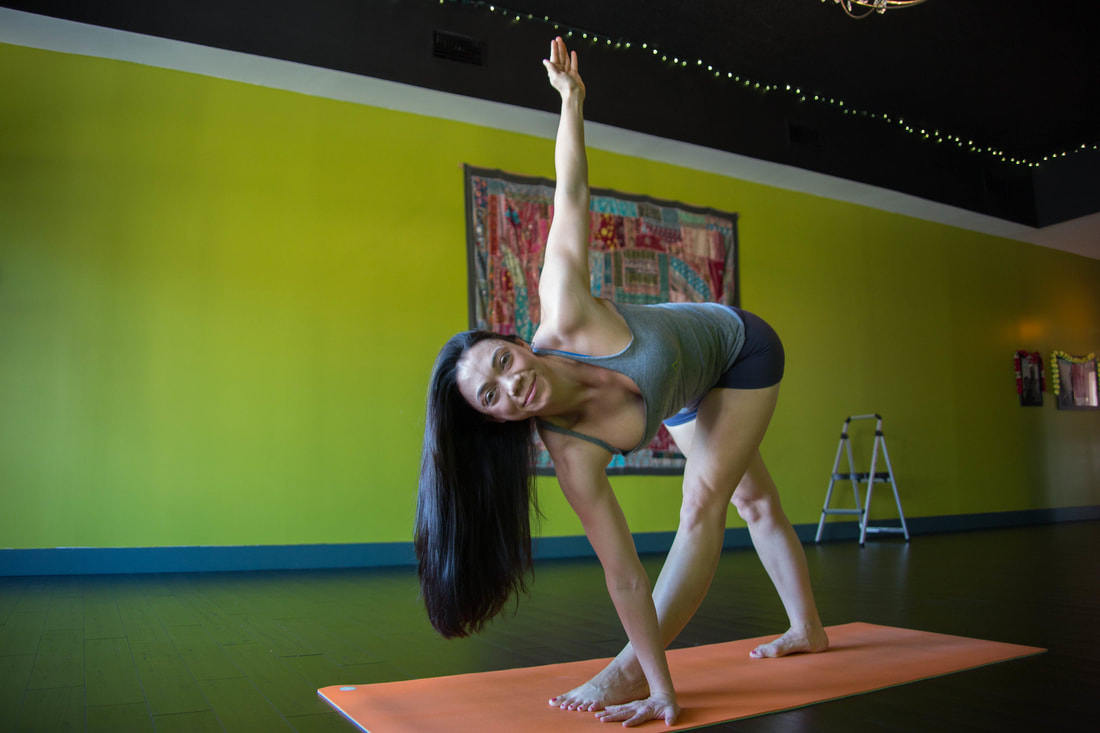 About Krista: Krista Shirley is a level II authorized Ashtanga Yoga teacher. She is deeply passionate about sharing these teachings with all who wish to learn. If you want to join Krista in person she teaches daily classes at The Yoga Shala in Winter Park, Florida. She also offers virtual sessions in Yoga, Meditation, Breath-work, Nutrition, Life Coaching and Mentorship. Check out www.theyogashala.org for more details. If you do not live in Central Florida and want to find an authorized teacher in your area, check out our teacher, Sharath Jois’ website, for a list of all teachers authorized and certified by his yoga centre in India. YOGA ASANA SERIES
❤️SHOP MERCHANDISE: Nysa Products
❤️LET'S BE SOCIAL: Instagram: Krista Shirley Yoga Instagram: The Yoga Shala Facebook: The Yoga Shala Facebook: KristaShirleyYoga For other inquires please contact: krista@theyogashala.org 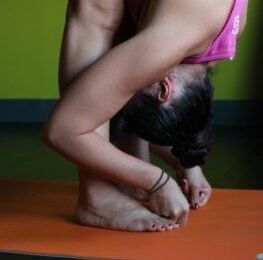 Ashtanga Yoga is a beautiful systemized practice with a set sequence of postures to follow. Regardless of what sequence the practitioner is working on, be it primary, intermediate or advanced, we always start with Sun Salutations A and B and foundational standing poses. After moving through the standing sequence, you then move into the postures of the Primary Series, Intermediate Series or Advanced Series' from Ashtanga Yoga. Work gradually to build up your practice, over time. It will allow your mind to memorize the sequence but more importantly, give your body time to begin to open and strengthen so you can safely move into postures that follow. Ashtanga Yoga Standing Sequence Once you’ve completed the Sun Salutations sequences, we begin the Ashtanga Yoga standing sequence. The very first two postures from the standing sequence are Padangusthasana (Big Toe Posture) and Pada Hastasana (Hand to Foot Posture). Let’s explore how to safely practice these foundational standing postures from the Ashtanga yoga system. Step-by-step instructions for Padangusthasana and Pada Hastasana Padangusthasana (Big Toe Pose): Step 1: Begin in Samasthiti (Equal Standing Pose), standing tall with your feet together, heels and toes touching, and your arms by your side. Step 2: Take a deep inhale and as you exhale, engage your core and bend forward from your hips, keeping your back straight and your knees slightly bent. Step 3: Reach down and place your index and middle fingers around your big toes, wrapping them from the inside of your feet, and then take hold of your big toes with a firm grip. Step 4: Inhale and lengthen your spine, lifting your chest and looking forward. Step 5: Exhale and fold deeper into the forward bend, bringing your forehead towards your knees, while maintaining your grip on your big toes. Step 6: As you hold the pose, focus on maintaining a long spine and relaxed shoulders. You can also gently pull on your big toes to deepen the stretch. Step 7: Stay in Padangusthasana for 5 deep breaths, gazing to your toes, engaging mula bandha. 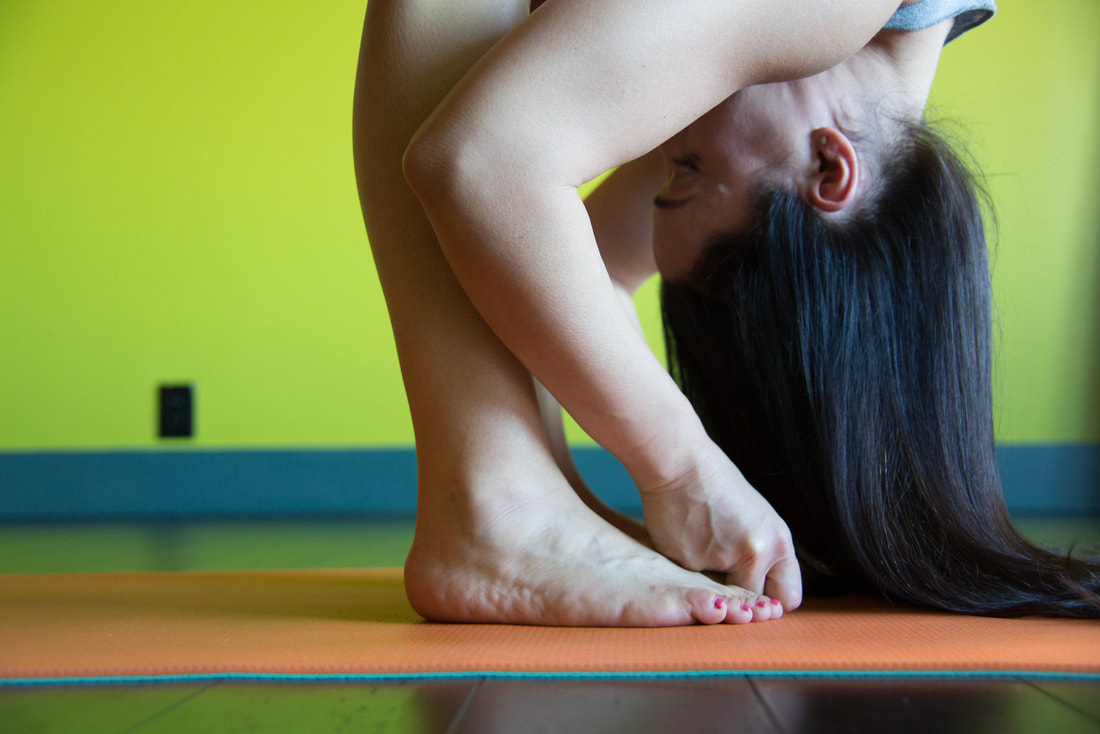 Step 8: To release the pose, release your grip on your big toes as you inhale and lift your torso. Pada Hastasana (Hand to Foot Pose): Step 9: Exhale as you move to place your hands underneath your feet. Step 10: Inhale again and lengthen your spine, looking forward. Step 11: Exhale and fold deeper into the forward bend, bringing your forehead towards your knees. Step 12: As you hold the pose, focus on maintaining a long spine and relaxed shoulders. You can use your hands to press down on the floor and draw your forehead closer to your knees. Step 13: Stay in Pada Hastasana for 5 deep breaths. Be sure to engage mula bandha and gaze to your toes. 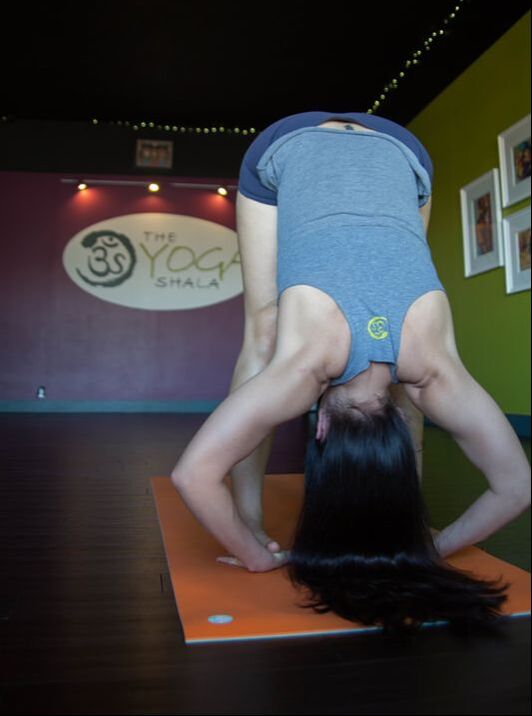 Step 14: Inhale and lift your torso half-way, looking forward. Exhale bring your hands to your hips and stand up, coming back to Samasthiti. Tips for Practicing Padangusthasana and Pada Hastasana:
If you’d like to practice along to our tutorial video breaking down these two Ashtanga yoga postures, tap here to access our YouTube tutorial on Padangusthasana and Pada Hastasana Practice with The Yoga Shala If you want to join us for LIVE classes, The Yoga Shala offers virtual and in person classes every weekday morning. Owner, Krista Shirley, also offers virtual or in person private sessions (Yoga, Meditation, Breath-work, Nutrition, Life Coaching and Mentorship). Visit theyogashala.org for details. Be sure to signup for our newsletter to stay on top of local events and classes, Nysa products sales, new offerings, new products and more! We hope you find this video series helpful to you in creating or maintaining your at home yoga practice! YOGA ASANA SERIES: VIDEOS 1-6
❤️SHOP MERCHANDISE: Nysa Products
❤️SOCIAL: Instagram: Krista Shirley Yoga Instagram: The Yoga Shala Facebook: The Yoga Shala Facebook: KristaShirleyYoga For other inquires please contact: krista@theyogashala.org |
Archives
March 2024
Categories
All
|
 RSS Feed
